
Beach-Inspired Placemats (Project Notes)
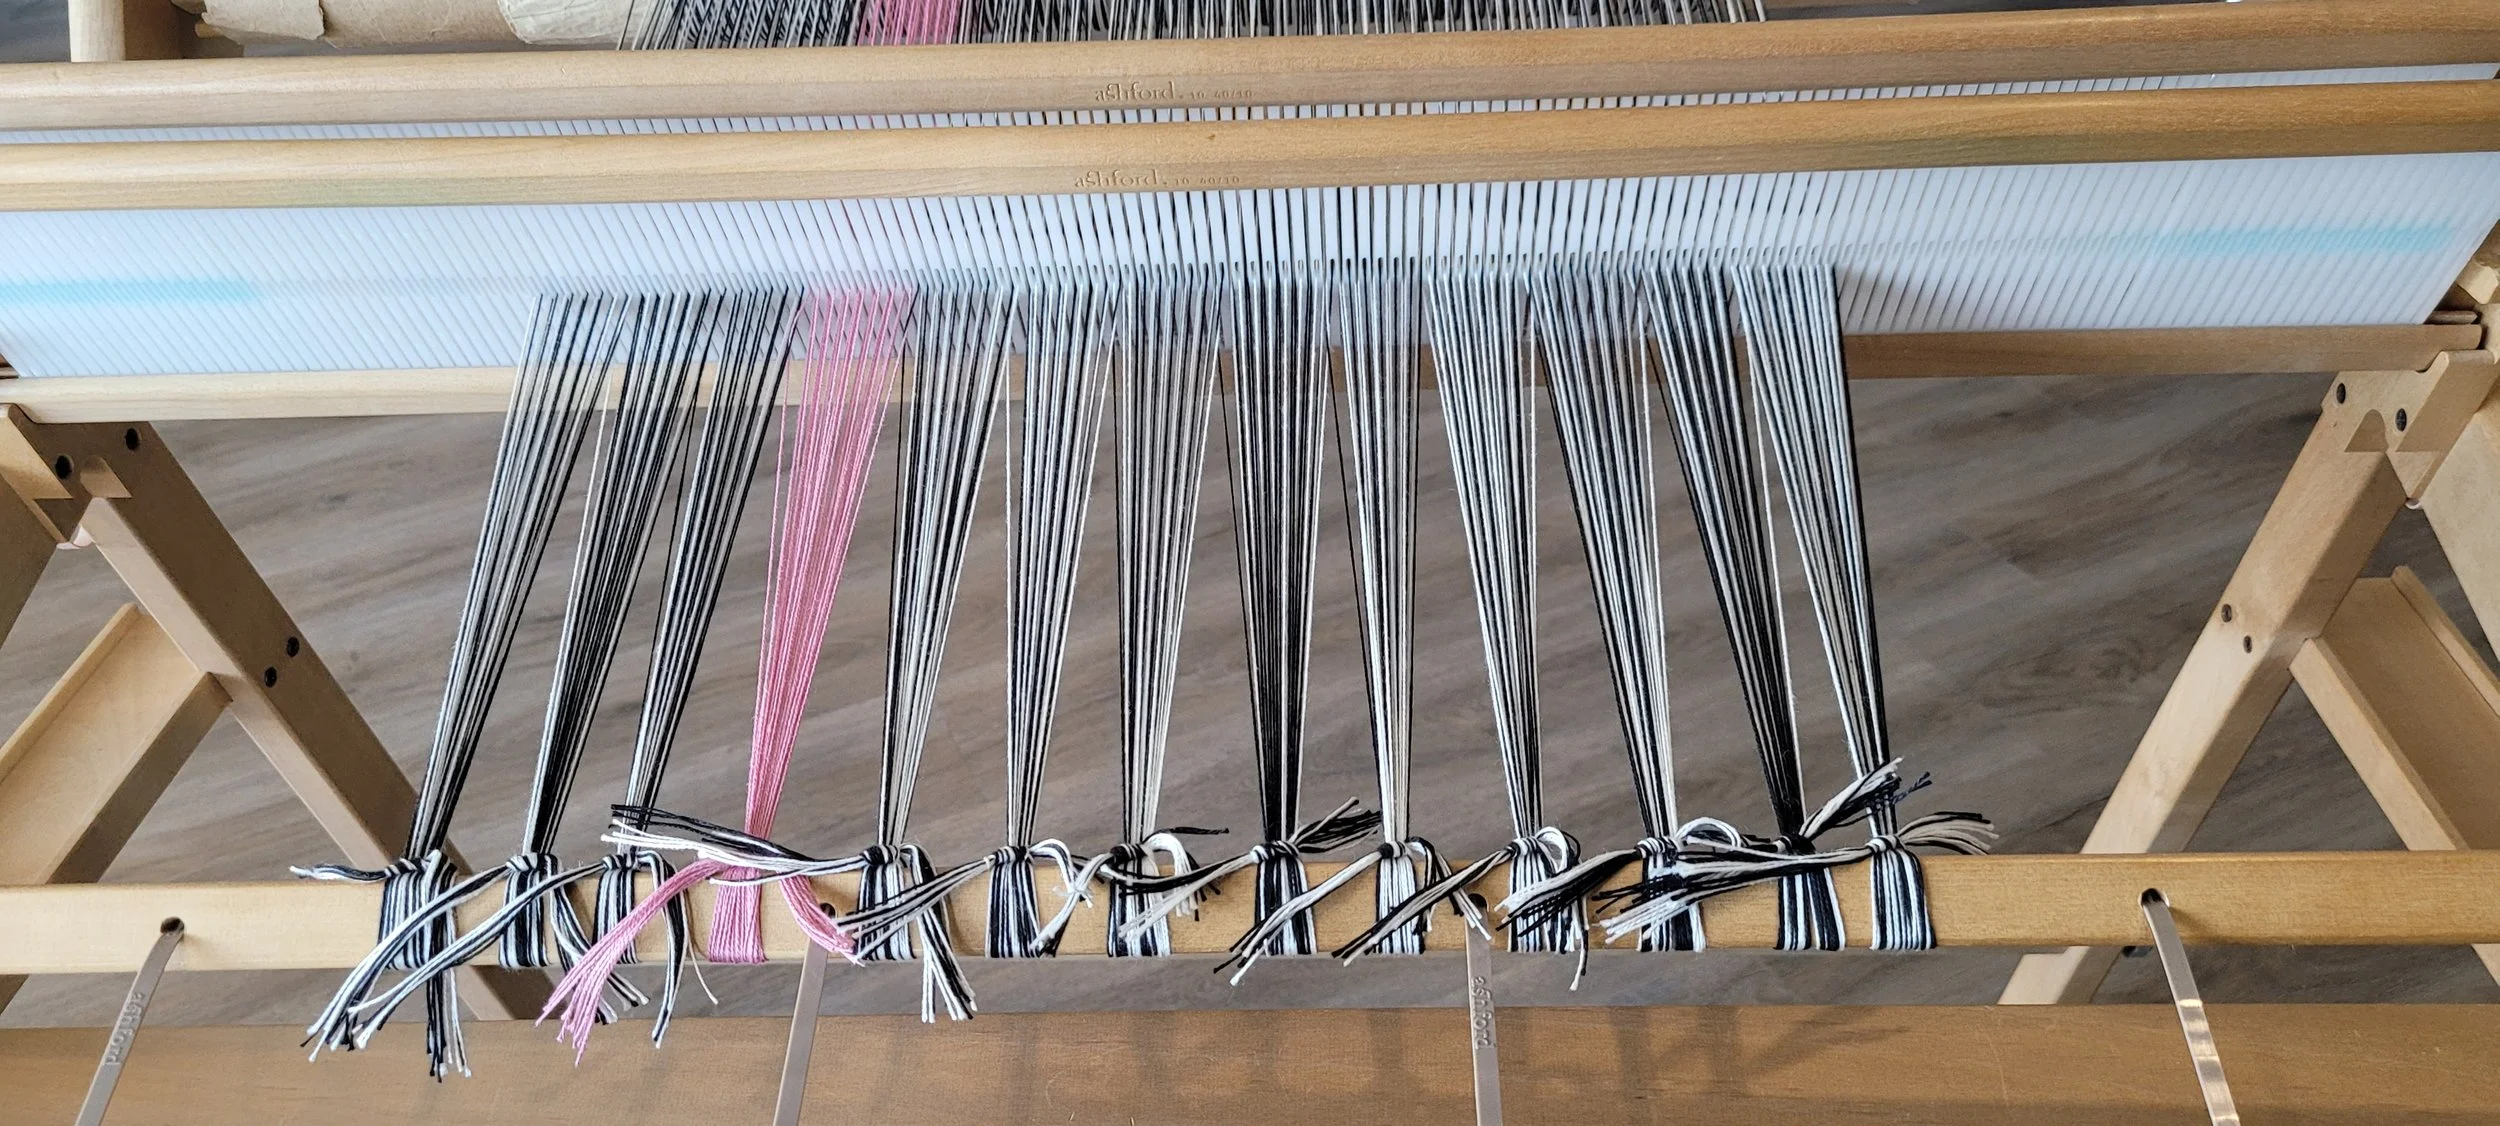
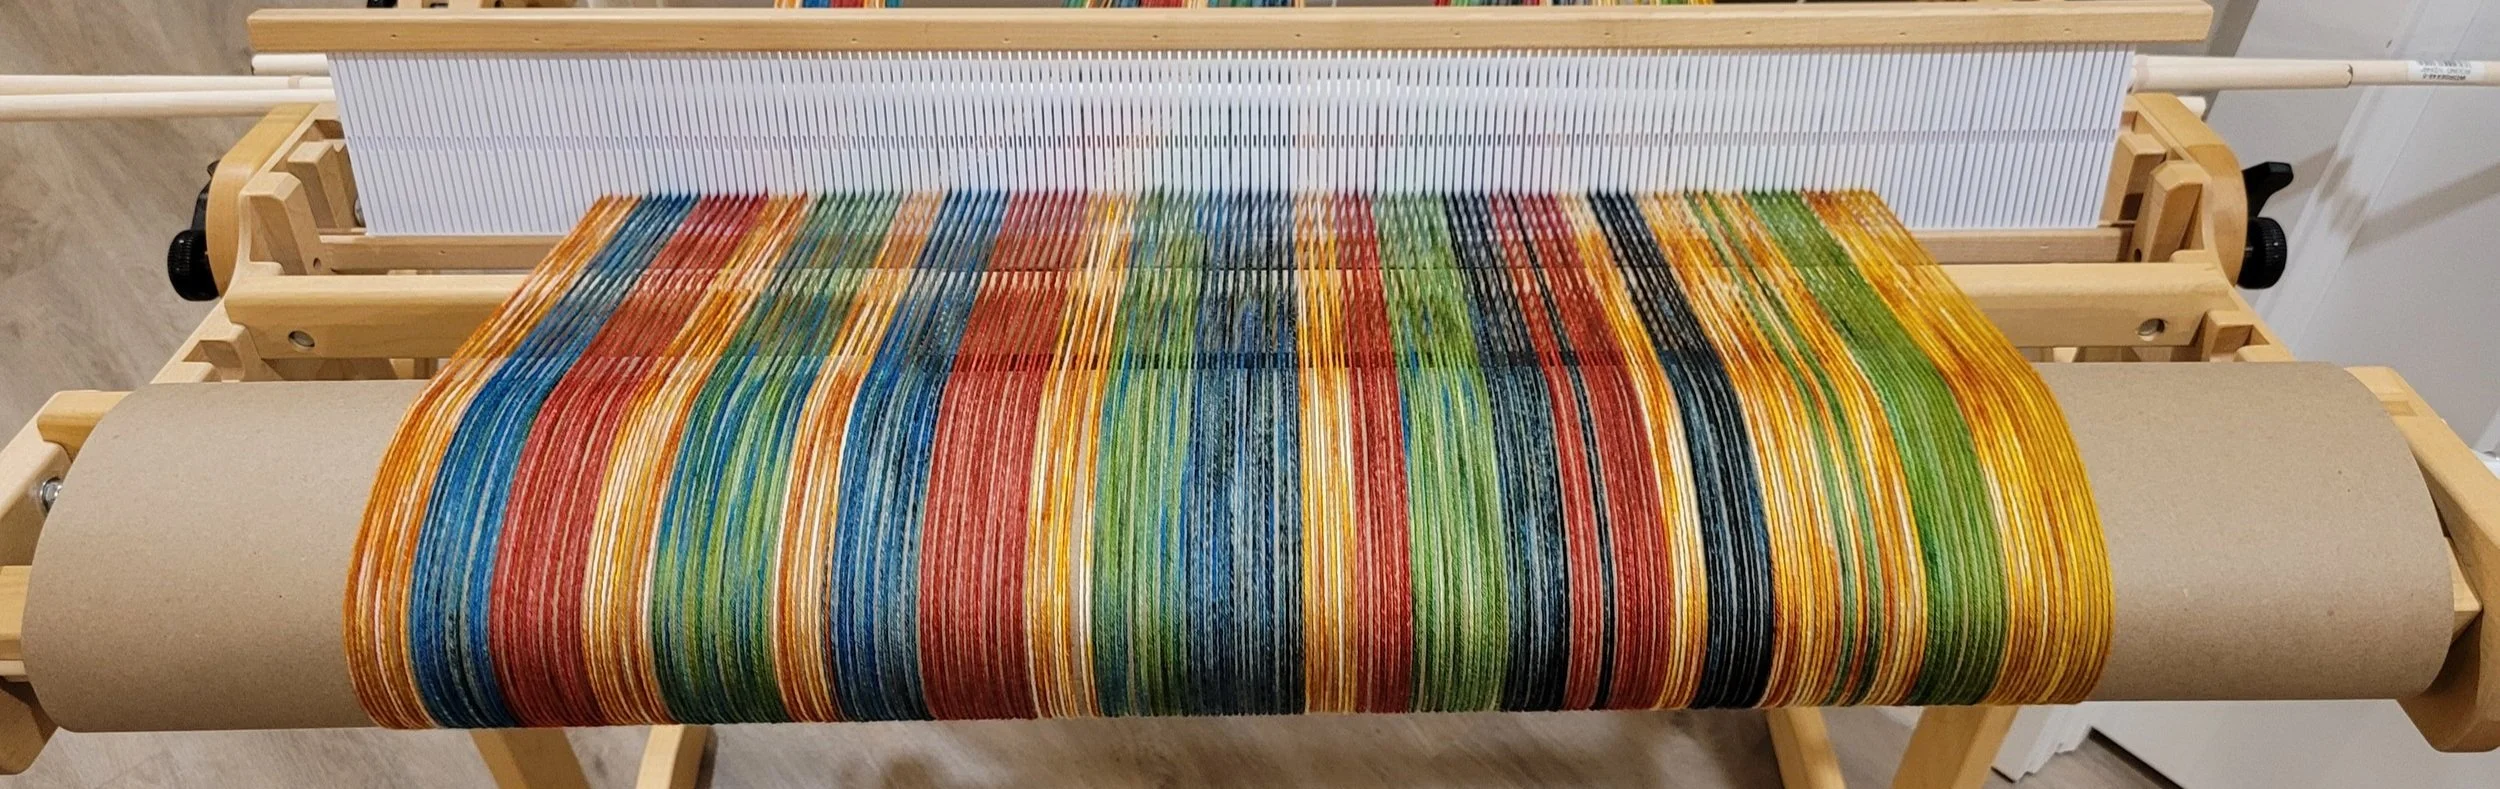
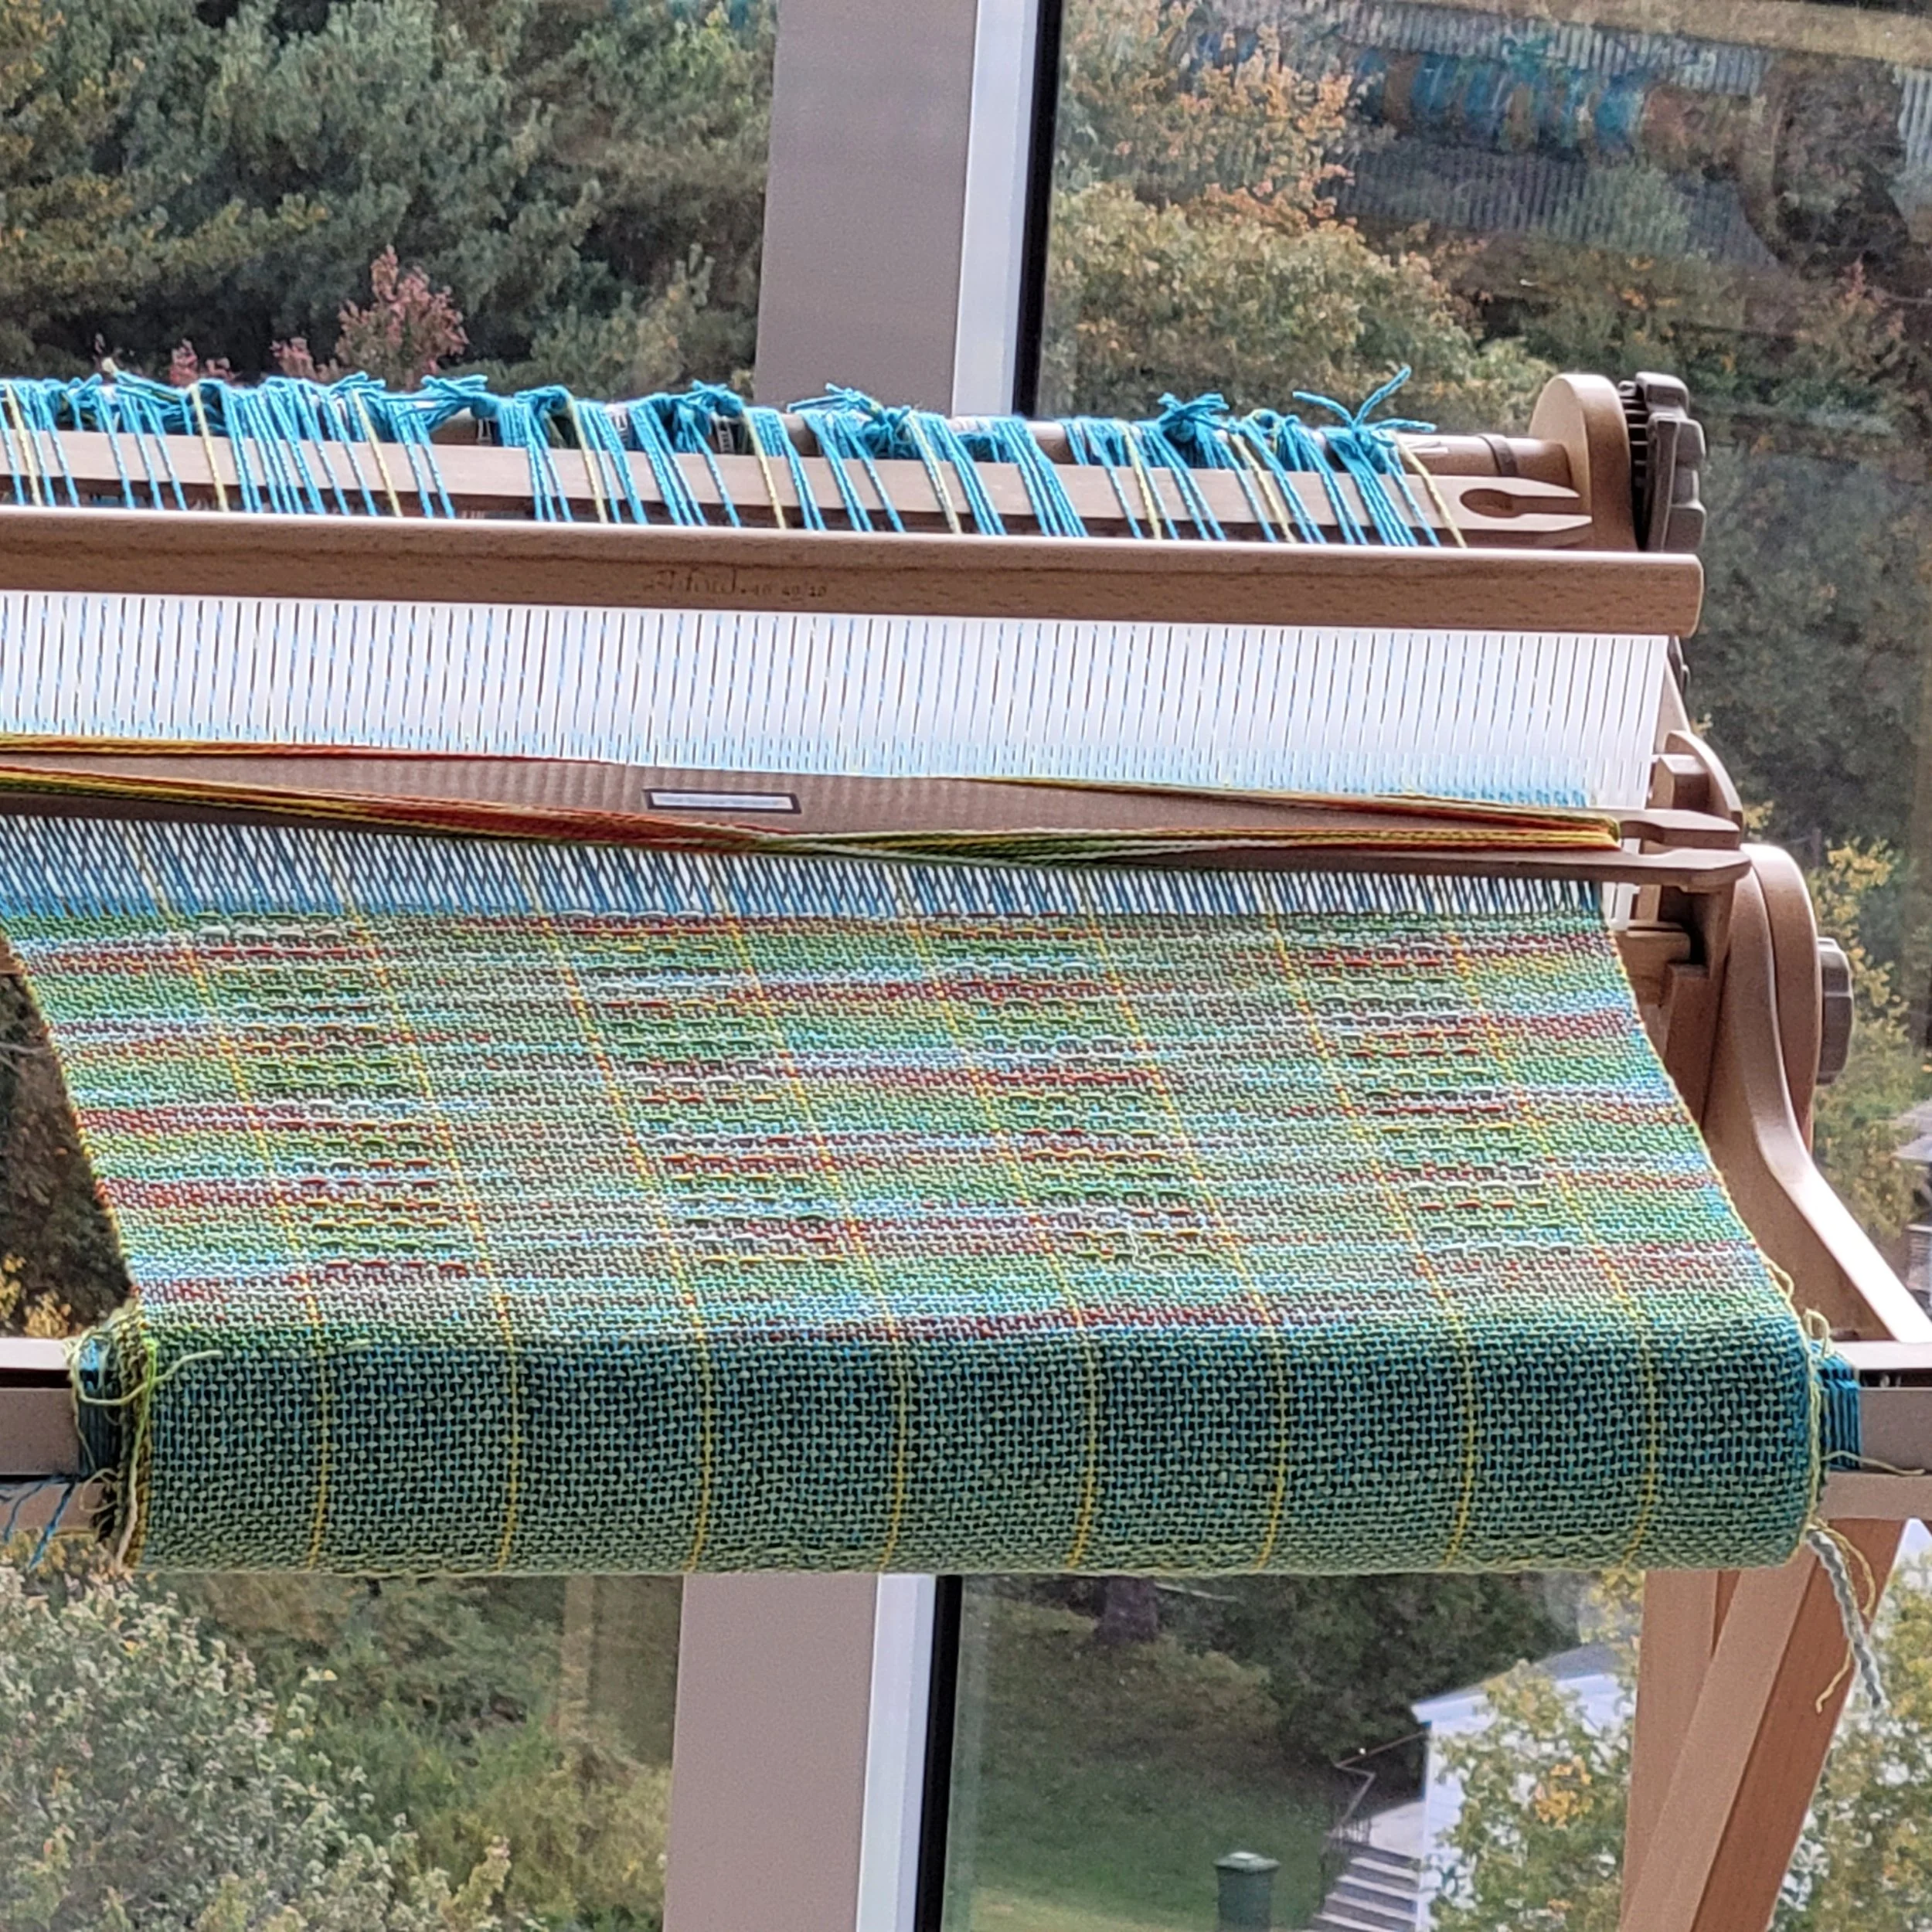
Last week I shared a little tale about a measuring mishap. This week, I’m happy to say the finished project is off the loom — six placemats, all woven slightly off-centred on my loom, yet all exactly the same size in the end. Yay me!
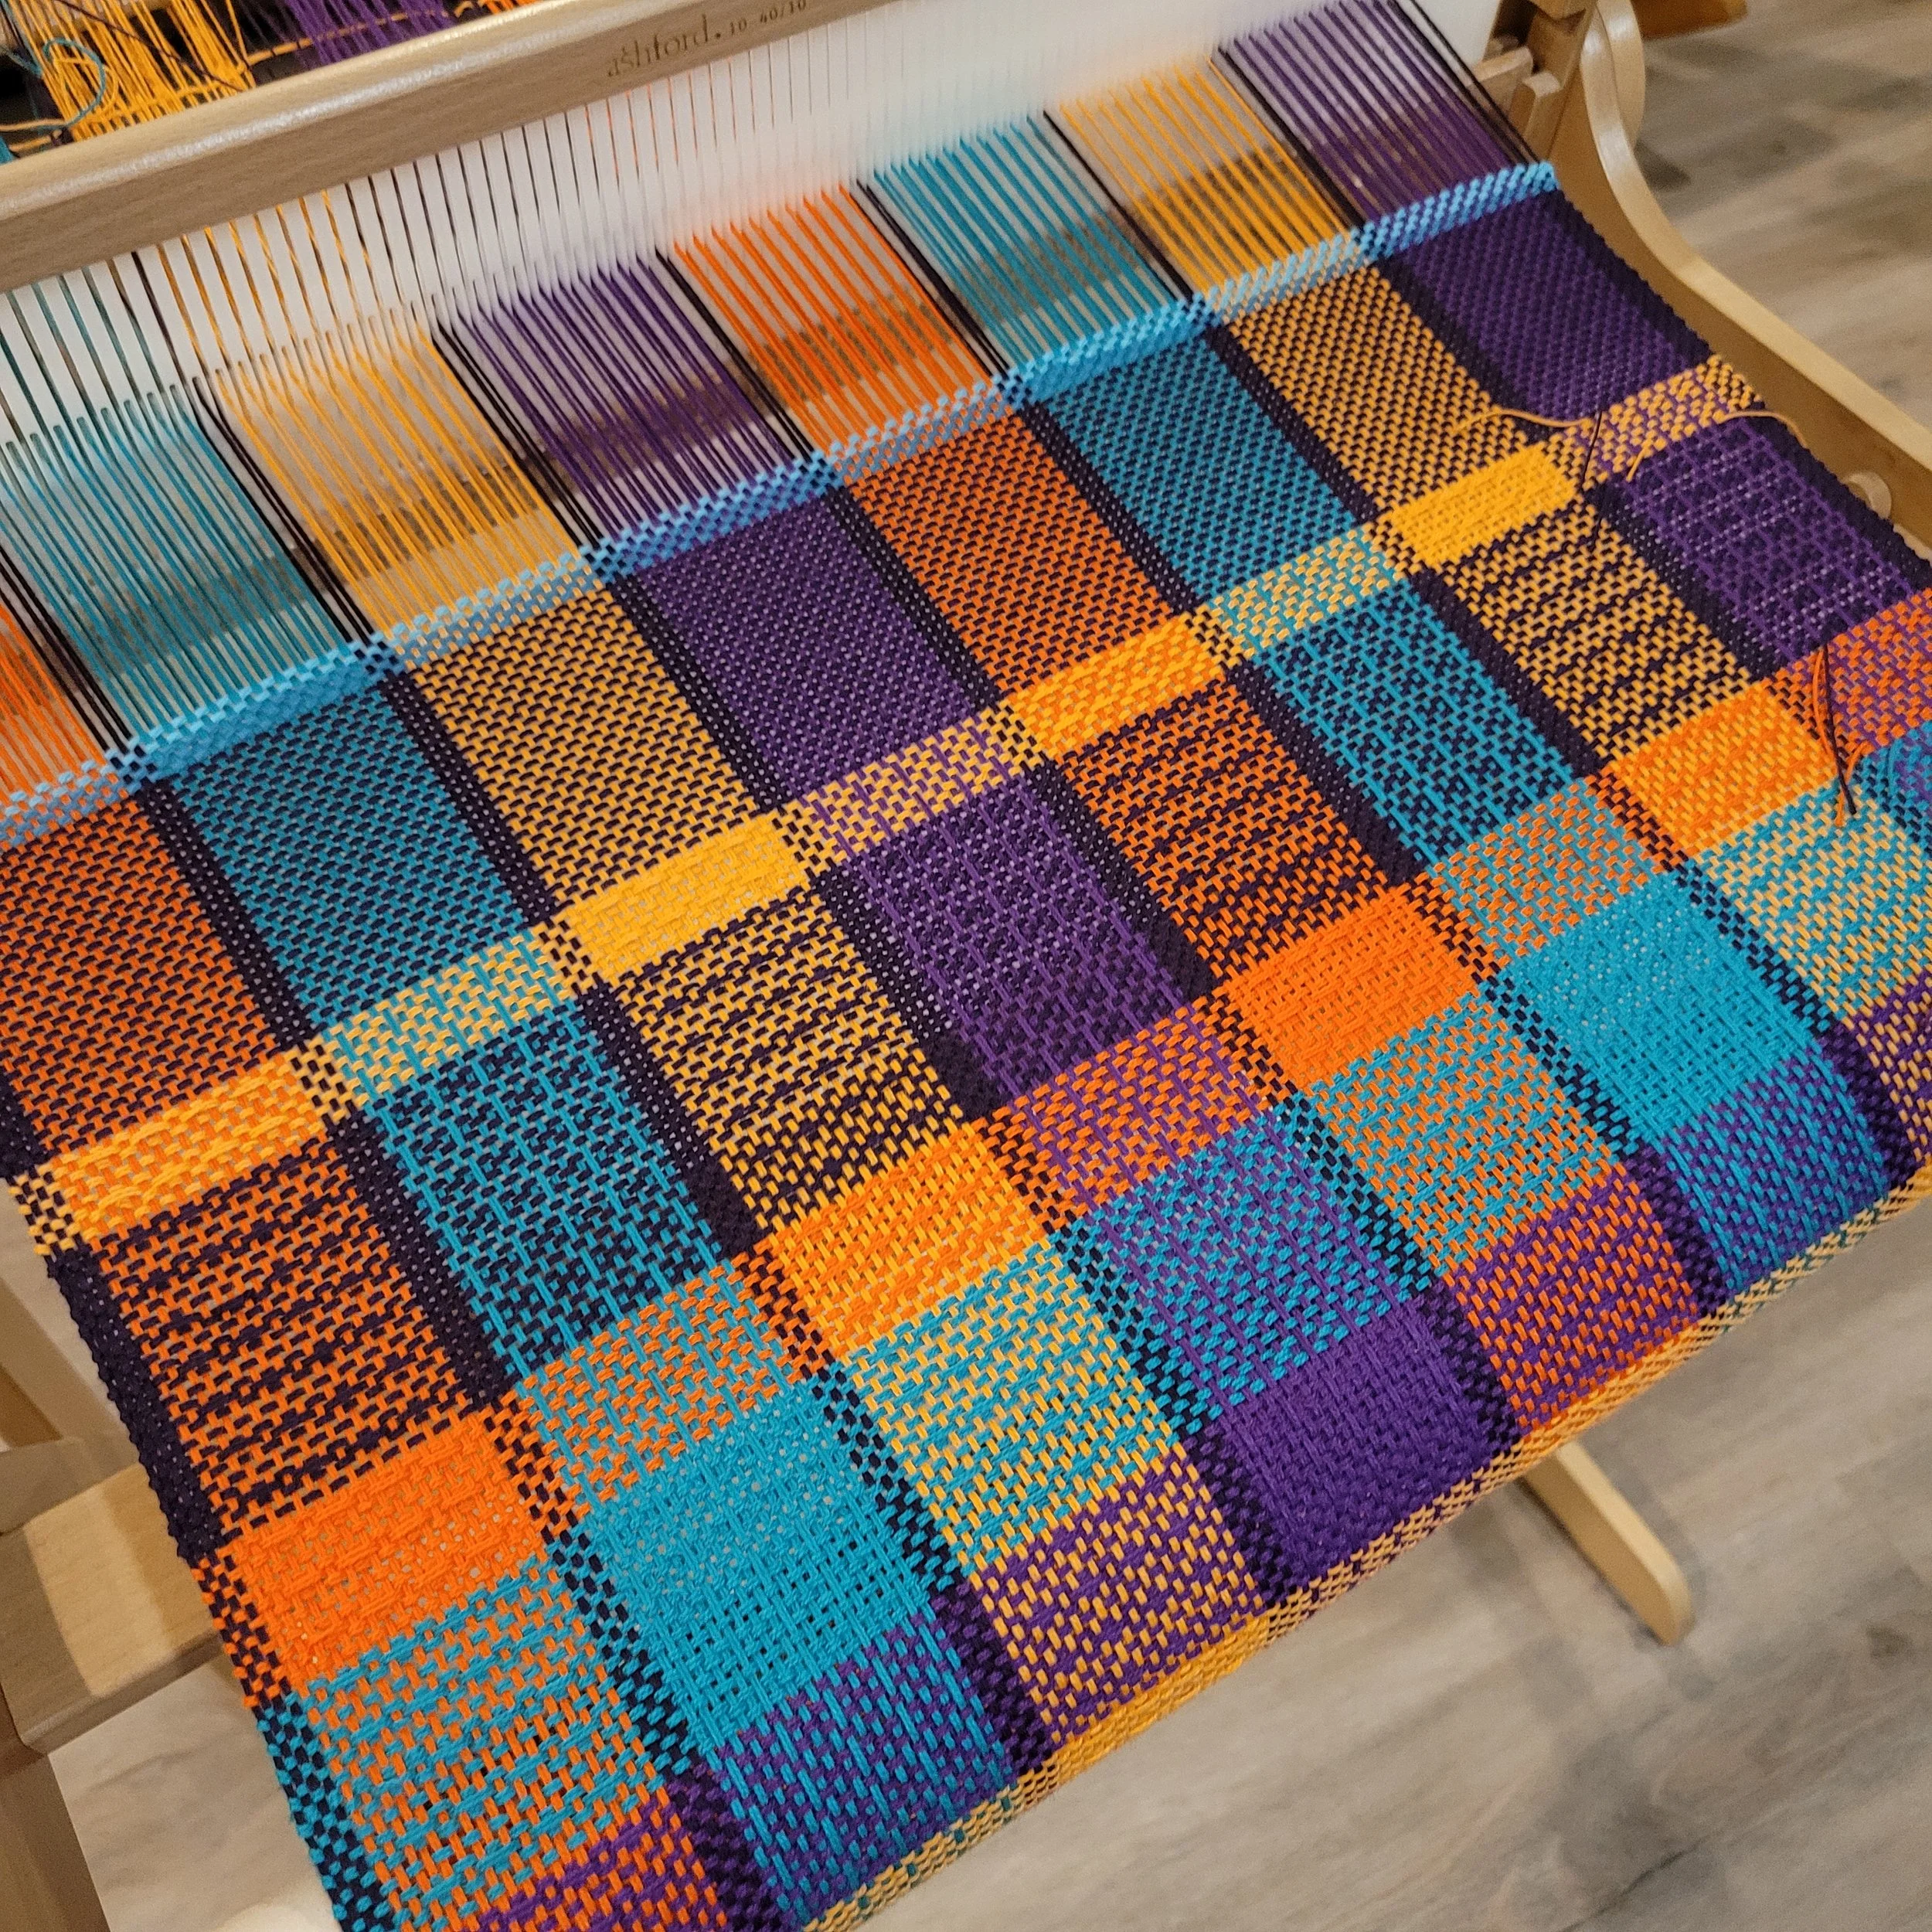
I thought about writing up the pattern, but it’s so simple, I wanted to just share with you what I did. Here’s a rough guide / pattern-style recipe. Feel free to choose your own colours. For mine, I used six colours, with a bright pop of red on the edges — the recipients love the beach and the ocean, so the palette was inspired by sun, sand, and sea.

Last week I shared a little tale about a measuring mishap. This week, I’m happy to say the finished project is off the loom — six placemats, all woven slightly off-centred on my loom, yet all exactly the same size. Yay me!
I thought about writing up the pattern, but it’s so simple, I wanted to just share with you what I did. Here’s a rough guide / pattern-style recipe. Feel free to choose your own colours. For mine, I used six colours, with a bright pop of red on the edges — the recipients love the beach and the ocean and the colour red. So the palette was inspired by sun, sand, and sea.
Warp
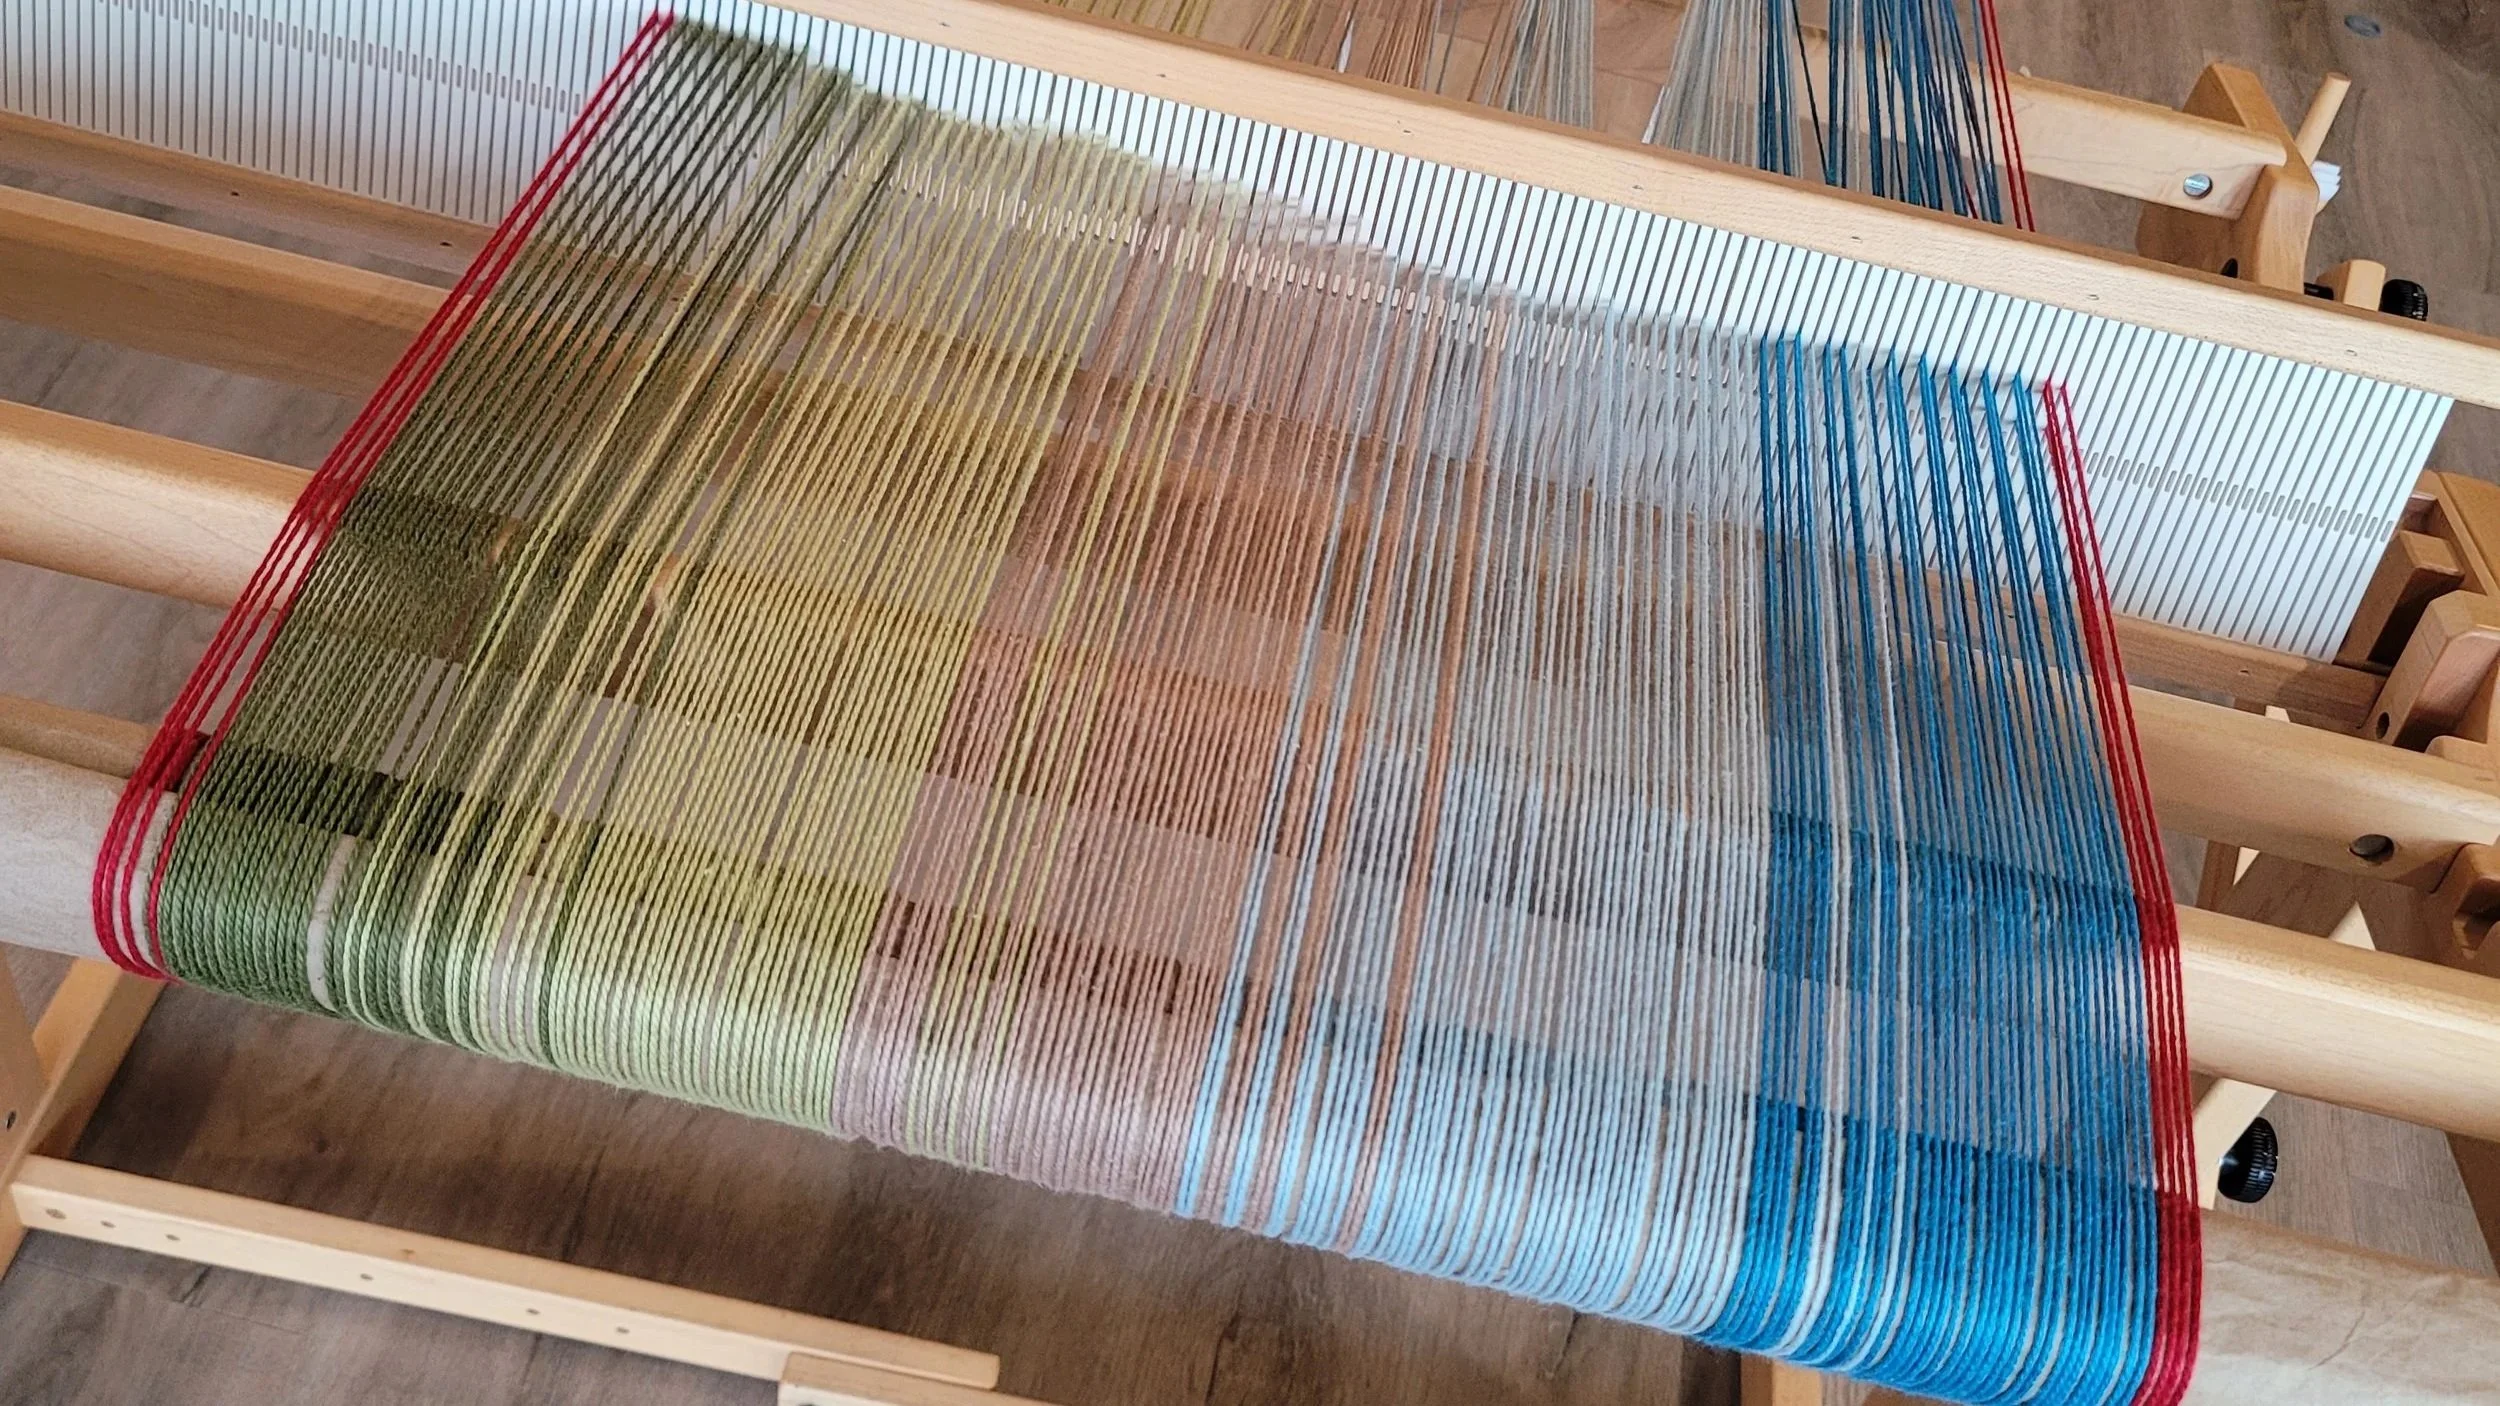
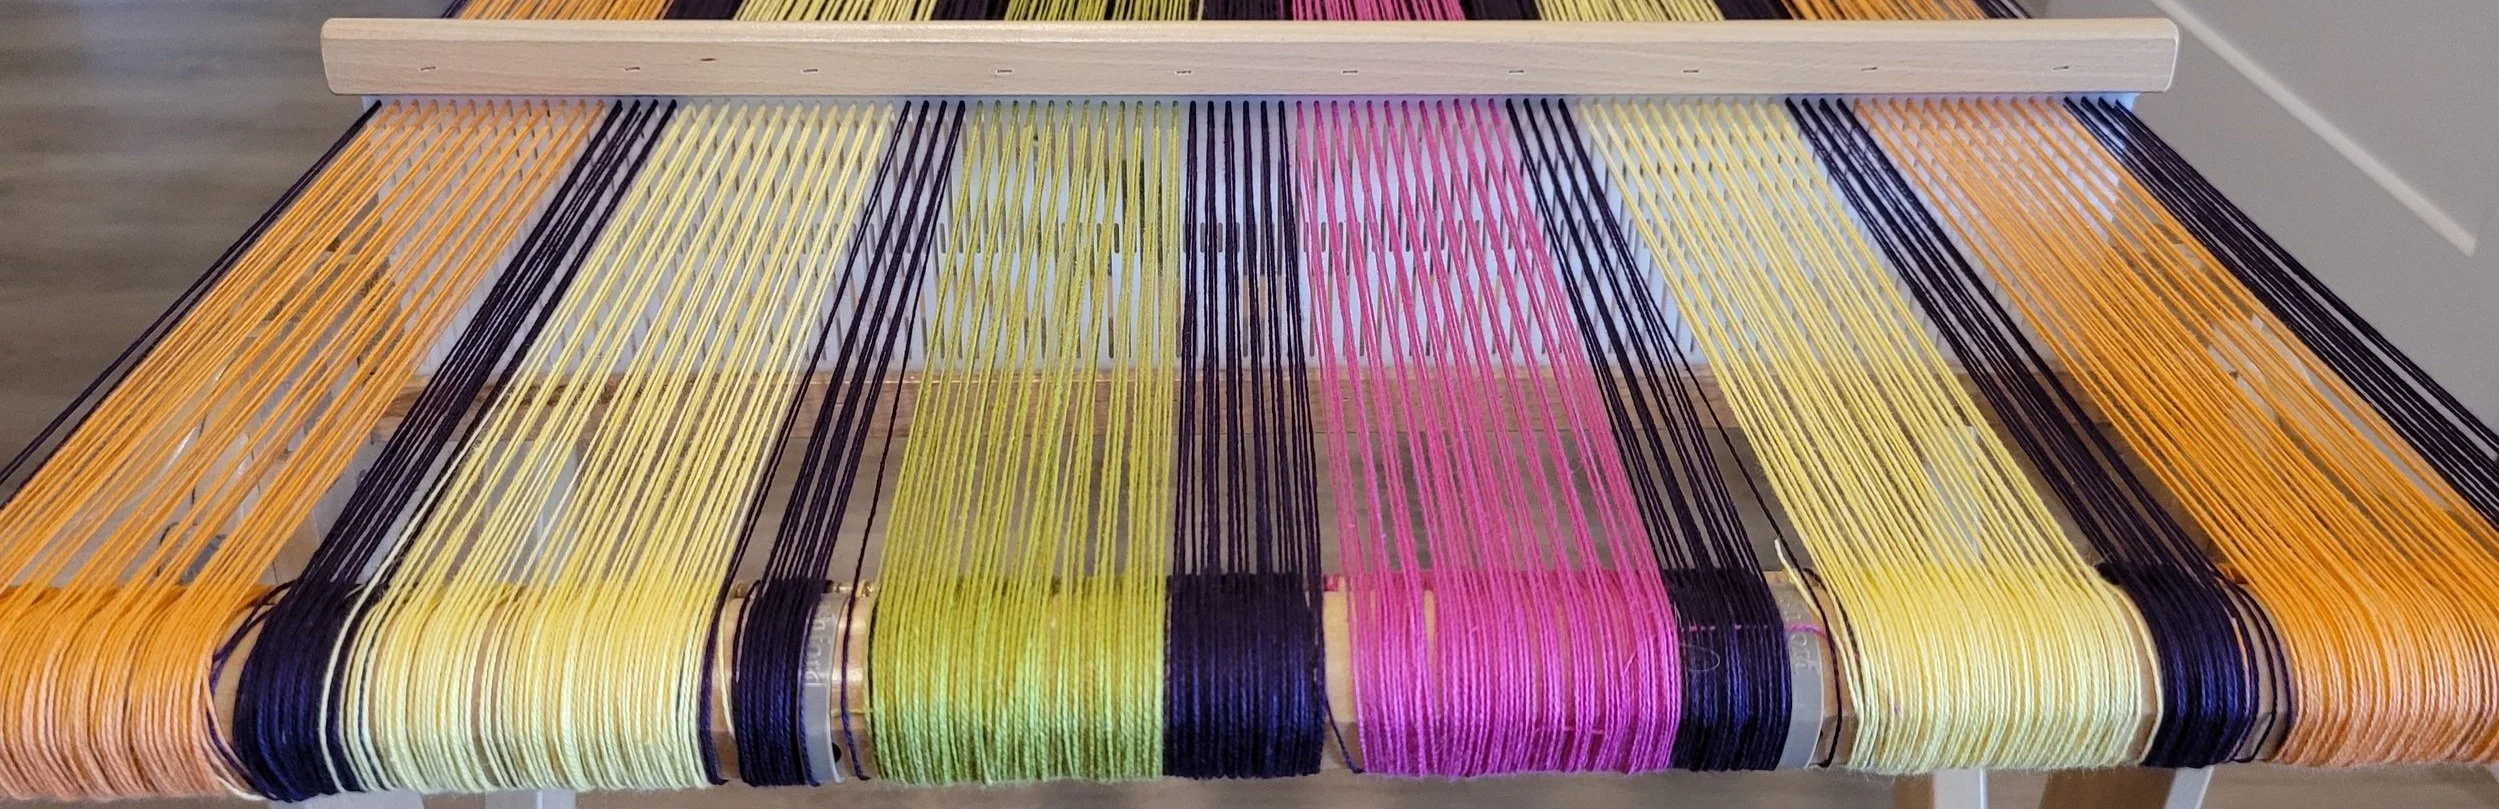
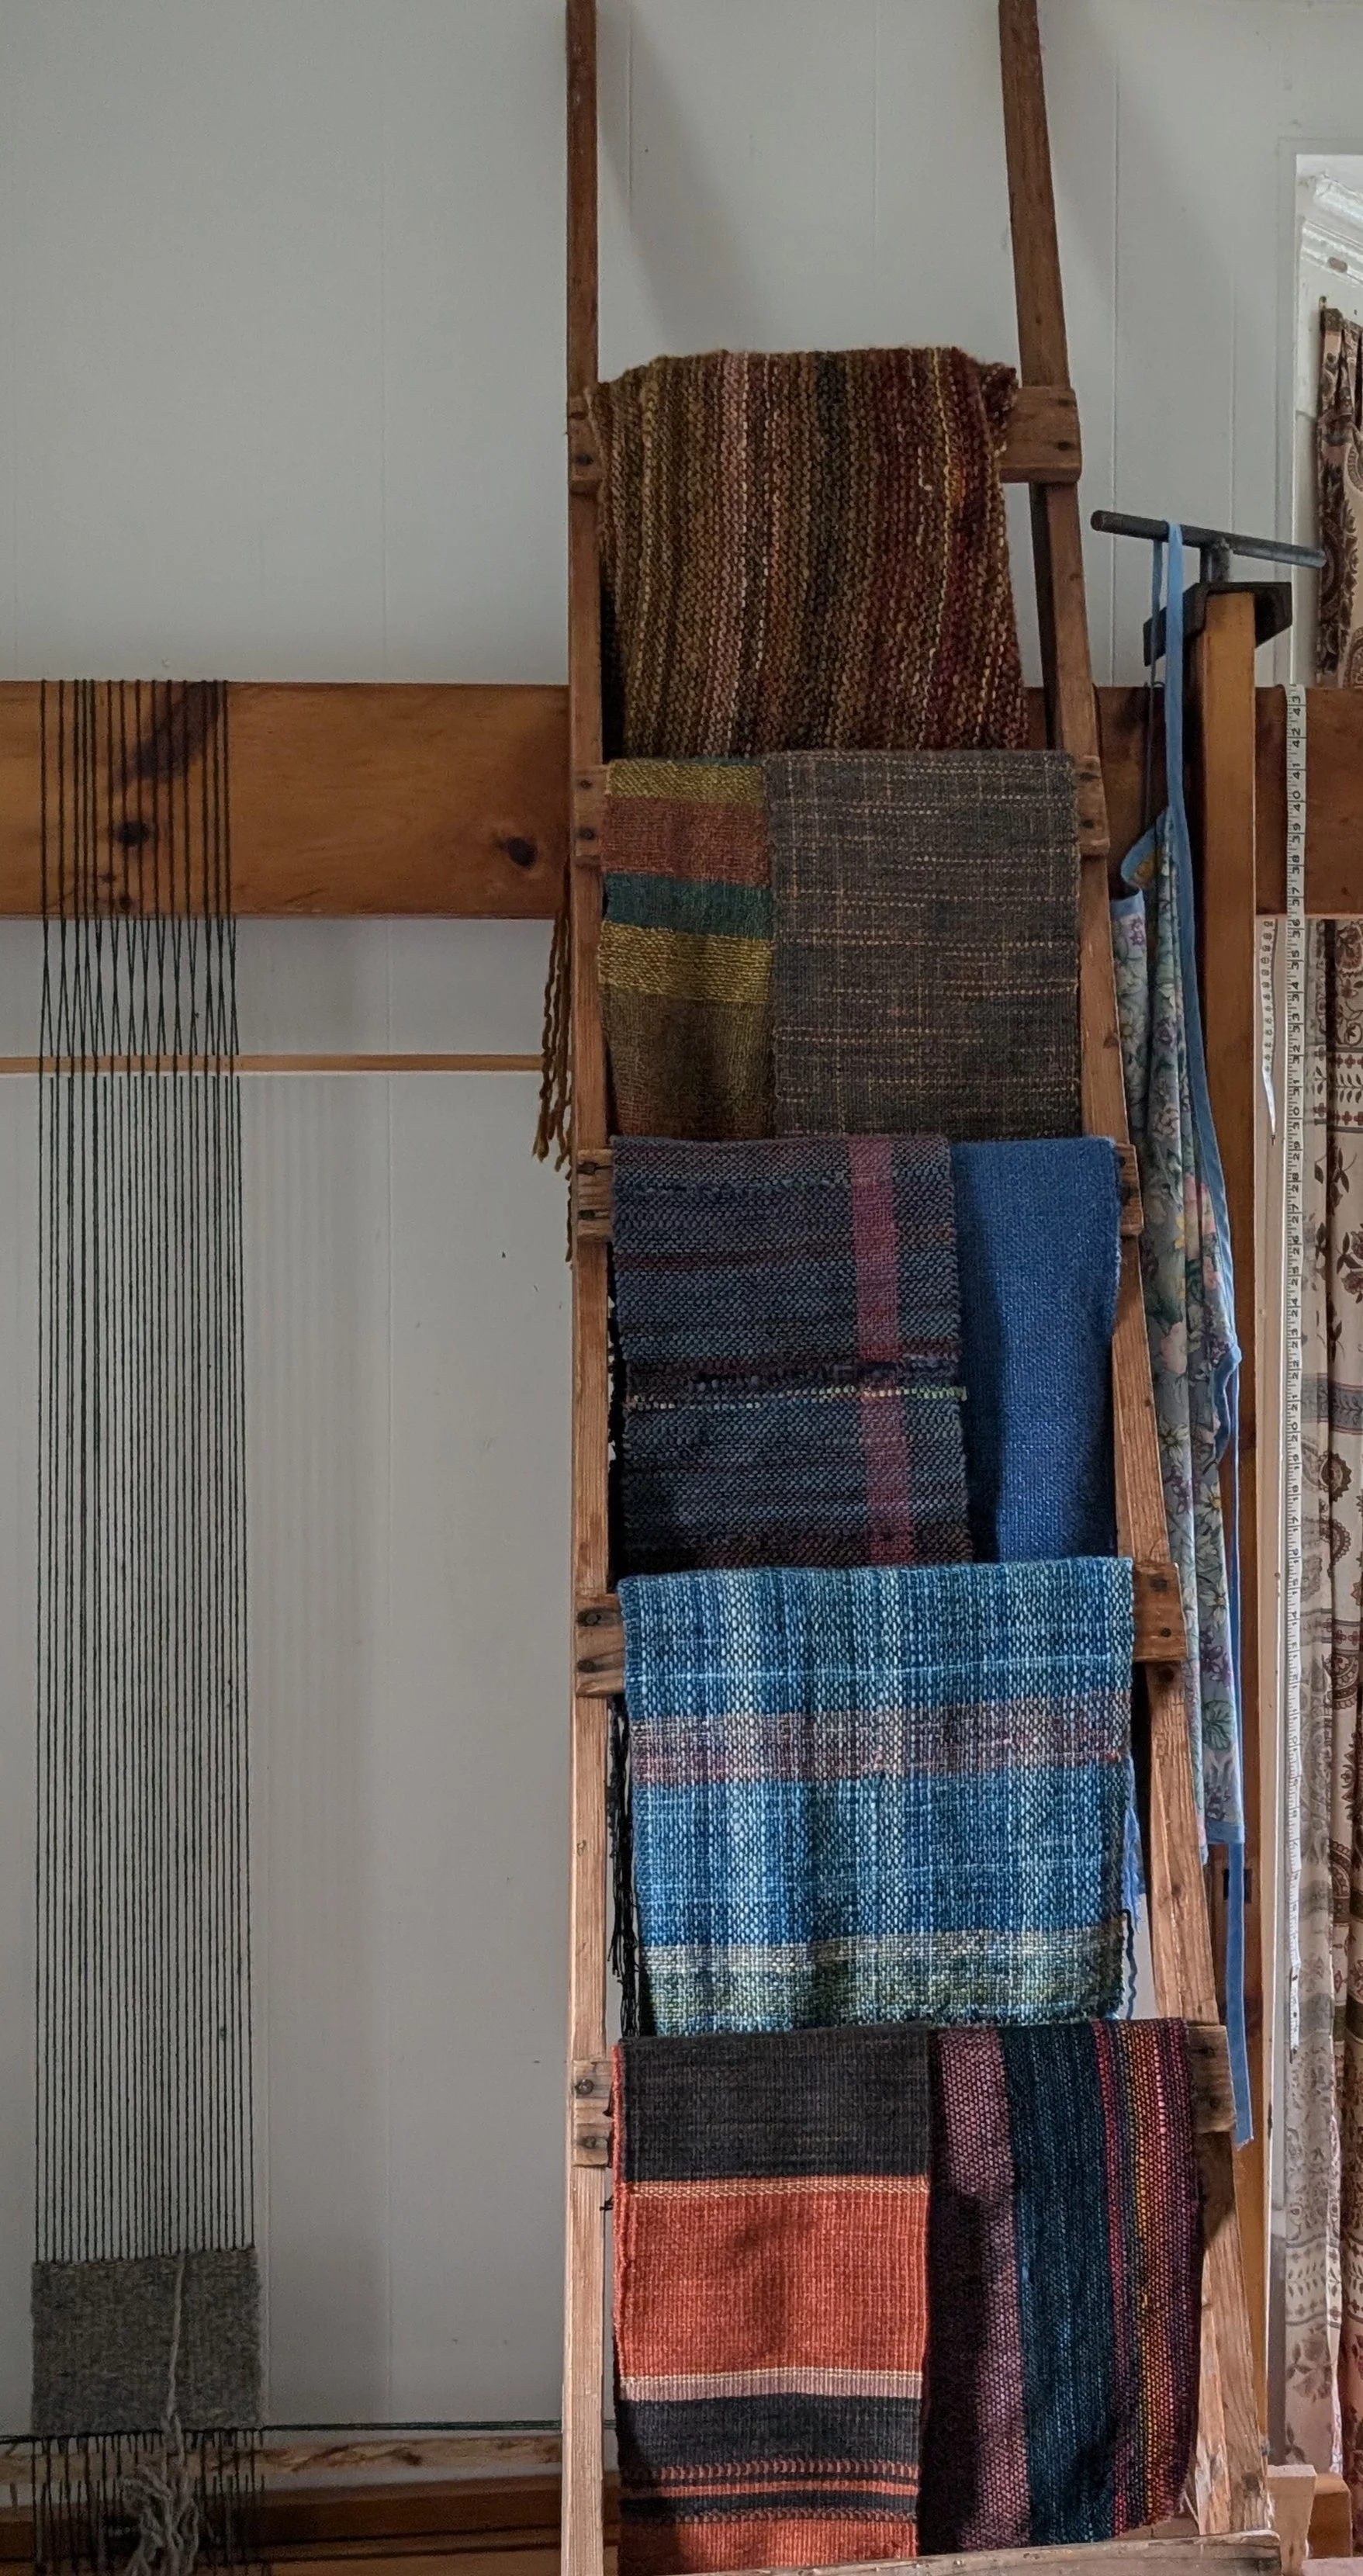
Yarn: Gist Beam 3/2 cotton in your choice of colours - I used 6. A bright pop on the edges works well! I faded from darker at the edges to paler colours in the center, then back out to the darker colours. This produced a fabric that feels very peaceful.
Warp length: 172" (approximately 4.4 m) for 6 placemats
Reed: 12-dent (or 12.5)
Ends: 94 slots = 188 ends total
Width in the reed: 15.5"
Colouring: I faded randomly from one colour to the next for subtle transitions. It did mean a little rearranging of ends in the reed after warping but it wasn’t hard. This is a good way to force yourself to be random! I was using 5 main colours and had 15” to work with so I knew I had about 3” for each colour. And don’t over do the edge pop…a little goes a long way!
Weaving
For each placemat:
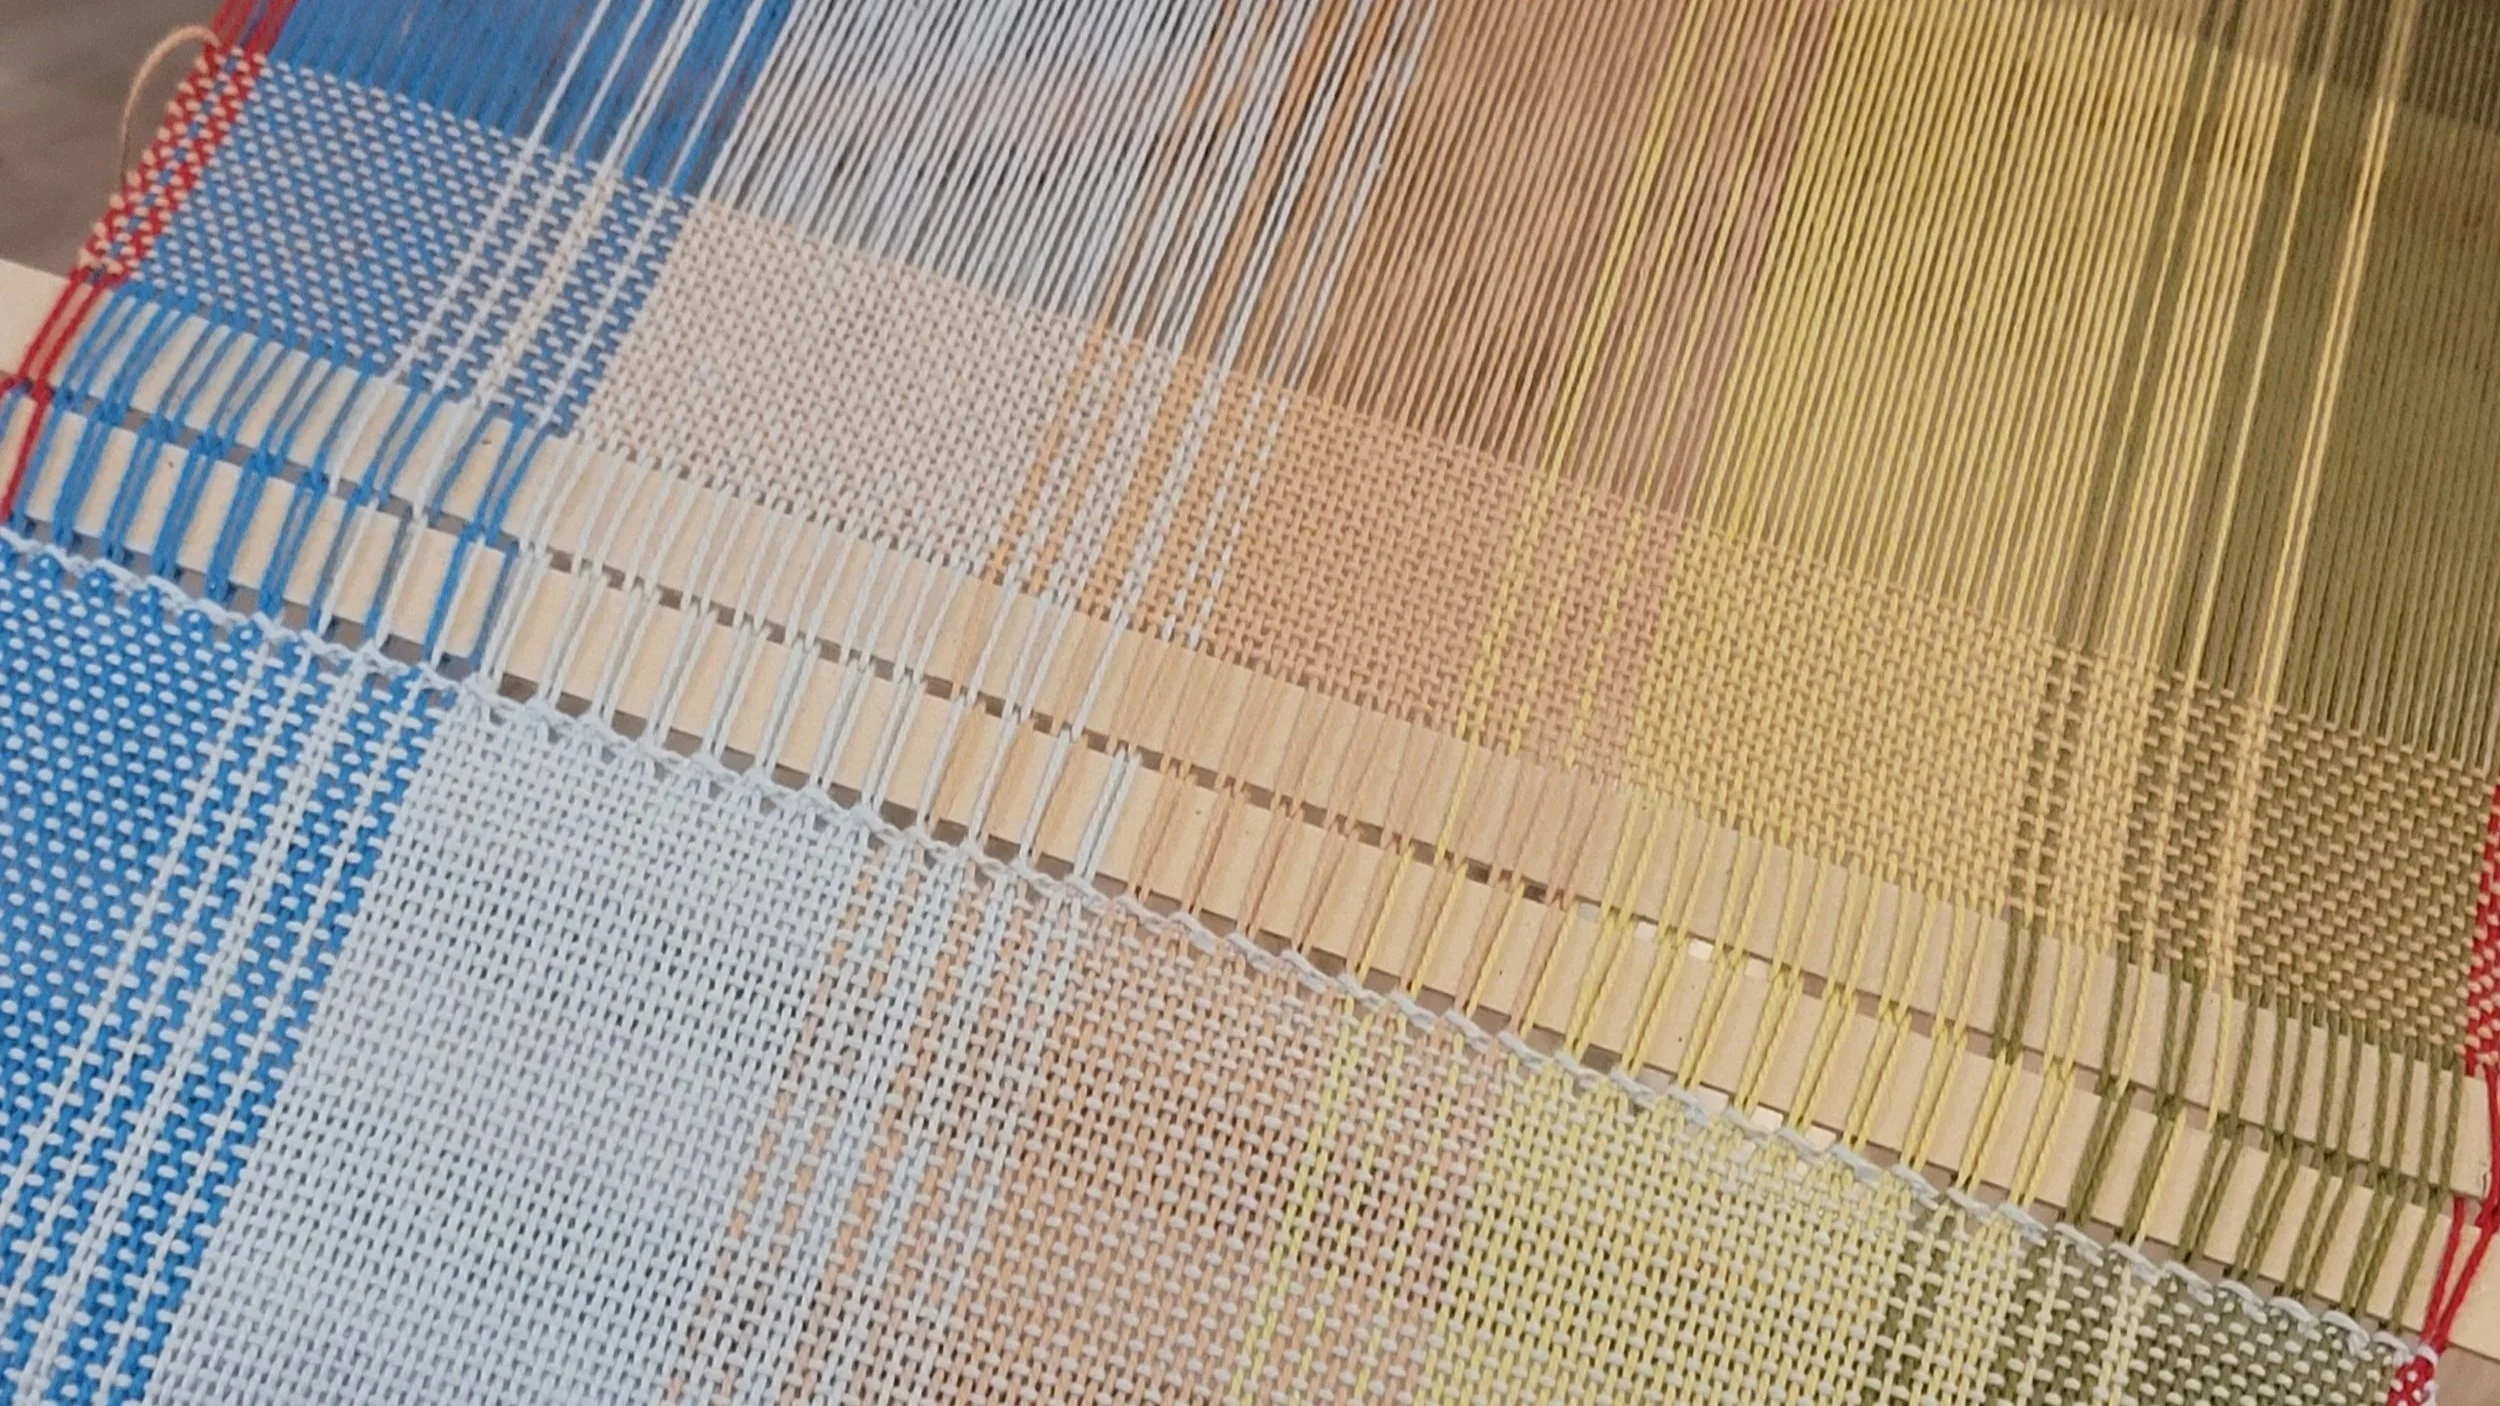
Plain weave 22" hemstitching in bundles of 4 at each end.
I used 2 warping sticks between each placemat to keep the fringe length the same.
After removing from the loom, cut the fringe between the two sticks for clean, even edges.
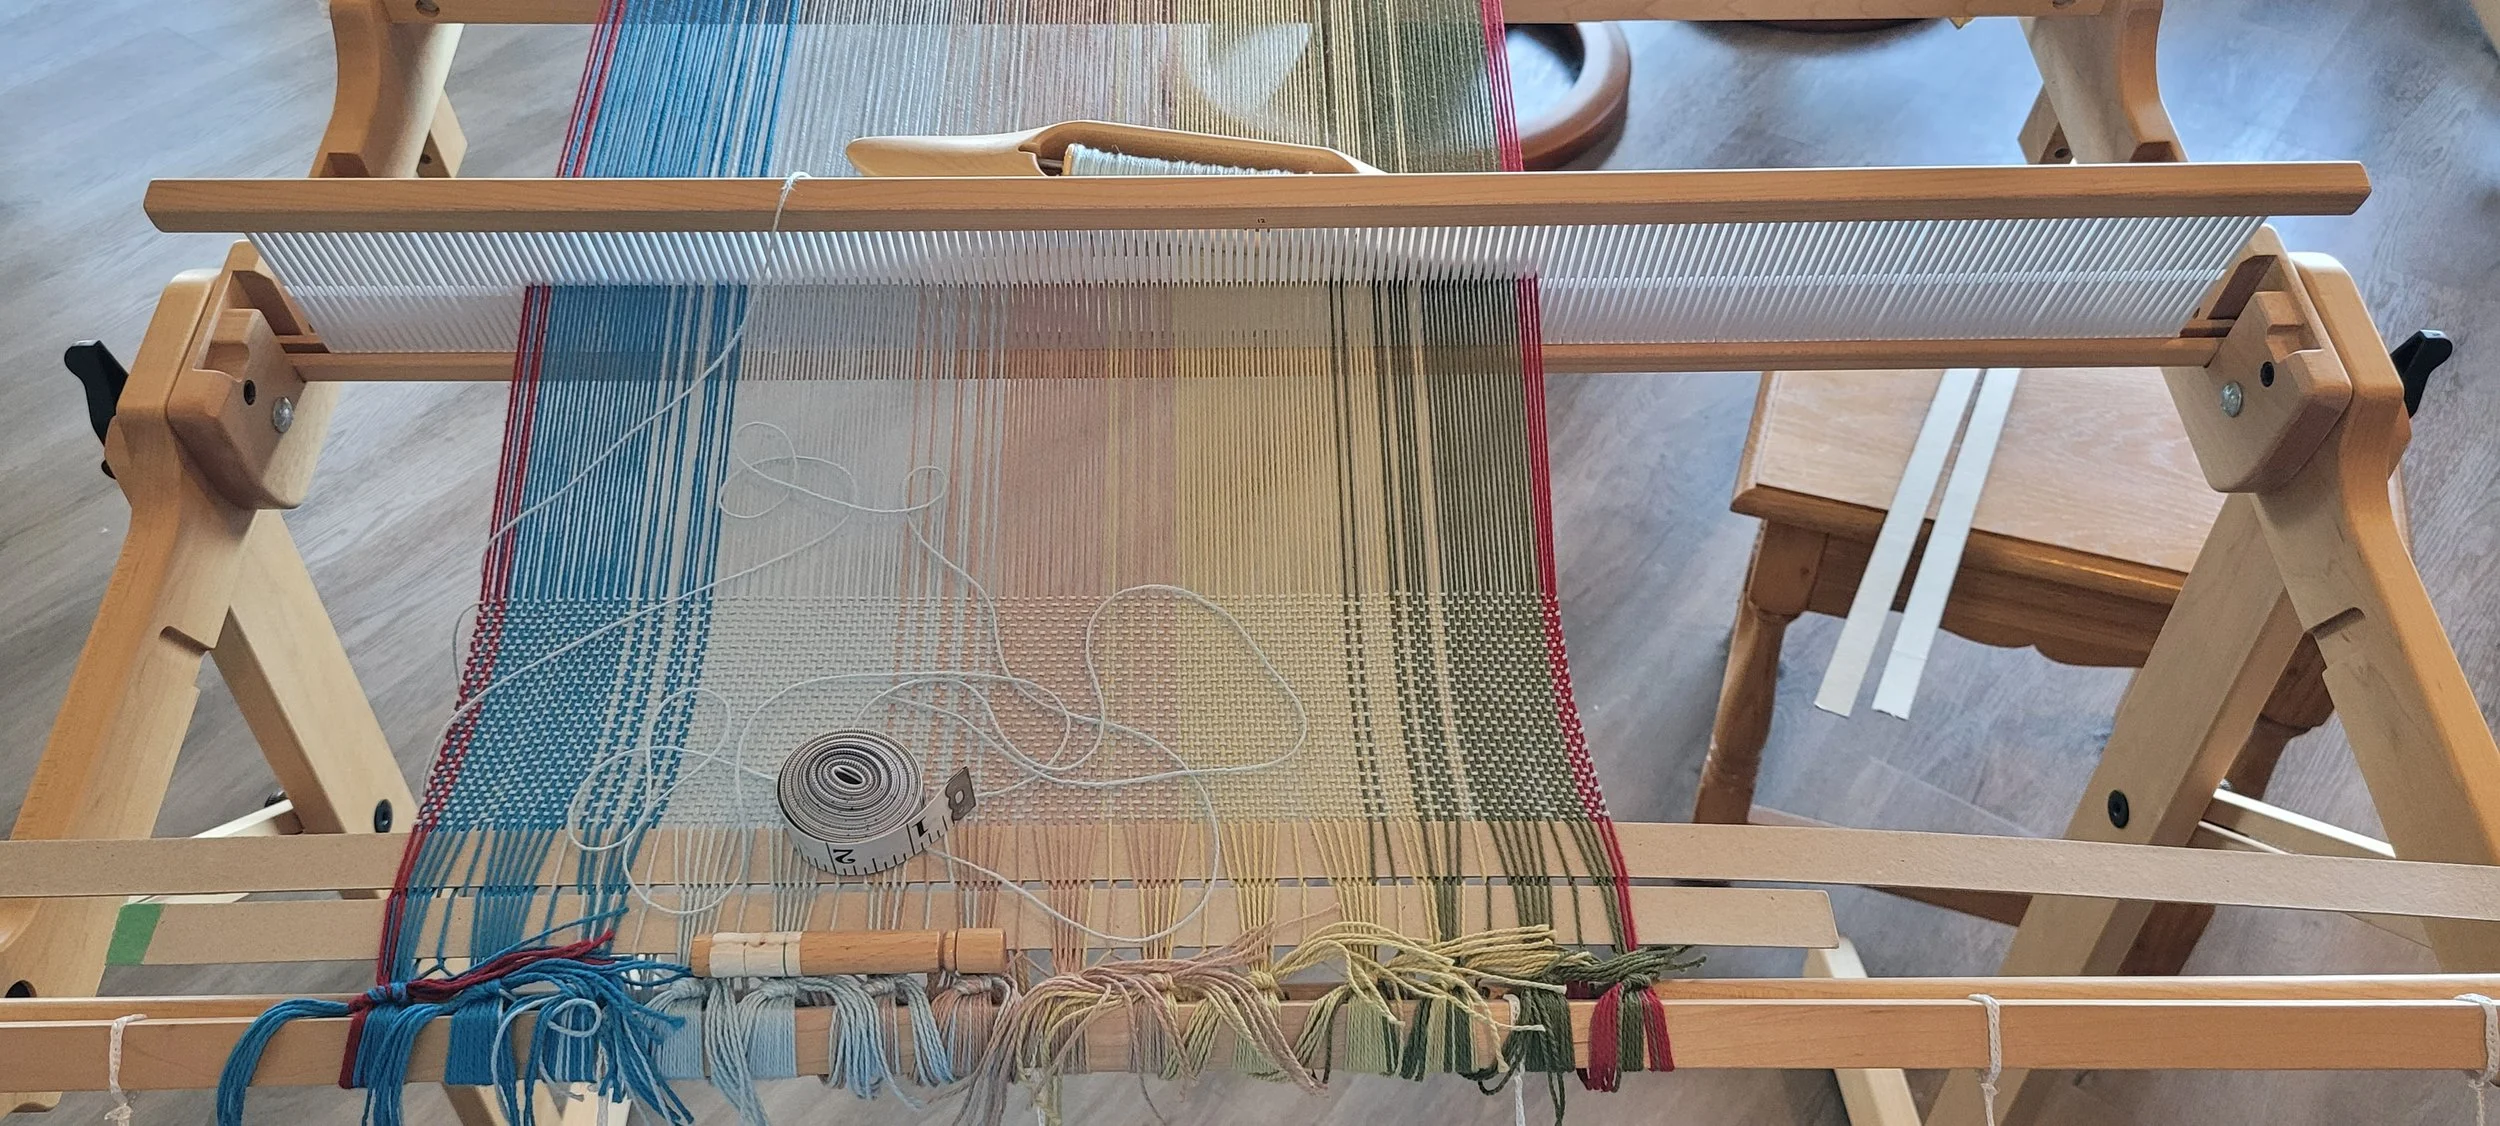
I split-plied at the bobbin changes. I used a boat shuttle and needed 2 bobbins to complete a single placemat. If you use a stick shuttle, you might be able to weave a full placemat without running out of weft on your shuttle.
My picks per inch was 9. This is important…if you have a different ppi for each placemat, they will finish to different sizes! Be sure to check frequently.
Weaving
Weft Colours:
I chose the middle three colours of my warp and wove two placemats in each colour. This ensured I didn’t run out of weft, but also made all the placemats coordinate beautifully. And since I used the lighter colours, it added to the peaceful feel.
Finishing
Wash in warm water
Dry on high heat
Press both sides, trimming any any tails as you press
Trim fringe to ¾"
Because they’re a gift, I repeated the wash–dry–press cycle to ensure they were fully fulled before wrapping them up.
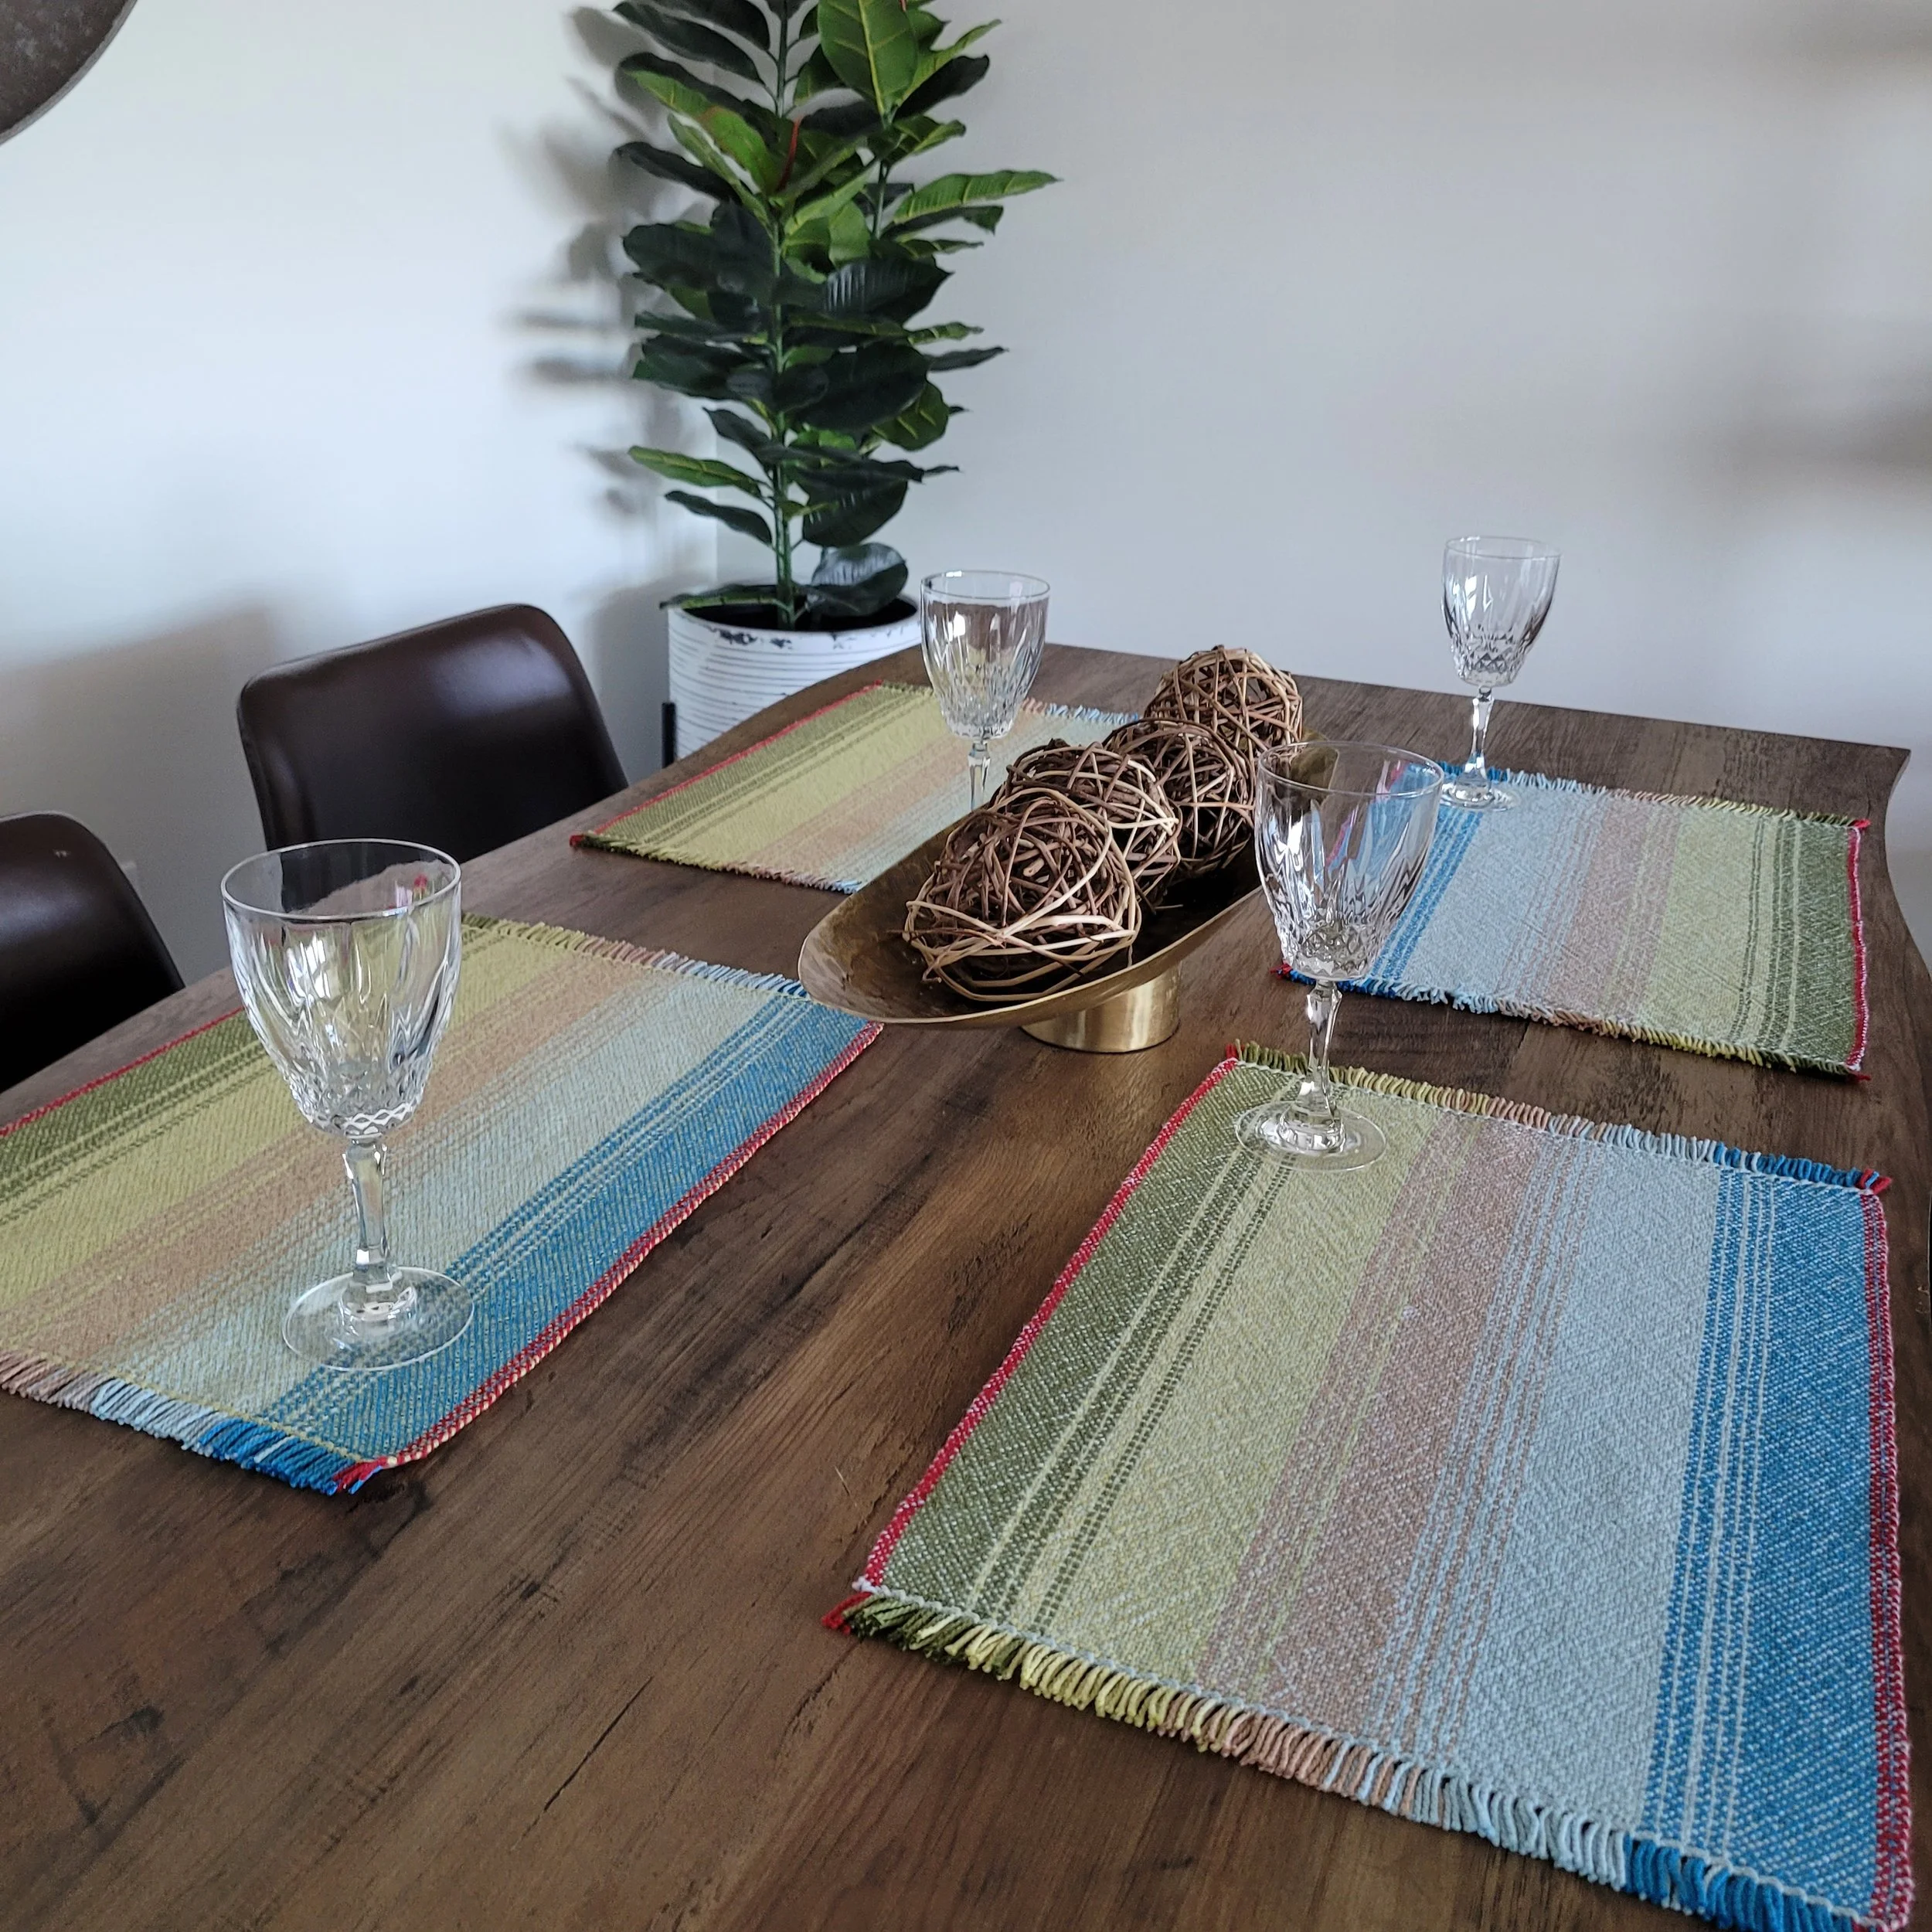
After wet finishing and pressing, the placemats should measure about 12 1/2” x 18 1/4” each plus fringe. If you have used Gist Beam, these placemats are completely washable, and mine did not shrink after the first wash.
Wondering where you can get Beam? Here are some options:
and for my fellow Canadians, Tisse et File
The Why Behind the Rule
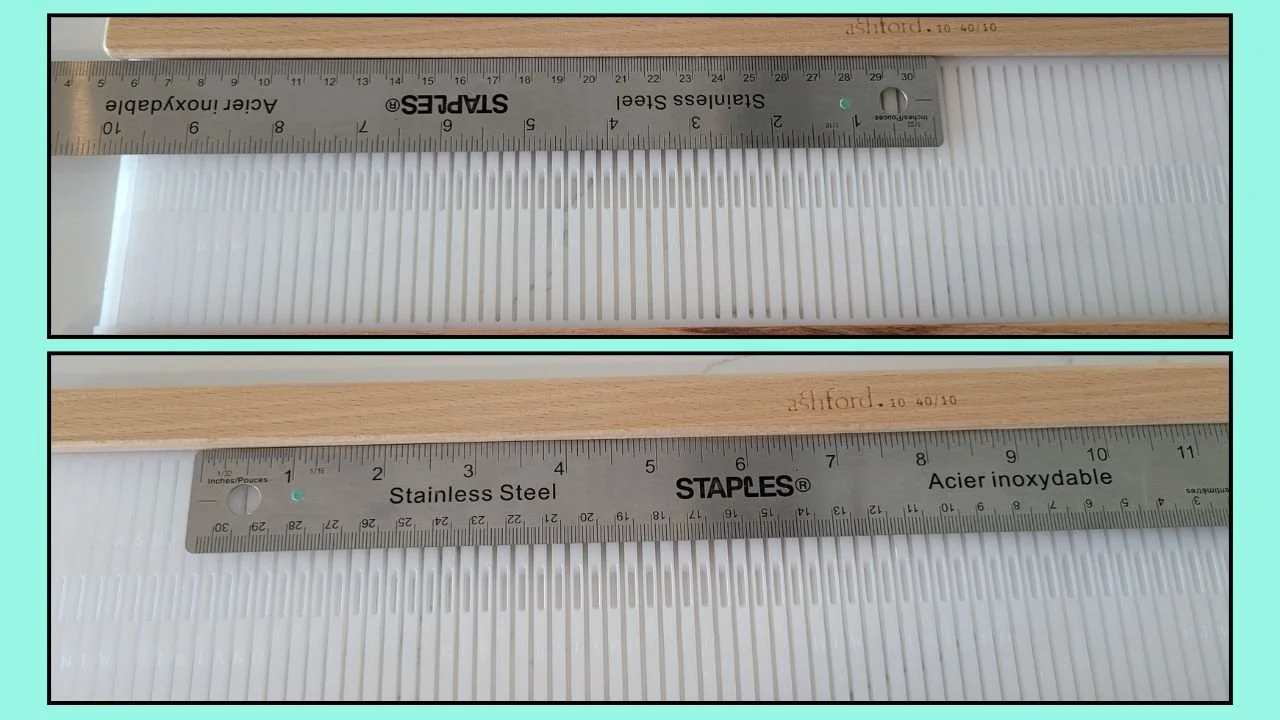
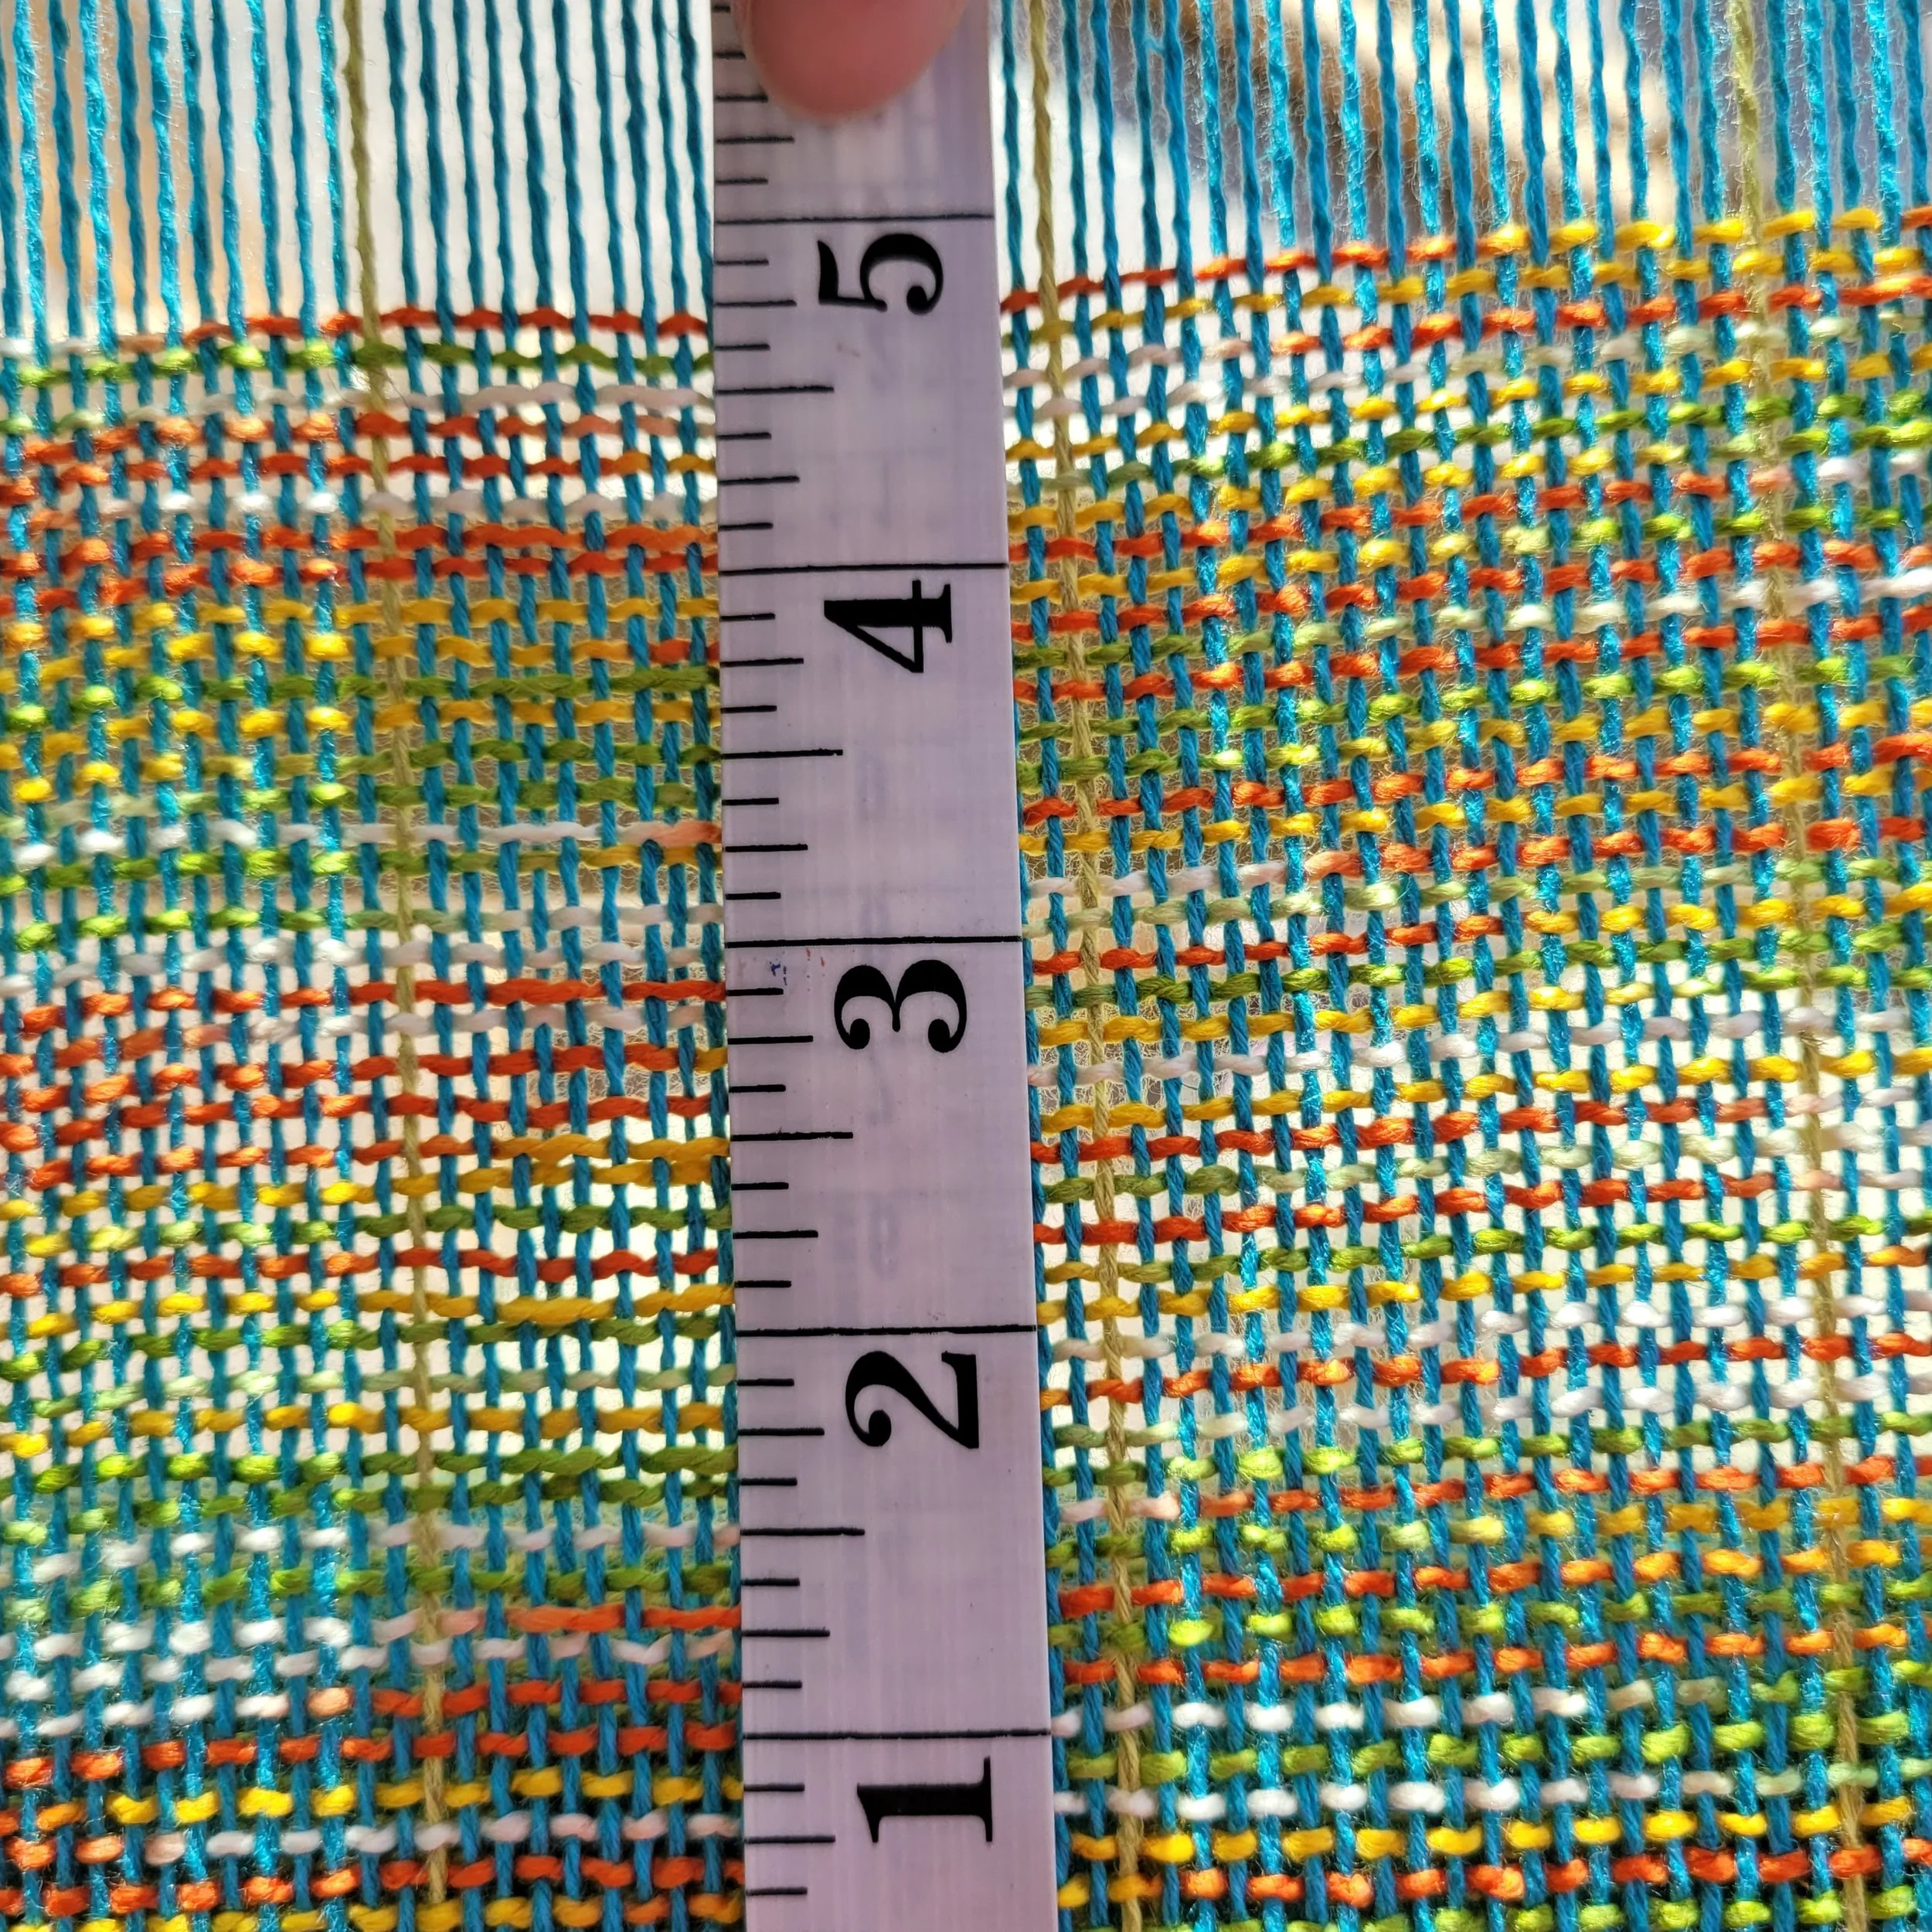
I had an incident with a ruler this week. It was a combination of handedness (I’m a lefty), feeling a little under the weather and grabbing the wrong tool. If you are not left-handed, you may not realize just how many tools are geared to right-handed folk…things like mugs, hair clips and yes, even some rulers! This isn’t to say they aren’t good tools, just that if you are left-handed, you might need to think a little harder! And thinking harder wasn’t working for me this week.
As a lefty, I usually start warping from the left side of my loom. So I measure from the center to the left. With the ruler I grabbed this week, that means the numbers on my ruler are upside down. This is no big deal - unless, your brain, for reasons as yet unknown, decides those numbers need to be right-side-up AND you start measuring with the end of the ruler (12”) at the center instead of the middle point of the warp (7.5”).
If you don’t understand this long explanation don’t worry, it took me quite a while to figure out what went wrong! The important part of story is I did not properly center my warp in the reed.

Look! More upside down numbers!
I knew early into the warping that there was a problem, and as I continued to warp, I pondered about how I might fix it and if I even needed to fix it. Which led to thinking about why we center the warp anyway. Which led to me decide to just go with it.
So, that begs the question…why do we center the warp anyway?
Centering isn’t about aesthetics or OCD. It’s about pressure and balance.
1. It keeps you centred at the loom
When you’re lined up with the reed, your hands naturally apply even pressure as you beat. It helps prevent angled weaving and keeps things smoother overall.
2. It’s better for your loom
As a left-handed weaver, I always begin warping from the left side. If I did that every time without centering, the left side of my loom would take far more stress than the right. Over time, that uneven pressure can lead to problems: warped beams, stressed warping sticks, and potential cracks.
So yes—centering your warp is a good habit. But if your warp is off-centered occasionally…just go with it…there are no weaving police!
Weaving and Ergonomics - The Wobble Stool
I’m always trying for find ways to work comfortably for longer at my loom. If I can combine exercise with weaving, even better! I’ve tried weaving benches (which I love, particularly with the addition of a sheepskin!), office chairs with wheels (nope!), various kitchen chairs (meh) and even an exercise ball (it promised great things but just didn’t deliver.) Given the frequency of questions on Social Media about stools and benches, I think I’m not alone in the search for the perfect seat.
I recently got my hands on a wobble stool during an office clean out. Let me tell you a little about this stool.
It’s easily adjustable, and it has a rounded bottom…which means it wobbles! This of course is designed to engage your core as well as keep the toe-tappers and pacers quietly in their seats for longer so they can, presumably work harder and be more productive. (Not quite sure how I feel about this but ok) I even read that using one can cause you to burn 20% more calories per hour than just sitting. (That’s the equivalent of 2 Oreo cookies or 15 chips over 8 hours in case you were wondering)
But seriously, I’m not so concerned about the exercise or the calorie burn. I was curious about the ergonomics of weaving and how it might impact my body. So this past week I did most of my weaving using this stool.
Here’s what I liked:
You can’t slouch on this stool, my back stayed straight and I could feel my core working. I actually got a little tired at first!
It swivels! So I can spin around to grab my tea or my tools, or just for fun!
I threaded a complex 2 heddle project on this stool. The ability to tilt the stool forward made this a more comfortable experience for my back and shoulders.
I liked the movement of the stool rocking back and forth as I passed the shuttle back and forth. I feel like it kept me better positioned.
I’m barely 5” and it adjusted well for me. I raised it slightly when threading the 2 heddles and it allowed me to easily see between the heddles.
Here’s what I didn’t like:
The seat is a little hard. It does have a thinly padded seat.
I found the bottom a little slippery, if I sat too close to the edge of the seat it would move backwards. So, plant your bum firmly in the center!
There was no place for my tools (I might sew a cover with a padded seat and pockets!)
So, do you need one? If you have struggled to find a suitable seat, I think this is definitely worth trying. I would not have spent the money on one, they run about $459 CAD - I’d rather buy yarn - but now that I have one I don’t want to give it up. It won’t replace my weaving bench, but it will be in regular rotation.
If you do want one, mine is a Steelcase Buoy Stool.
I took it to a class this week and everyone tried it. I think they all liked it! Here’s a little video of class fun and the wobble stool!
I’m curious…what you you like to sit on while weaving? Have you tried a wobble stool? What did you think?
Why You Absolutely, Definitely, Need Another Loom

Let’s begin with full disclosure…I love weaving. I weave for work and I weave for pleasure. I have 4 rigid heddle looms, all bought for very good reasons.
The first was because I was buying a spinning wheel and my daughter thought she might, maybe, possibly, be interested in weaving, so I bought an Ashford 32”, ostensibly for her. She never used it, I use(d) it all the time.
Then I got a FREE 36” four shaft loom. How does one say no to a free loom? (Is it even legal??) But, 36” wasn’t really big enough, so I started looking for a 60”. (Go big or go home right?) A free 45” came up…but when it arrived there was no back beam. So I bought a 48” rigid heddle as a consolation.
Now I’m up to three looms.
Then I was selected to teach in Alberta and I “needed” a loom I could travel with, so I got a 20” Ashford Knitters loom. Loom number 4.
All was going well, looms were being used but I still had a desire for that 60” four shaft. And wouldn’t you know, one came up on Marketplace for a great price and delivery included! Can’t say no to that! I gave my 36” four shaft to a new weaver and brought in the 60”. With a sectional beam…always get a sectional beam, trust me!
So that kept me to 4 looms. Not so bad, all were being used so clearly, I needed them. Then I started designing for Webs…and they carry Schacht looms, which have different reed sizes, so, obviously, I needed a Schacht loom, it was just good business sense right?
The story continues…I started getting pretty serious about writing patterns, and people started asking for 4 shaft patterns. Now, towels on a 60” loom seems like a waste and I live in an apartment now so there really isn’t room for a 60” (it is currently in storage waiting for a studio). So I was sort of searching for a table loom. But it was going to need to be a really good deal and I didn’t want to drive far to get it (because I don’t like driving and did I really need another loom anyway?) However, if you look long enough, you will eventually find a sweet deal, which I did, and my final (for now) loom was added to the herd, an older Schacht 4 shaft 25” table loom.
That brings my total number of looms to 6 (If you ignore the inkle loom and pin loom!)

It’s pretty clear I am pro-loom. So, here’s my list of why you should get a(nother) loom in case you need help getting off the fence!
Single looms get lonely. They thrive in company.
If you have one loom you weave alone, if you have 2 you can weave with a friend, who will learn to love weaving, who will then buy a loom and you will have a weaving buddy!
Different looms do different things: small looms travel in your suitcase, or RV. You can set them up in a hotel room or spare bedroom so you have an escape if needed during long visits. Big looms look great in living rooms filled with pretty-colour warps.
If you get frustrated with one project, you can put it in time out and move to an easier, more well-behaved loom. (Maybe the one in timeout will think about its behavior and regret its bad choices?)
If you need to weave up a quick gift and the “main” loom is full you still have a loom!
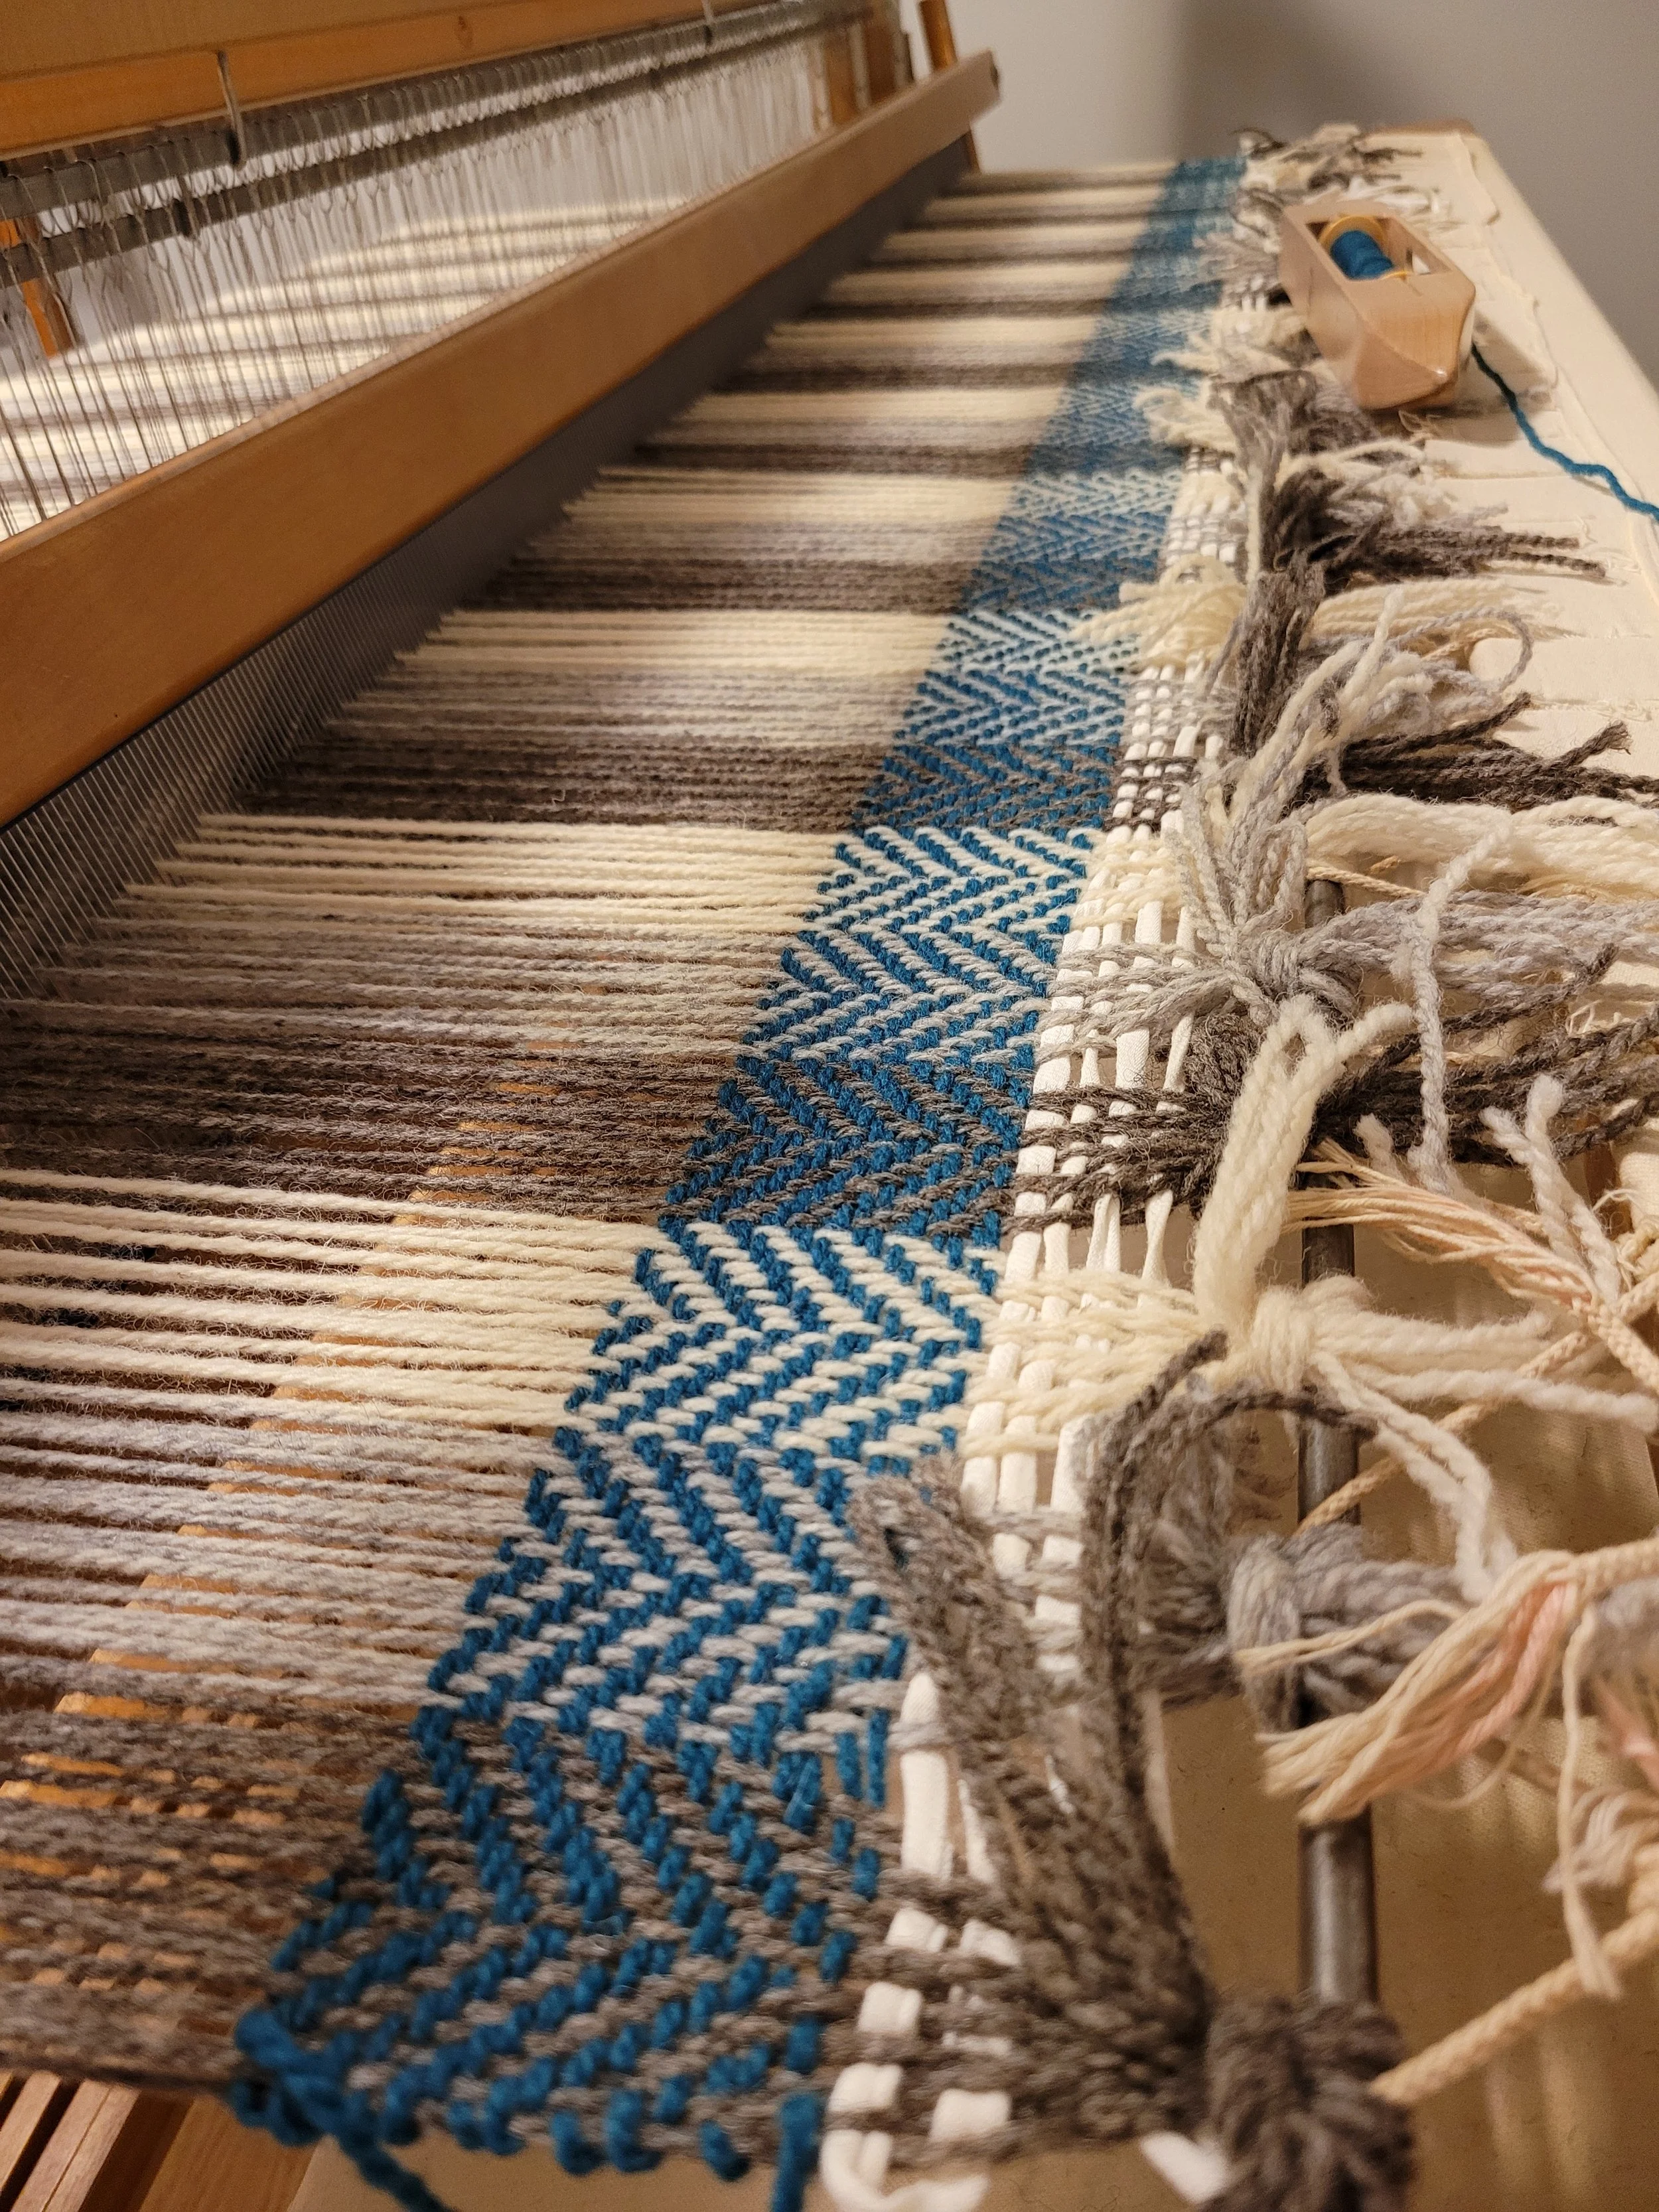
Finger-Manipulated Weaves

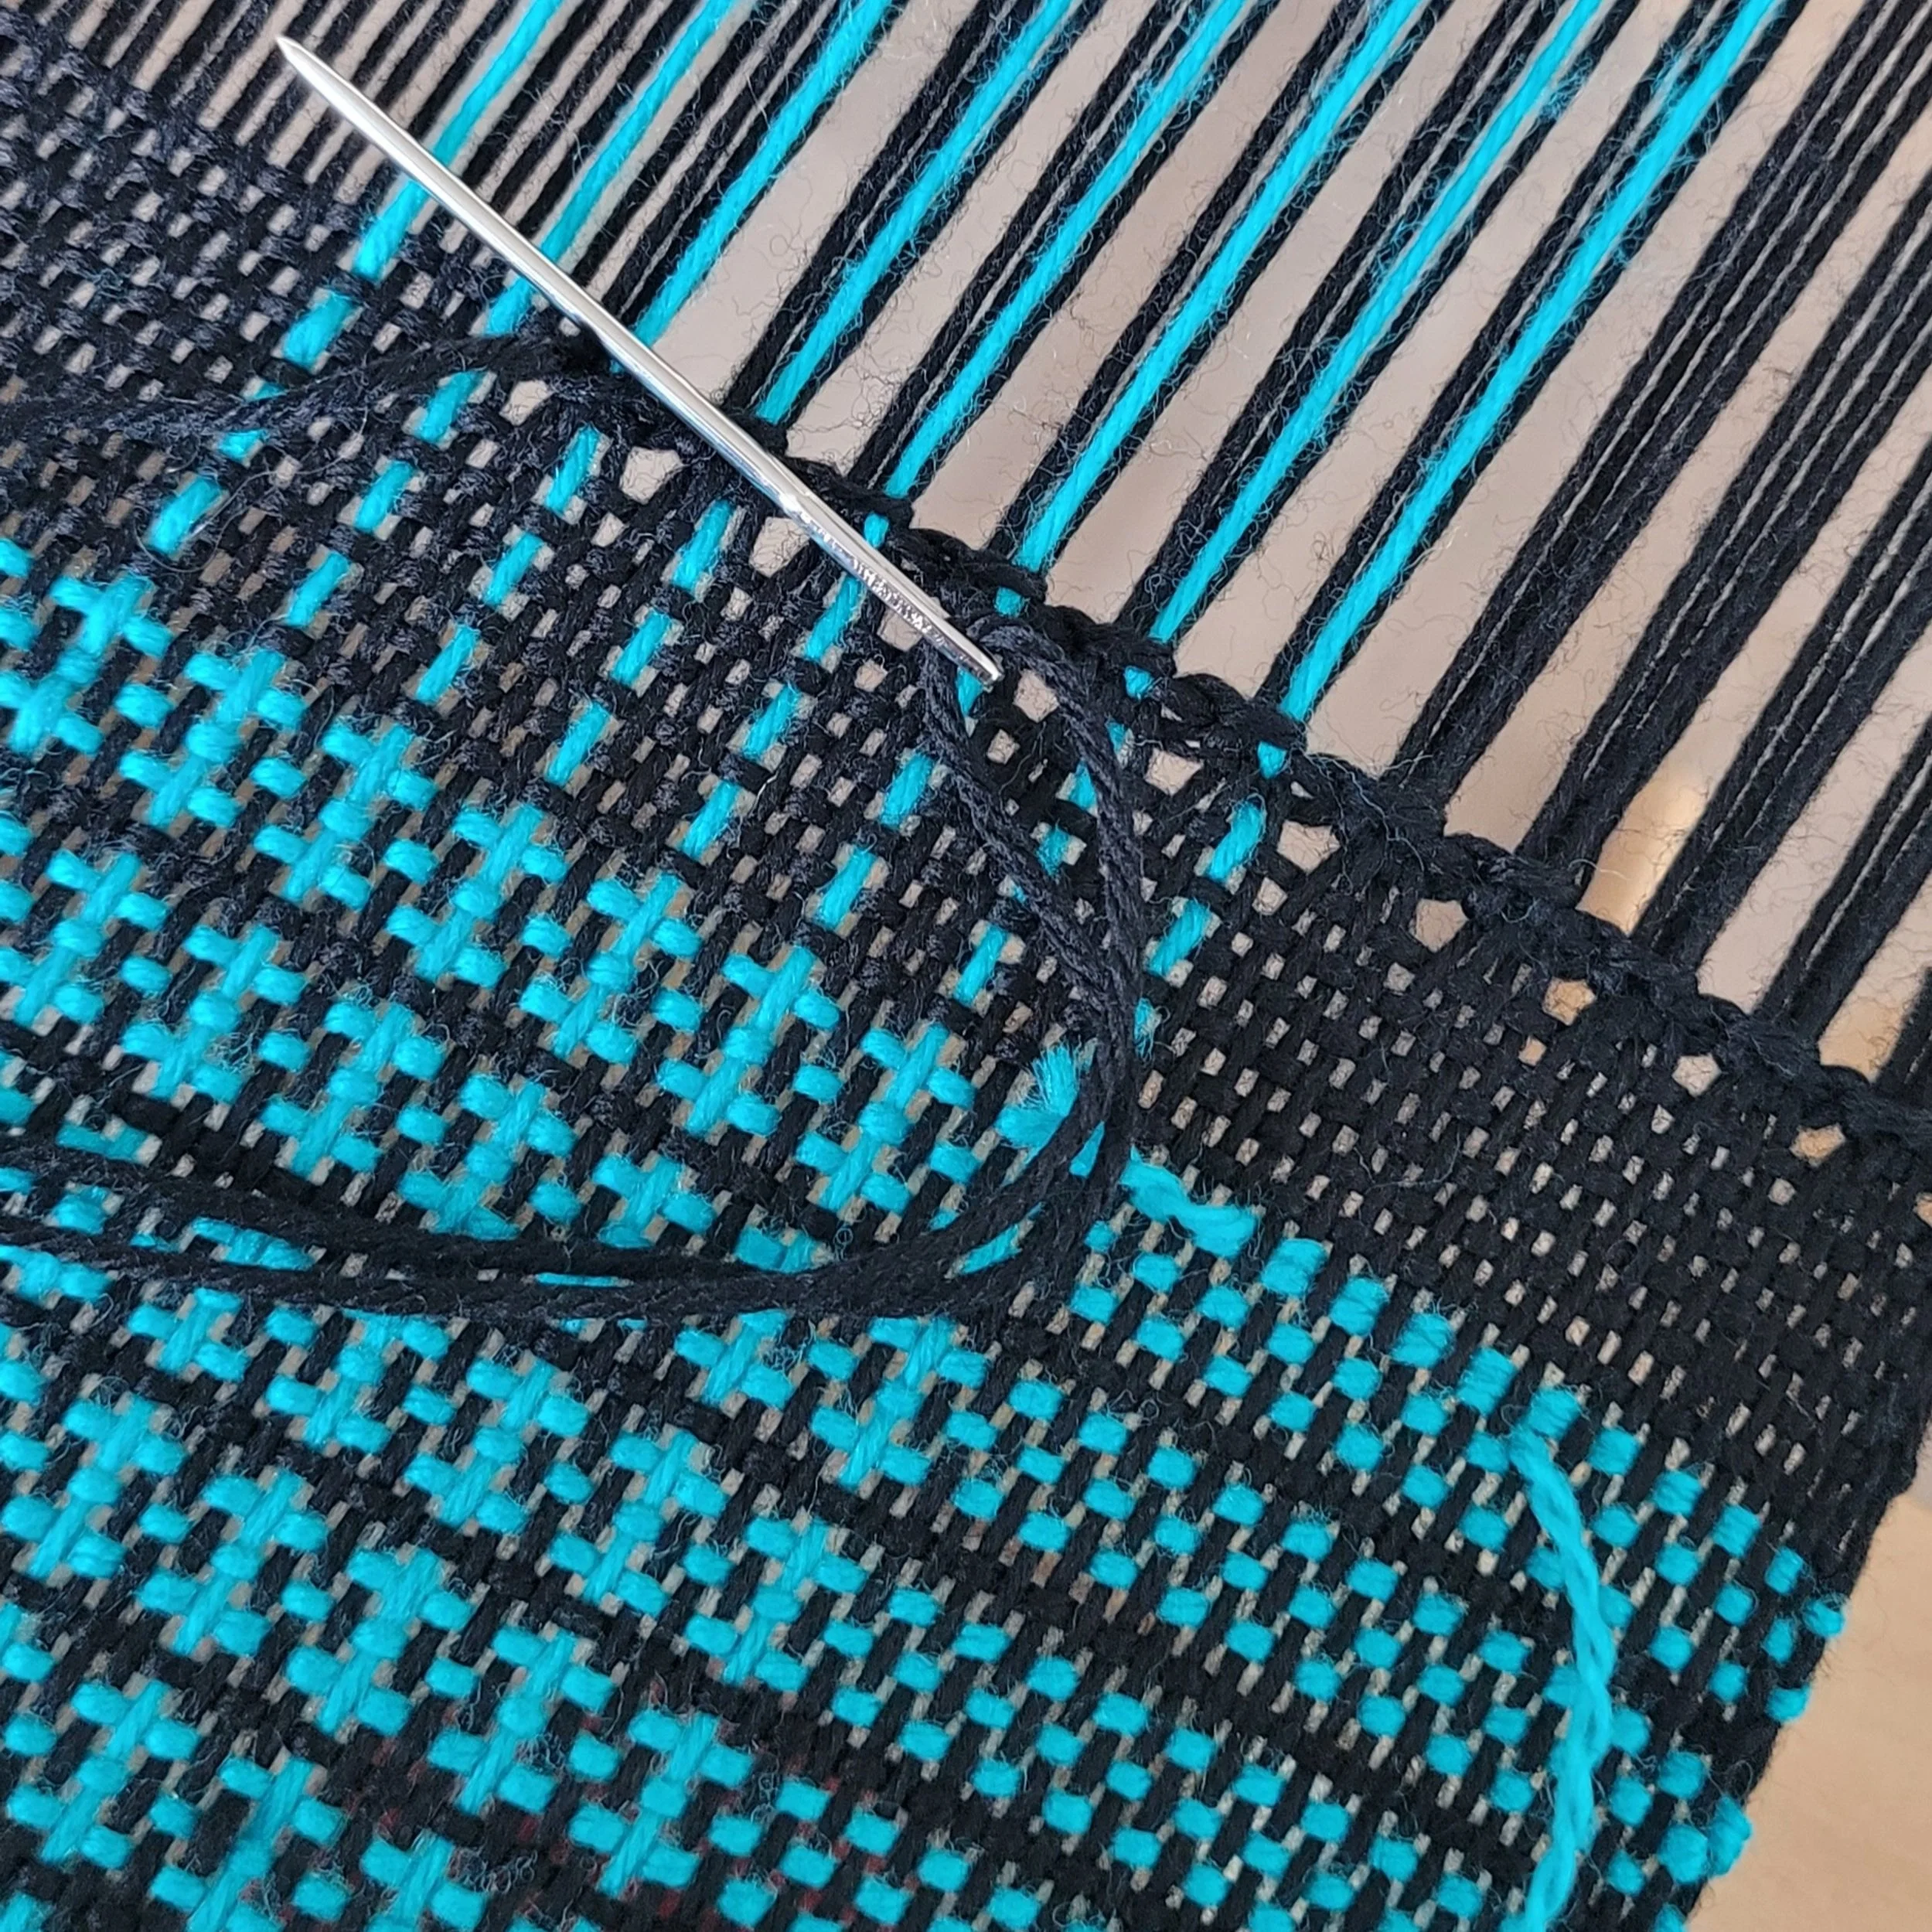
When I think of weaving, I think of the shuttle gliding back and forth through the warp. I think straight lines, even beat, and smooth texture. Even when I use pick-up sticks the lines are crisp and clean…and the weaving flows! But if you are willing to slow down and use your fingers (and a few extra tools that you probably already own), you can add curves and texture and dimension using only your rigid heddle loom.
Finger-manipulated techniques allow you to use your hands, shuttle, and a few tools like crochet hooks, chopsticks, or knitting needles (instead of only the loom’s heddle) to manipulate the warp or weft threads. And the results are truly amazing!
What Makes Finger-Manipulated Weaves Special?

Unlike regular weaving where the shuttle glides straight across the loom, finger weaves demand that you get your hands right into your work! You will use your fingers to twist, wind, wrap and pull the warp and weft to make curves, loops and angles.
Here are a few examples:
Leno – twisting warp threads to create a lacy, open effect.
Brooks Bouquet – wrapping the weft around bundles of warp to form little “bouquets.”
Soumak – wrapping the weft across the warp for a braided look.
Medallions – using the weft to wrap around previous rows, forming rounded, jewel-like shapes.
Loops – pulling weft up into soft raised loops for a very tactile experience both on and off the loom.

Each method adds detail or texture that transforms even the simplest project. They can edge a tea towel with a decorative border, bring life to a scarf, or become the focal point in a cushion or table runner and even throw mats and garments!
Why Try Them?
Finger-manipulated weaves force us to slow down. It’s easy when weaving a plain weave project to send the shuttle through, zip, zip, zip, and not really pay attention. Weaving medallions or shaping loops brings our full attention to the loom. We feel the yarn in out hands: the texture, the strength, and the density in ways we don’t normally. We learn about the yarn and how the warp and weft intersect. If you want to practise mindfulness in your weaving, this is the perfect way to get started!
Bringing It Into Your Weaving

I have no written patterns that use finger-manipulated weaves on my website…yet! But I’ve been playing with them all summer and I know I’ll be writing some up as patterns. But in the meantime, try adding Medallions to the edge of a plain weave tea towel. Try some Brooks Bouquet or Leno Lace on the edge of a scarf. Or weave a sample piece using all the techniques and sew it into a pillow cover. The possibilities for these techniques are truly endless: let your imagination and creativity loose!
Also, check out Little Looms Spring 2025 for Tropical Sea Soap Savers (one is a loopy bag) and Spring 2020 for the Forest Floor Mat.


Warp Length, Take-up and Waste
If you are weaving purely for fun with no care about the length of a finished project, terms like warp length, take-up and loom waste are all terms you don’t really need to know or understand. The same is true if you weave from patterns using the same fibre the designer has used.
However, if you are designing for a specific length, these terms matter! So let’s take a look at them.
When we weave, we put a length of warp on our loom. This is the warp length.
We know that whatever the warp length is, our woven length will be less. This is because we need to tie the warp to the front beam, and, we can’t weave any warp that is left behind the reed after all the warp has been woven and wound onto the front beam. This unwoven warp is called loom waste. Sometimes that waste is important for the fringe of a scarf: you might see in a pattern to “tie-onto the front beam leaving enough for an 8” fringe, or cut, leaving 8” for fringe.

Finally we have take-up. Our warp begins as a straight line. As we add weft, the warp moves over and under the weft, becoming wave shaped. While the project is on the loom and under tension, this isn’t very noticeable. However, once the project comes off the loom and the fibres bounce back to their relaxed state, suddenly the weaving is much shorter than expected!

Let’s put this into practise. I just wove a wool scarf. The warp length was 90”. I used 7” to tie onto the front beam. I wove 75” and had 10” of warp left at the end left unwoven. This actually adds up to 92”, 2” more than my warp length! This is because as the yarn is under tension, it stretches. Let’s look at another project using cotton. I warped 104”. I used 9” to tie on, wove 84” and had 12” of unwoven warp at the end, adding up to 105”, 1” more than the warped length.
When I took the wool scarf off the loom, my total woven woven length was only 65”…a loss of 10”! When I took the table runner off the loom, the woven length was 77”, a loss of 7”. This is take-up. And it is important to know when you are designing! A general rule is to expect 5-10% take-up. Practically, this means add 5-10% extra warp length. But as I said, this is a general rule. My scarf had 13% take-up, while my table runner only had about 8% take up.
This is why sampling is important. Every fibre behaves differently. Additionally, how a fibre is constructed AND the weave structure will impact the take-up! A super-stretchy yarn is likely to have more take-up (like my scarf). More floats will add take-up as the weft can pack tighter, making more waves in the warp. Something that is gauzy, with a non-stretchy warp will have less take-up. Experience can help you predict what a fibre is likely to do, but only sampling will tell you for sure!
(Don’t forget: your project isn’t finished until it had been wet-finished…and there will be additional loss of length in this process too!)
Winding a Shuttle Double

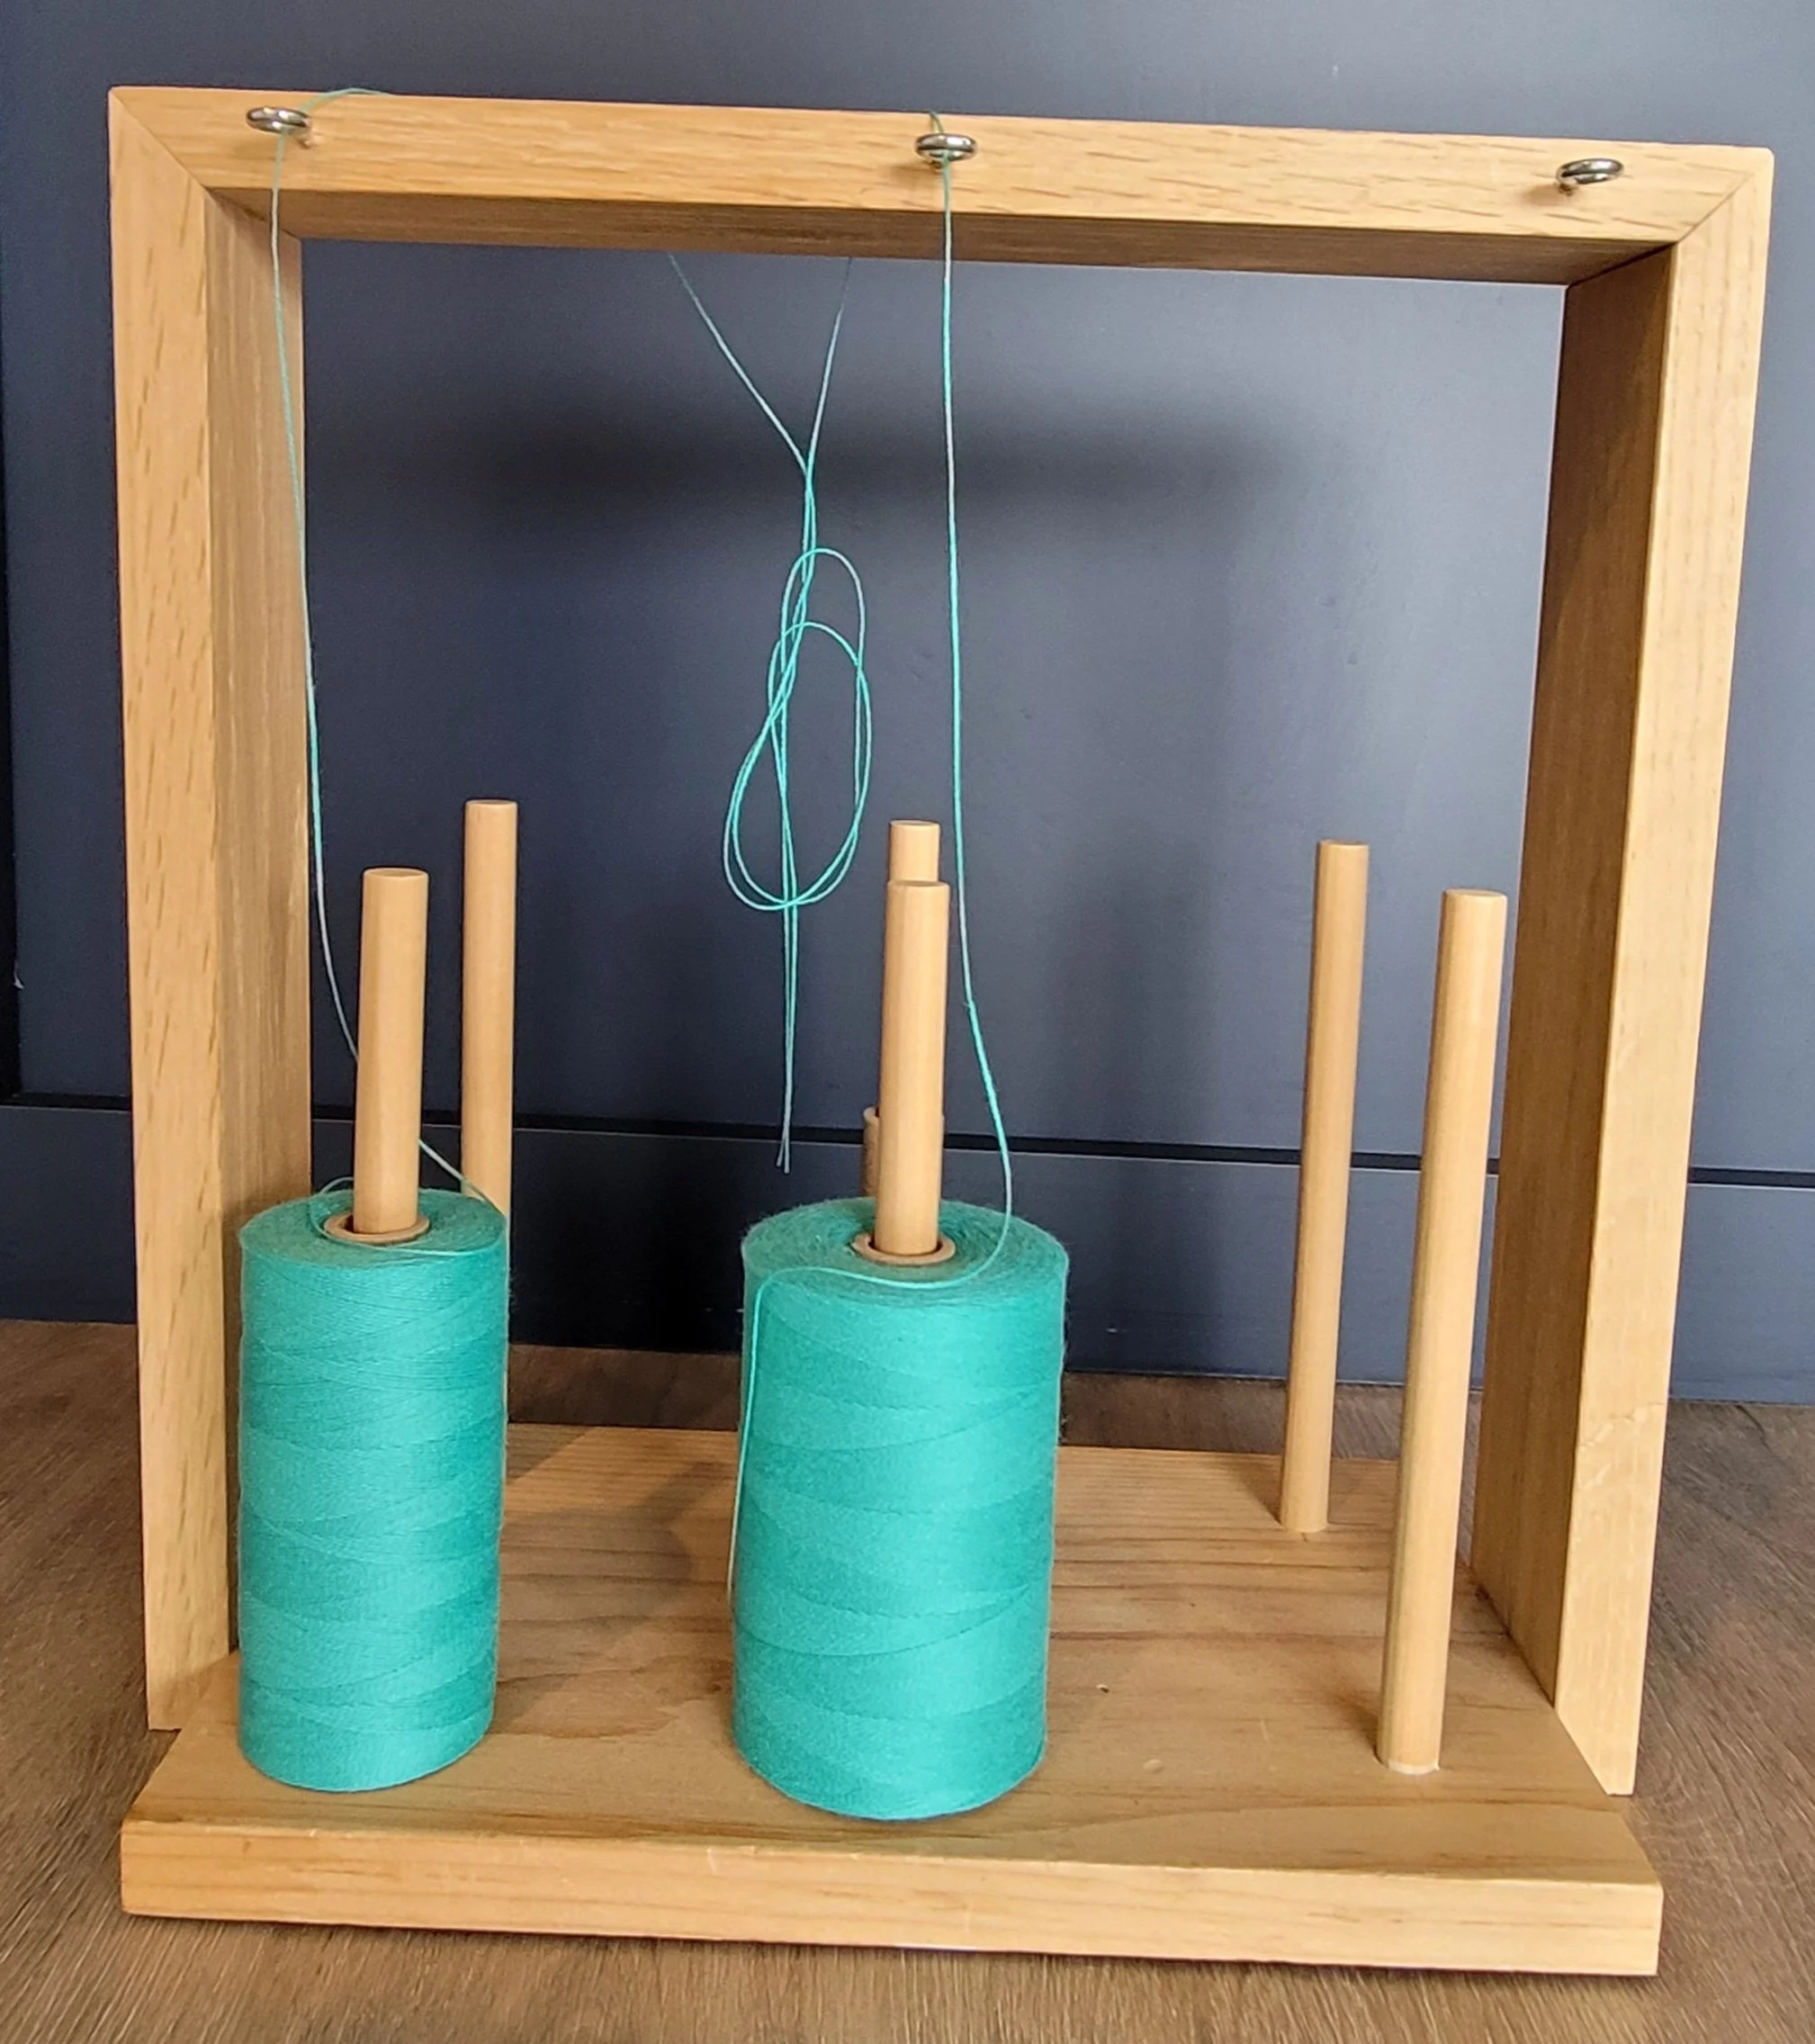
I love using 8/2 cotton for a variety of reasons. You can read about them here. But it does require a little extra work to wind a shuttle double. It’s a question that I get asked a lot so I thought I’d do a little post about how I do it, as well as how I’ve heard others do it. I’ve also done a video.
Of course, the simplest way to wind a shuttle double is to have 2 cones of the same colour. Here are a few tips:
It works best if your cotton is on a stand. When the cotton comes off the cone and up, it doesn’t travel in a straight line…it travels in ever widening circles. When you are using 2 cones, those circles can get tangled leading to tension issues.
If you do not have a stand, keep the cones separated as much as you can…8-12” is usually good.
Pinch the cotton between your thumb and forefinger as it winds onto the shuttle. This will help maintain and even tension and you will feel if there is a tangle or knot.
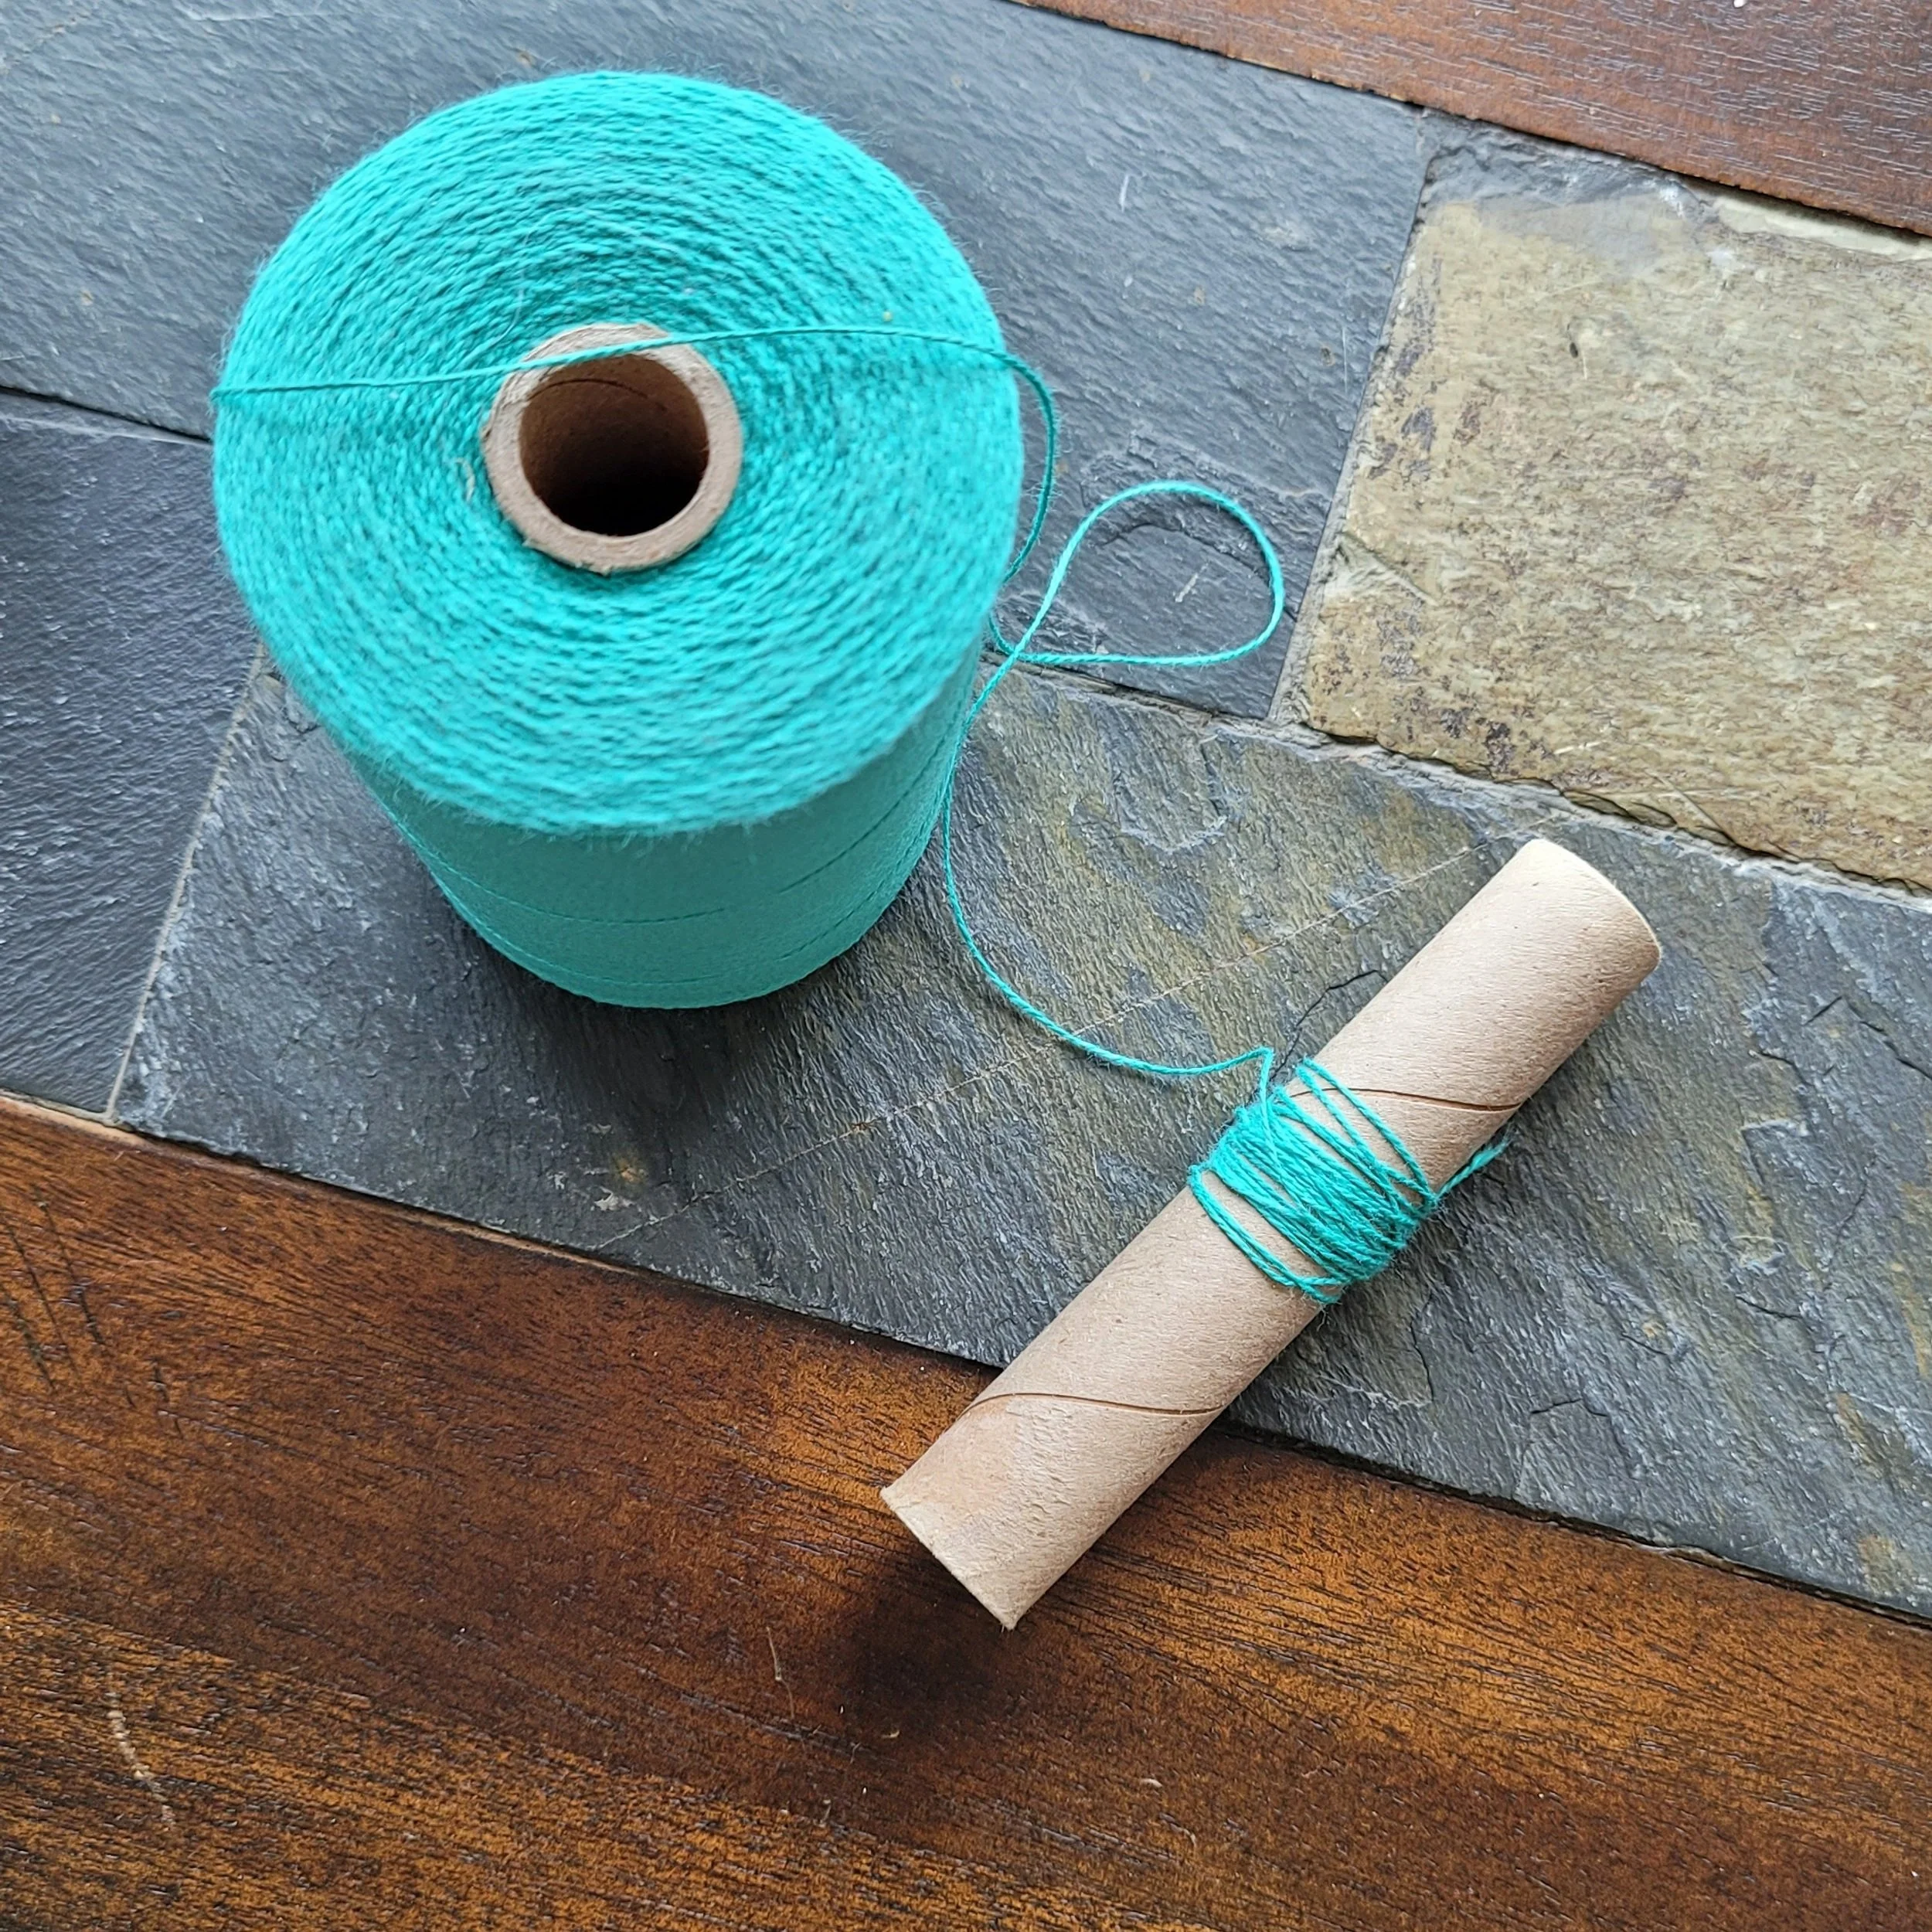
Of course, we won’t always have a second cone handy! So the next easiest way is to wind a second ball. You can wind it by hand into a ball, onto an empty cone or use a ball winder. If you use an old cone or ball winder, you can wind just as detailed above. If you have wound into a ball, you *might* want to place the ball into a bowl or bag as it will roll everywhere!

I have heard that with a cake wound from a ball winder, you can take the outside end and inside end and wind them together. I haven’t tried this, but it makes sense. If you are using a cone and a cake from a ball winder, always use the center pull! If you pull from the outside of the cake, the outside end and the inside end will get tangled and it will be a mess! (Trust me on this!)
Now, before I had as much experience as I have now, and before I had a ball winder, I would literally wind off a whole bunch of cotton onto my floor, cut it from the cone and wind the cone and floor cotton together. It worked really well unless it got tangled. I reduced the tangling by winding off 10 lengths, then, without cutting, starting a new pile of 10 lengths. It works and works well! I do recommend that both strands of cotton run under your foot and up to your shuttle. Your foot will reduce tangles and help maintain an even tension.
The next thing to cover is the actual winding onto the shuttle. This is very important as a poorly wound shuttle is a real pain in the butt! So first: tension.
Just like in warping, tension is important on your shuttle. If your two stands are not evenly tensioned, you will continually be adjusting each thread at each end of each pick. You’ll have one thread that seems to get longer every pick. Eventually you might need to cut, split-ply the ends and start weaving again.
I find that the further my cones (balls) are from my shuttle the better. So I stand up and have my cones on the floor. If I am not using a cone holder, I will run the strands under my foot. Regardless of the method of making the second ball, the tips at the top of this blog will be useful.
I like to wind my shuttles in a figure 8 on both sides of the shuttle at the same time. But how you wind isn’t nearly as important as tension…so wind in the way that makes you happy! I do like to start with a little figure 8 around the end of the shuttle. This helps when you get to the end of the shuttle and the cotton wants to fall off! I’ve tried several options…knots, double-sided tape and painter’s tape, but found the figure 8 works best.
And that’s it! Your shuttle is wound double, and with a bit of practise you will get the tension perfect!
Happy winding!
Colour Challenge(d)
Colour is hard! So here are my four favourite ways to choose what colours to put together.

I hate Monopoly. From the first purchases of houses and hotels, I know I am on a very slow, very long journey of losing. While everyone else amasses empires, I am struggling and just hoping I will make it to Go and Collect $200 without landing on Park Place. I can’t quit, because that would mean being a sore loser, but I also can’t overcome my desire to take the safe route. (What? Mortgage a property to buy a more expensive one?! I don’t think so!)
When I started weaving, I made a lot of decisions about how to conduct my weaving life. One was to remember that my materials are only yarn. If a project doesn’t work, it really doesn’t matter. Yes, it might be sad for a moment, but there was no real risk involved.
I’ve done pretty well…I’ve only got 2 skeins of yarn in my stash that I’m afraid to use because they are so pretty! And it’s only the one with the lovely texture I’m afraid of.

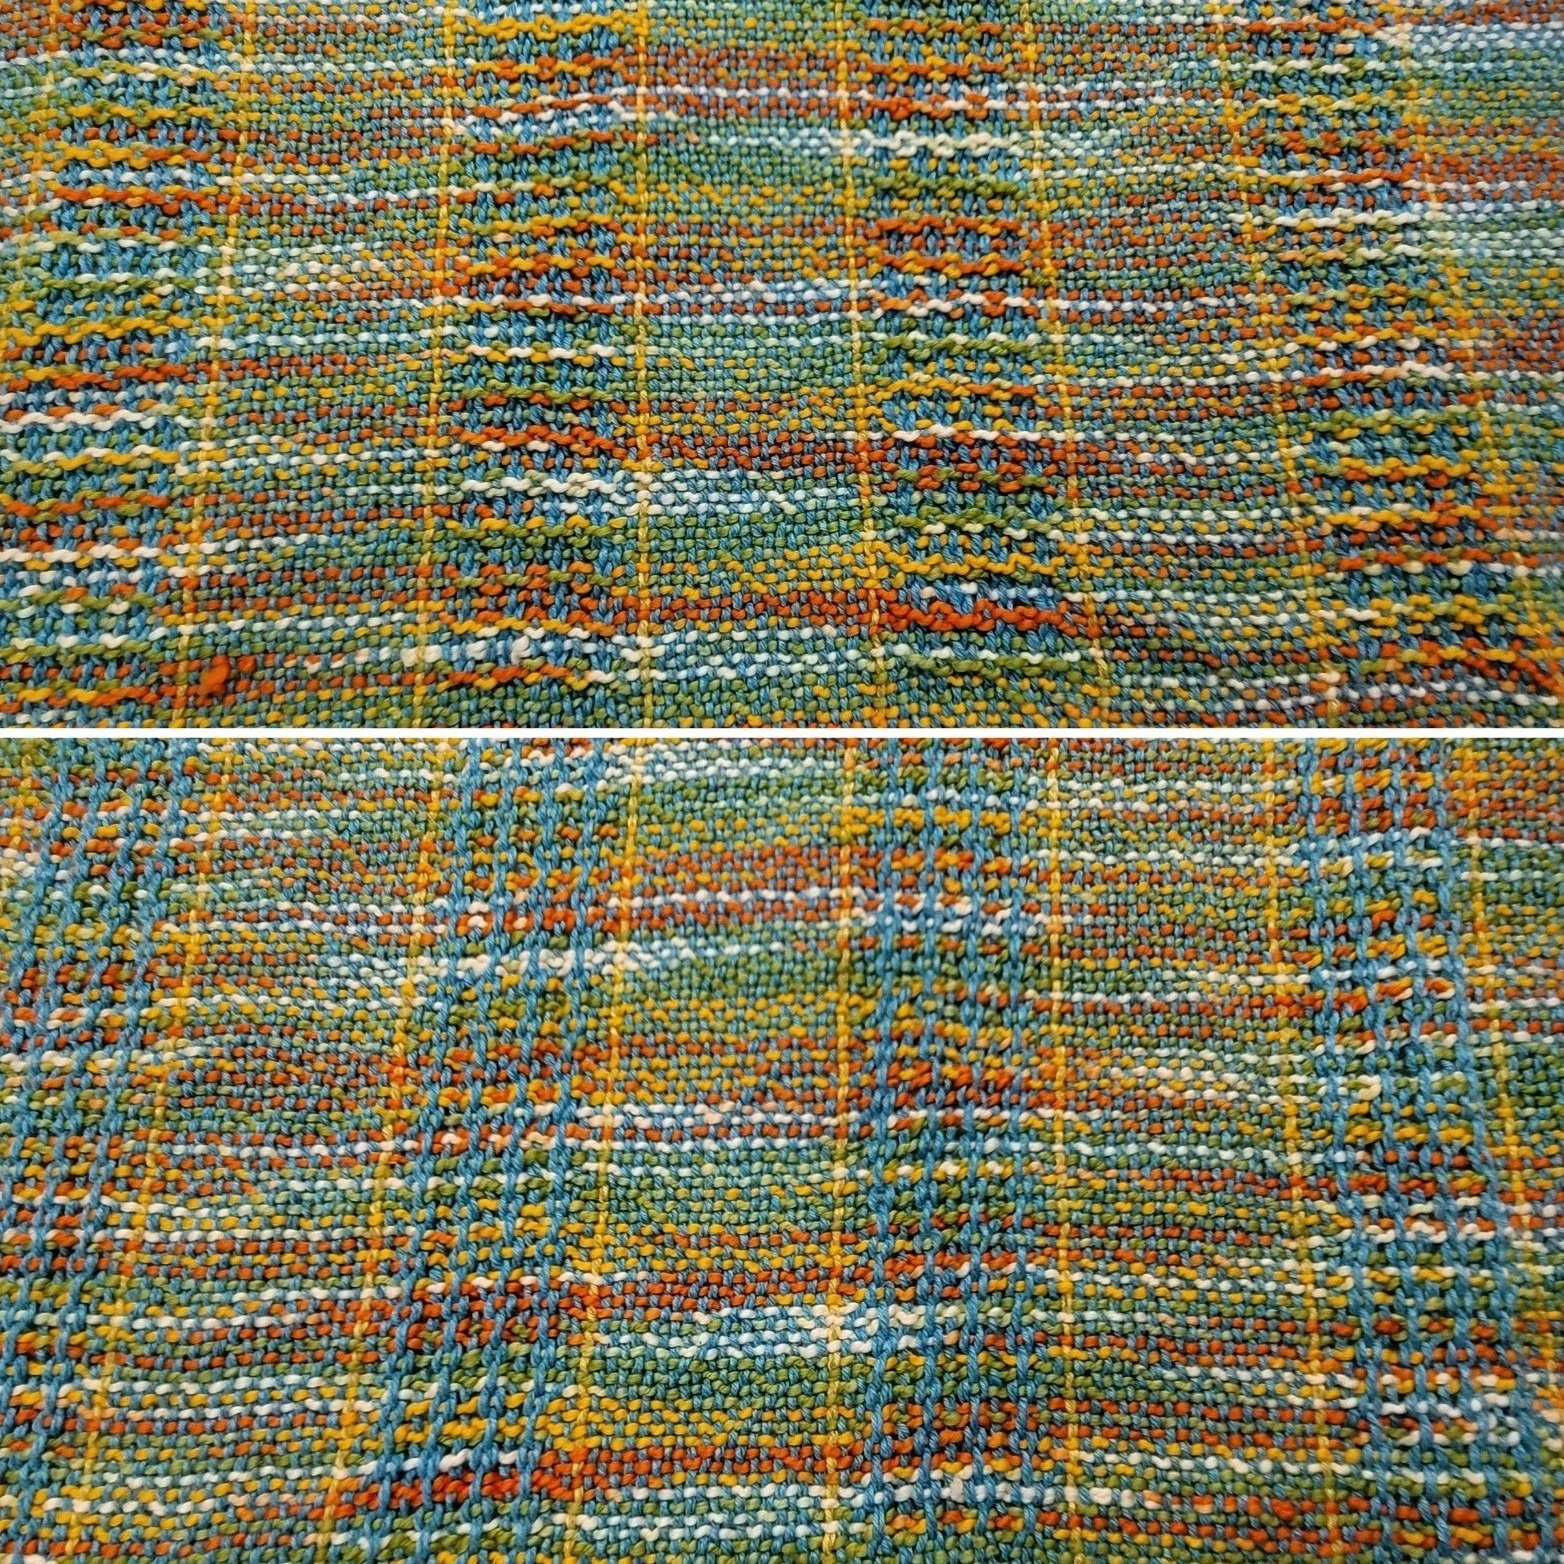
Colour is a little different matter though. I struggle with taking risks with colour. Sometimes I look to you for help…do you remember this picture from social media? I gave you 2 choices…and most of you picked a 3rd option!!! (The Turquoise and the Lime Green). I almost went with your choice, but, that was the safe choice. I wanted something that would challenge me.
I wove up the bottom selection…it still seemed a safer choice than the top. I’m pretty happy with the results. But I should have taken a little more risk and used a different shade of turquoise. it would have had a little more zing I think.
Colour is hard! So here are my four favourite ways to choose what colours to put together:


Look at my stash of variegated yarns. What colours have the dyers put together, and in what quantities? I will build a whole scarf around a single skein of yarn (I do this a lot with my Wabi Sabi scarves). If you don’t have variegated skeins, look at the clothes you wear, and the clothes others wear. When you go shopping, don’t hesitate to take a picture of something that you love the colours of (even if you could never see yourself wearing them!) Remember, you can benefit from the research other people have done…and you know there are designers behind the clothes and logos whose sole job is to figure out what colour combinations are pleasing to our eyes! Living in a Maritime province, I also take pictures of houses…we have some very colourful houses.
Take a look at nature. None of us has ever looked at a flower and wondered who thought putting those colours together was a good idea! Or complained that the colours in the sunset clashed. Even when they are orange and pink! Check out the colours of wildlife…brown pheasants with a flash of red and gold, butterflies, even snakes and spiders have interesting colours. My Sunrise Tea Towel was inspired by a picture I took after a storm.
Pinterest…I use it a lot for inspiration. Especially if I have a limited selection of colours (like right now when I’m trying to use what I already have). I can put in my main colour, for example Lime Green colour palette, and I will get so many possibilities! Sometimes I'll pick 2 colours that I don’t think will work, and see what Pinterest has to say. It almost always comes up with something I can work with! The Doldrums colour scheme came from entering orange and eggplant together. I don’t even like orange, but I love these towels!
Social Media! Don’t be afraid to seek advice from the multitude of weavers out there. Every time I ask for colour advice online, with options, I get so much great feedback and suggestions I would never have otherwise considered. You don’t have to agree with everyone, but you will be positively challenged. And weavers know colours work differently in weaving than in any other craft. Harness the power of weavers!
This is what keeps me coming back to weaving with joy. There is no wrong answer, just different answers. And if you don’t like the combination, I guarantee that you have a friend who will love it! Weaving is a safe place to try new things: the risk is low. I think that taking risks in my weaving life has helped me take more risks in the rest of my life too. Well, the rest of my life pretty much is weaving…but outside of the actual weaving…like teaching, and Zoom and writing patterns.
But this is not just good for me…I’m pretty convinced that if you get brave in your weaving choices, you will get braver in your daily life too. And who can’t use a little more bravery in our lives?
PS. Please, never ask me to play Monopoly with you, I’m not that brave!
Weaver Stories - Veena
A few weeks ago I asked for weaving stories. I received this email from Veena. One of the things I am always struck by is how, as creatives, we always find on outlet! And that has certainly been the case with Veena. I hope you enjoy her journey into weaving.
Veena writes:
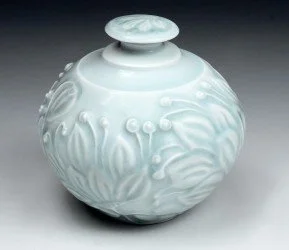
I had been a successful potter for over 40 years selling in several galleries in various states. I was more or less self-taught going to workshops with several well-known, generous, and successful potters at the NYC YMCA, watching videos, and reading countless books. Then, about 4 years ago, I had to give it all up on the advice of my doctor because of bad arthritis, which got worse when I threw pots on the wheel. I was devastated,
So, I decided to try and teach myself how to weave on a rigid heddle loom, again reading many books and watching countless great YouTube videos by so many weavers. It has always amazed me how generous artists are with sharing information and helping those less knowledgeable in their art or craft. I also taught myself how to use spindles. I tried Turkish and drop spindles, but ended up falling in love with the support spindles, both Russian and Tibetan styles. Then a year ago, I found that I could not spin on a spindle for any length of time, as the arthritis in my wrists came in the way. So, on my daughter's suggestion, I decided to try an electric spinning wheel. I thought I would sail into this new venture seamlessly, only to find that, since I had never spun on a spinning wheel, I could not quite grasp the mastery of tension (the speed and tension necessary to get the right amount of twist into my yarn)! Again, with the help and advice of people online, I was able to get some control of this technique and can spin and ply fairly decent yarn. I have even tried spinning art yarn and have woven a couple of interesting arty pieces.
When it comes to art, I am not a very disciplined person. Maybe it is because I have never had any formal art eduction in any medium (I also paint in oil, do pen & ink, charcoal, and pen washes). In the beginning of my weaving journey, I followed patterns and made some nice scarves and shawls.
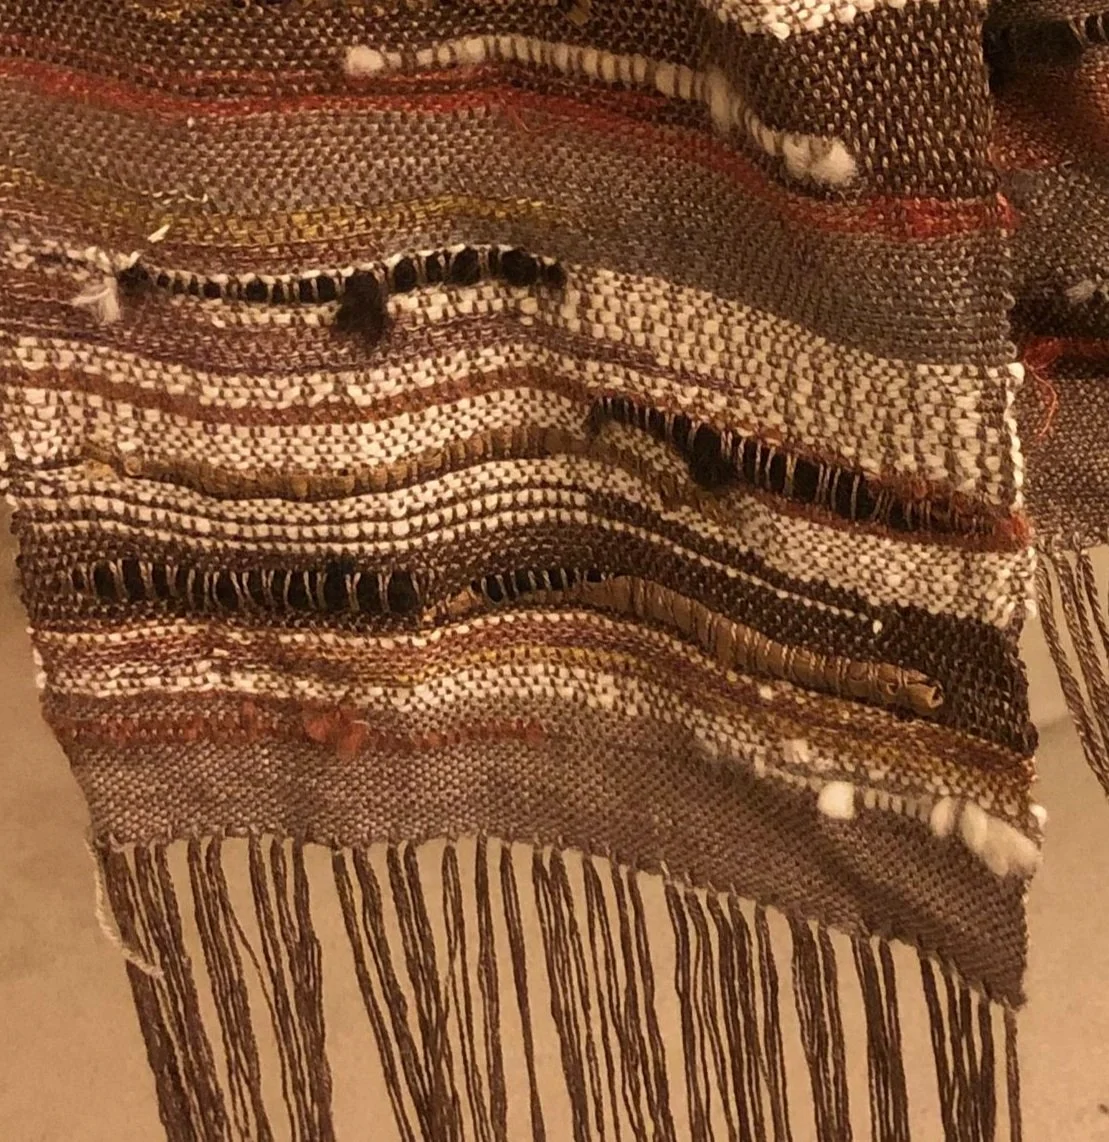
Now, I am over 86 years old and find that my concentration is not what it used to be. So, I am following my free spirit and weaving pieces, in some cases, combining commercial and self-spun yarn, all in plain weave, just counting on texture and color to provide an interesting surface. Weaving and spinning will never replace my passion, which was pottery, but it gives me an outlet. Spinning on a support spindle still gives me more pleasure and joy than other spinning or weaving. I think it is feeling the texture of the various fibers go through my fingers as it is almost sensuous and is the closest approximation to the exquisite joy of shaping wet clay into a beautiful shape, as the wheel spins.
Thank you Veena for sharing your story!
Temple Thoughts
A few weeks ago I mentioned in a newsletter that I had bought a temple and would do a blog about it after I had a chance to use it for a few projects, so, let’s talk temples today!

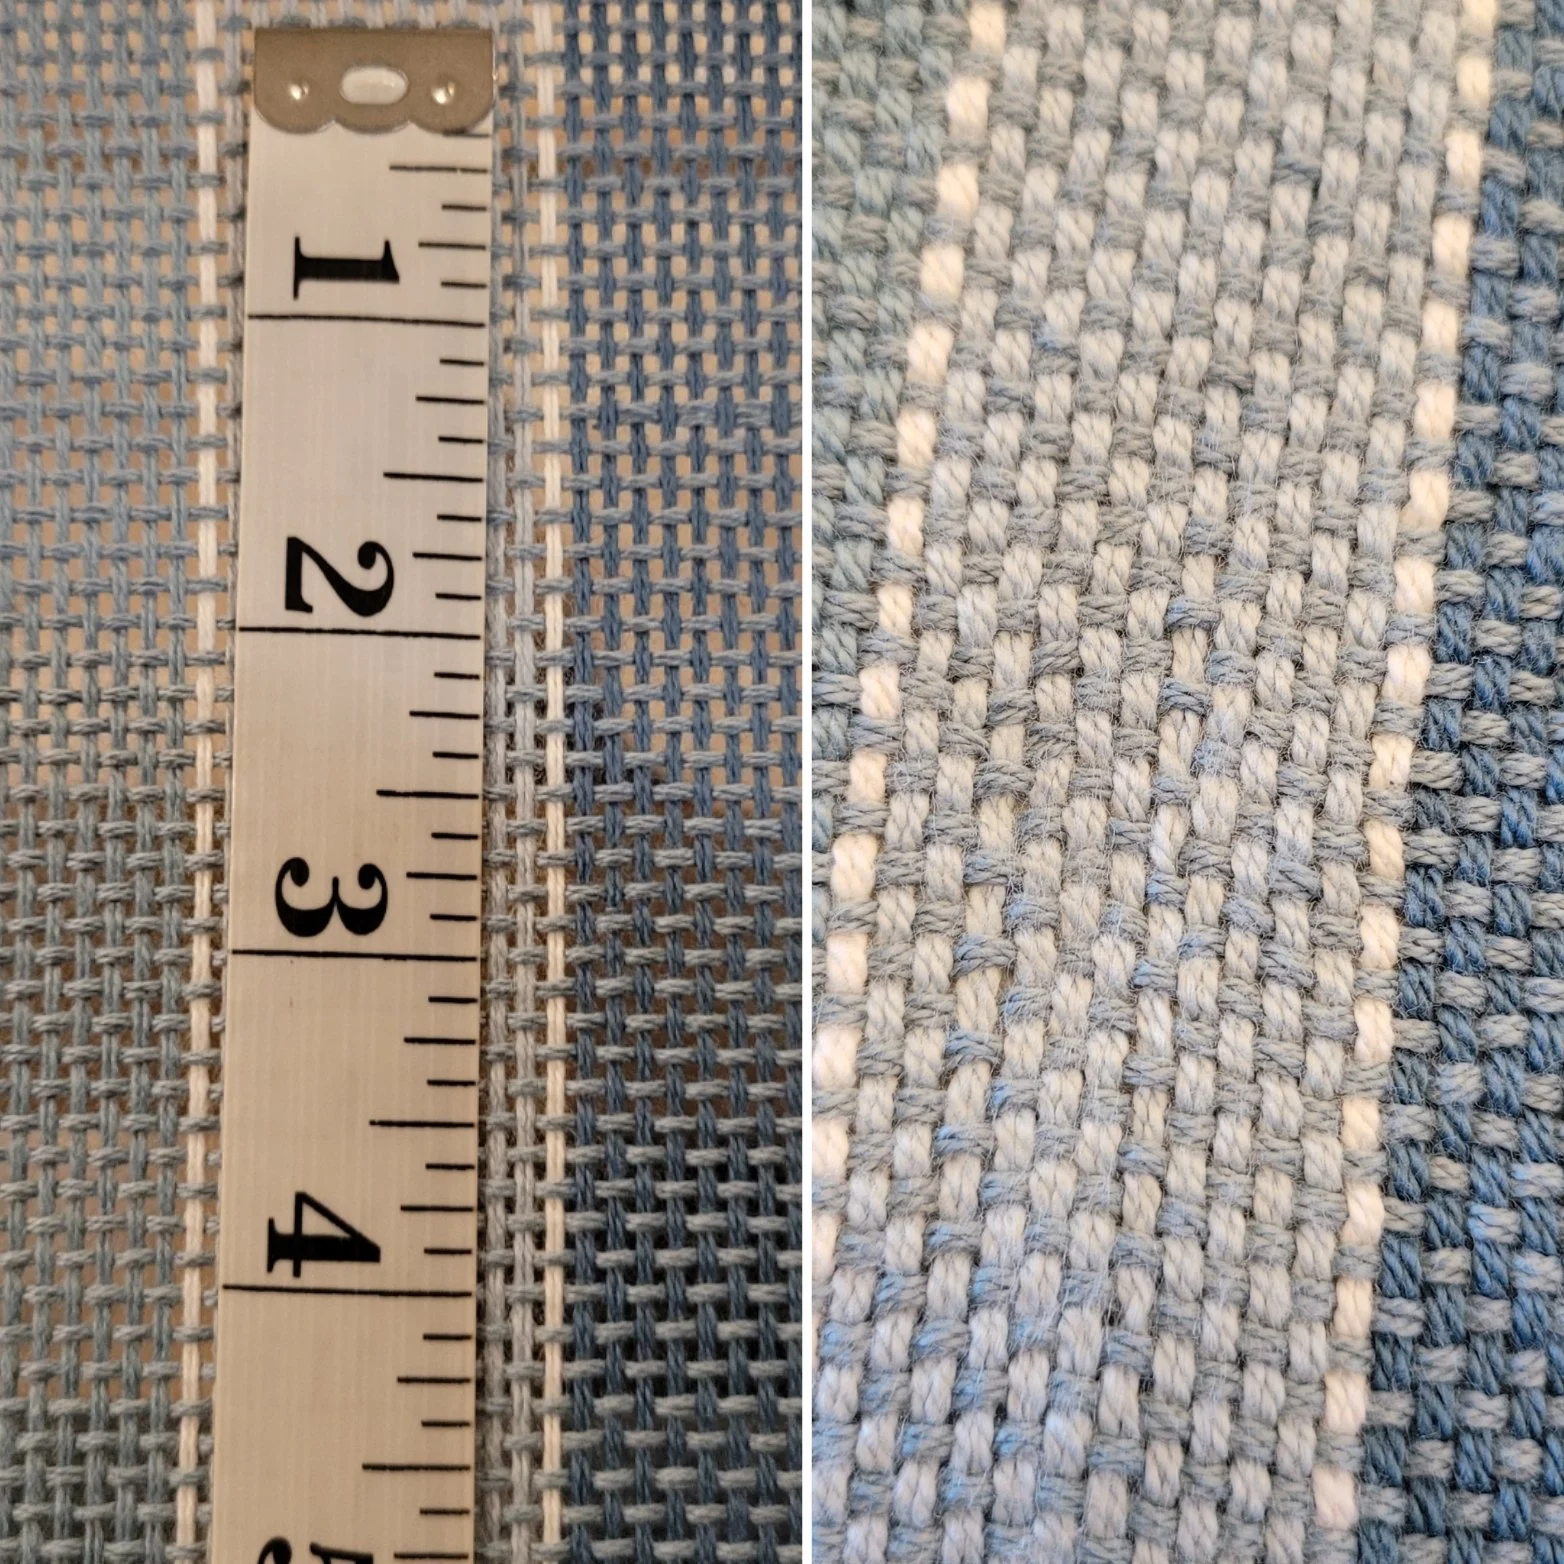
A few weeks ago I mentioned in a newsletter that I had bought a temple and would do a blog about it after I had a chance to use it for a few projects, so, let’s talk temples today!

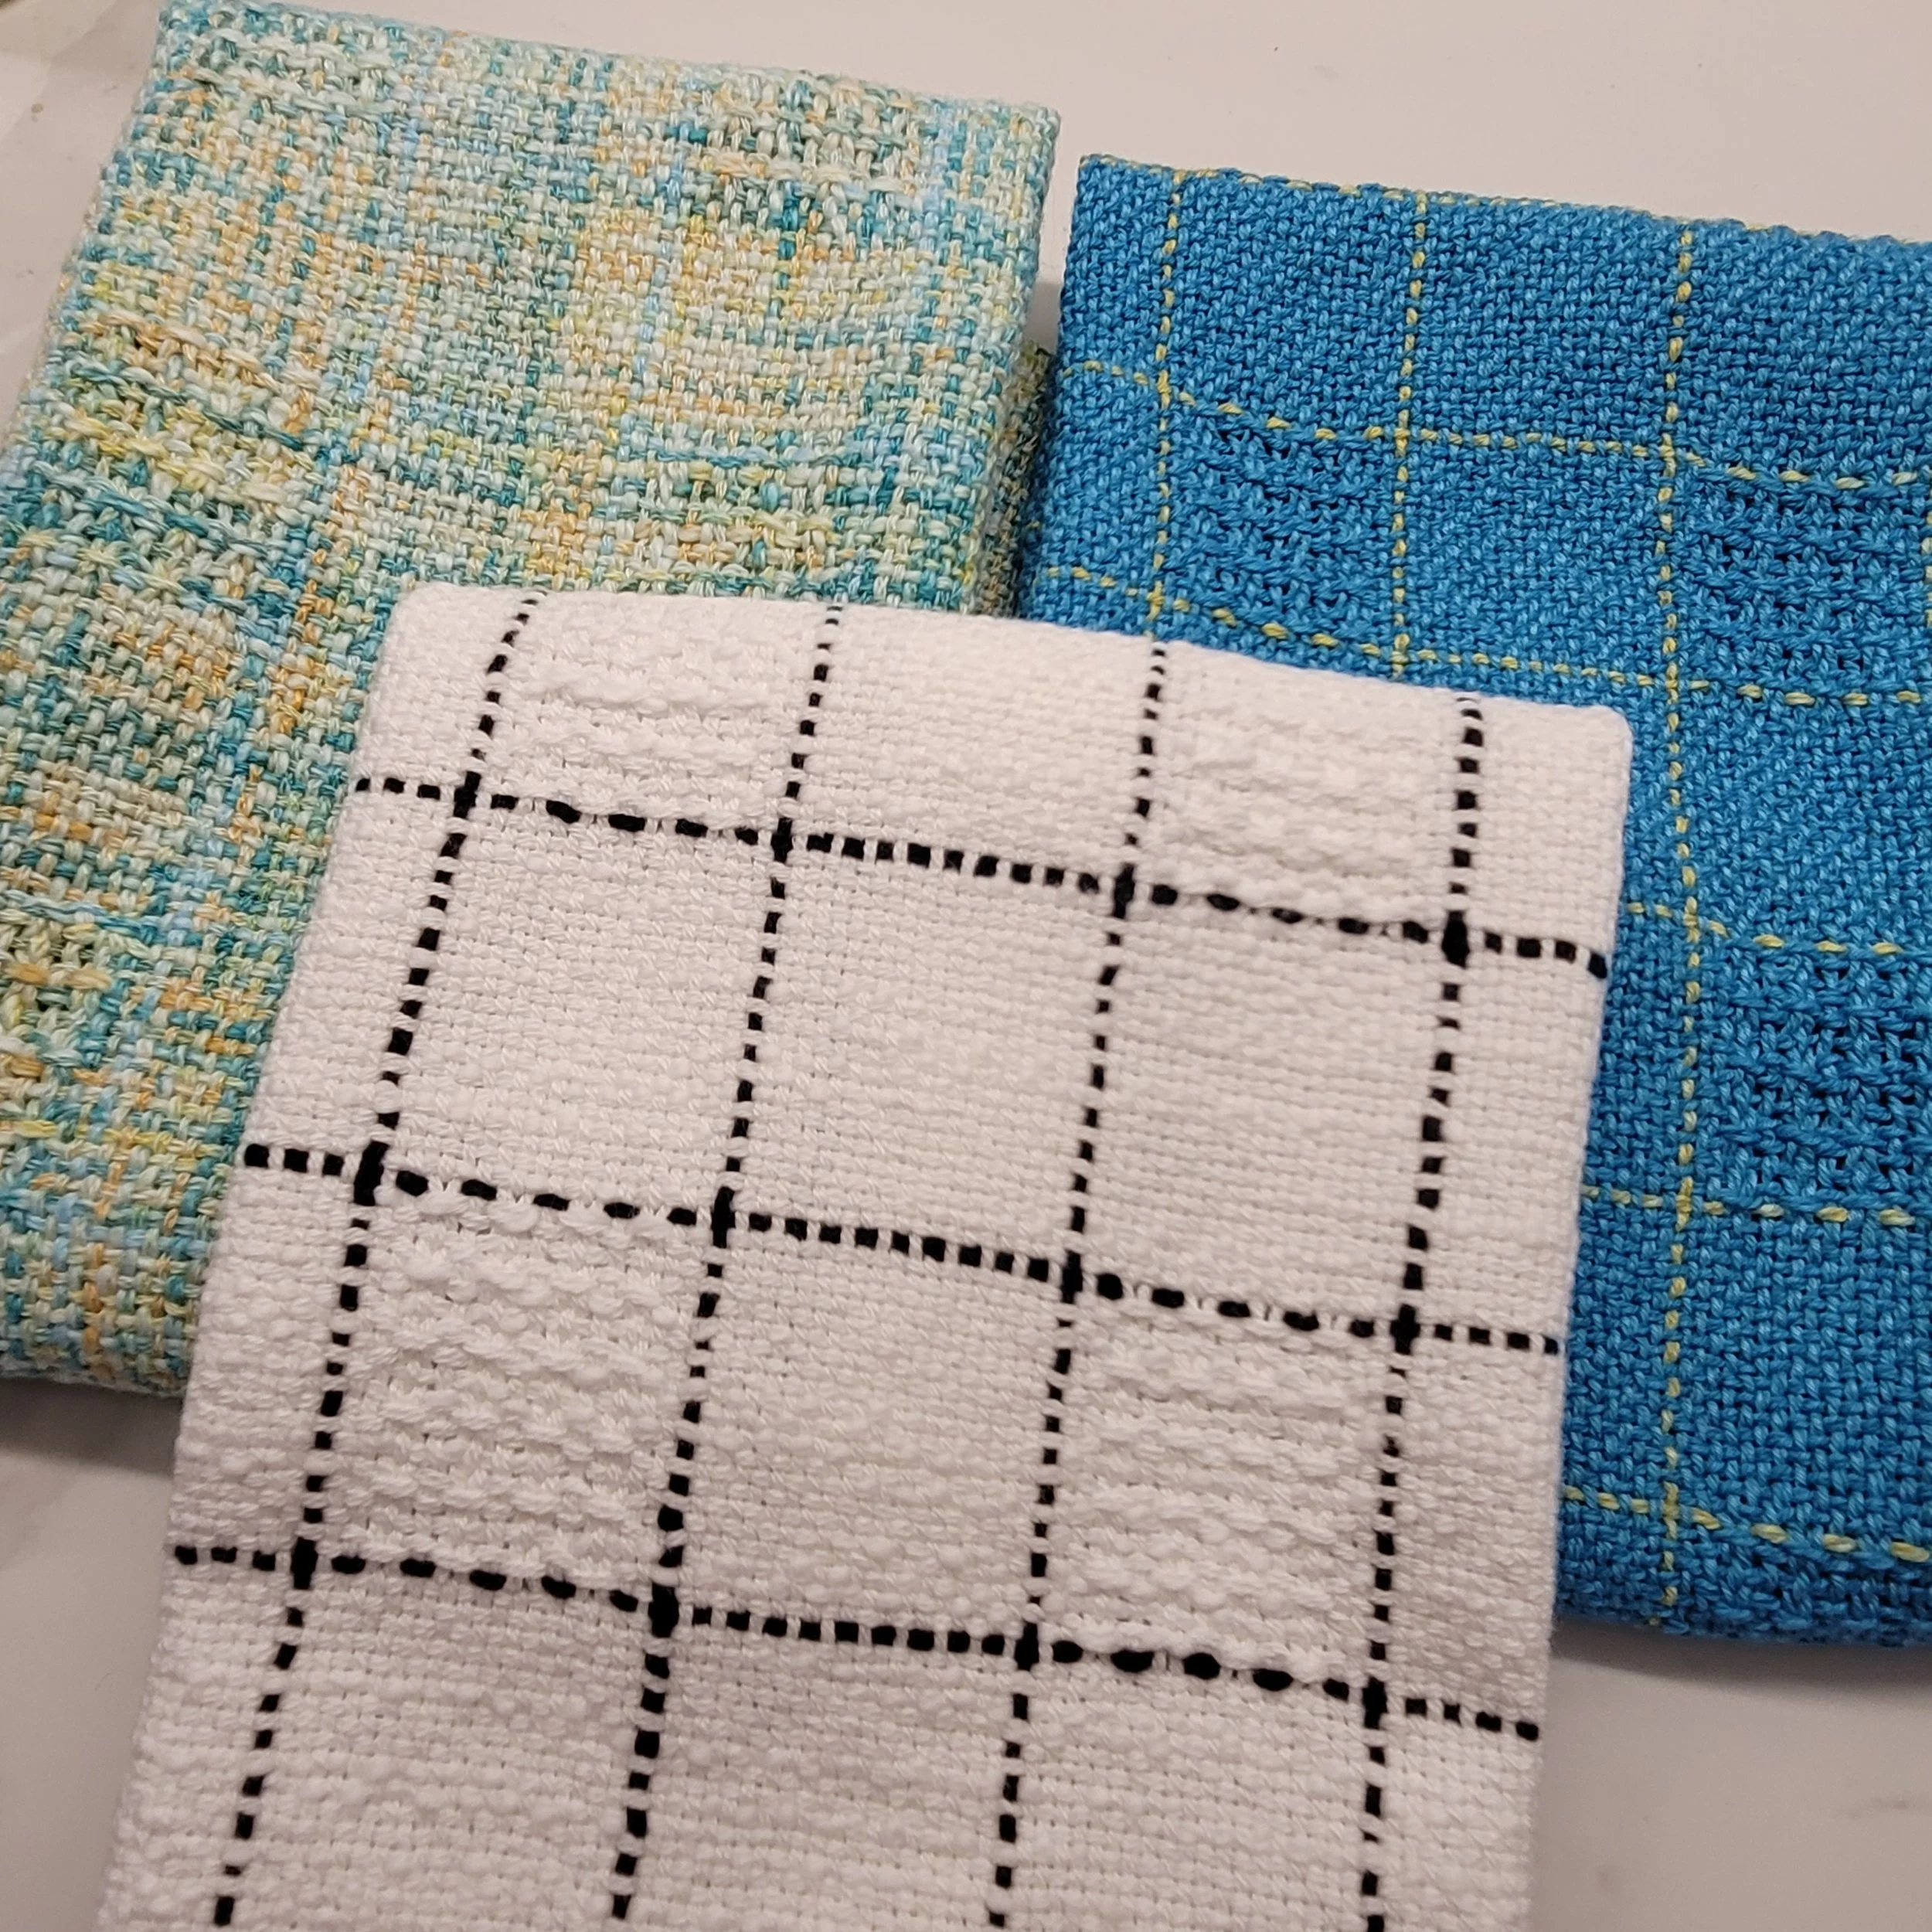
The fabric on the left has the edge warps a little smushed together, the fabric on the right is woven with a temple.
A temple is a tool weavers use to help prevent draw-in. You may notice that as you weave, the width in the reed does not match the width of your weaving. This difference is called draw-in. As weft threads interlace with the warp, they naturally pull in a little at the edges. A little bit of draw-in is inevitable. Too much and things can begin to go wrong…warp ends break, tension can become an issue and your selvedges just look bad. Projects that combine plain weave and lace, or that use a variety of fibres (like my Wabi Sabi scarves) can be particularly prone to draw in. I did a little Googling…apparently 5-10% draw-in is normal, so on a 20” project that can bring you to 18-19” woven width.
I put off trying a temple until recently. Back when I first started weaving I was either told, or read, that a “good” weaver doesn’t need a temple and one should learn to weave the “right way”, eliminating the need for a temple. Now, as The Rogue Weaver, I’m a big believer that if something works for you, and gives you the results you want than you are doing it right! But I hung onto that temple idea.
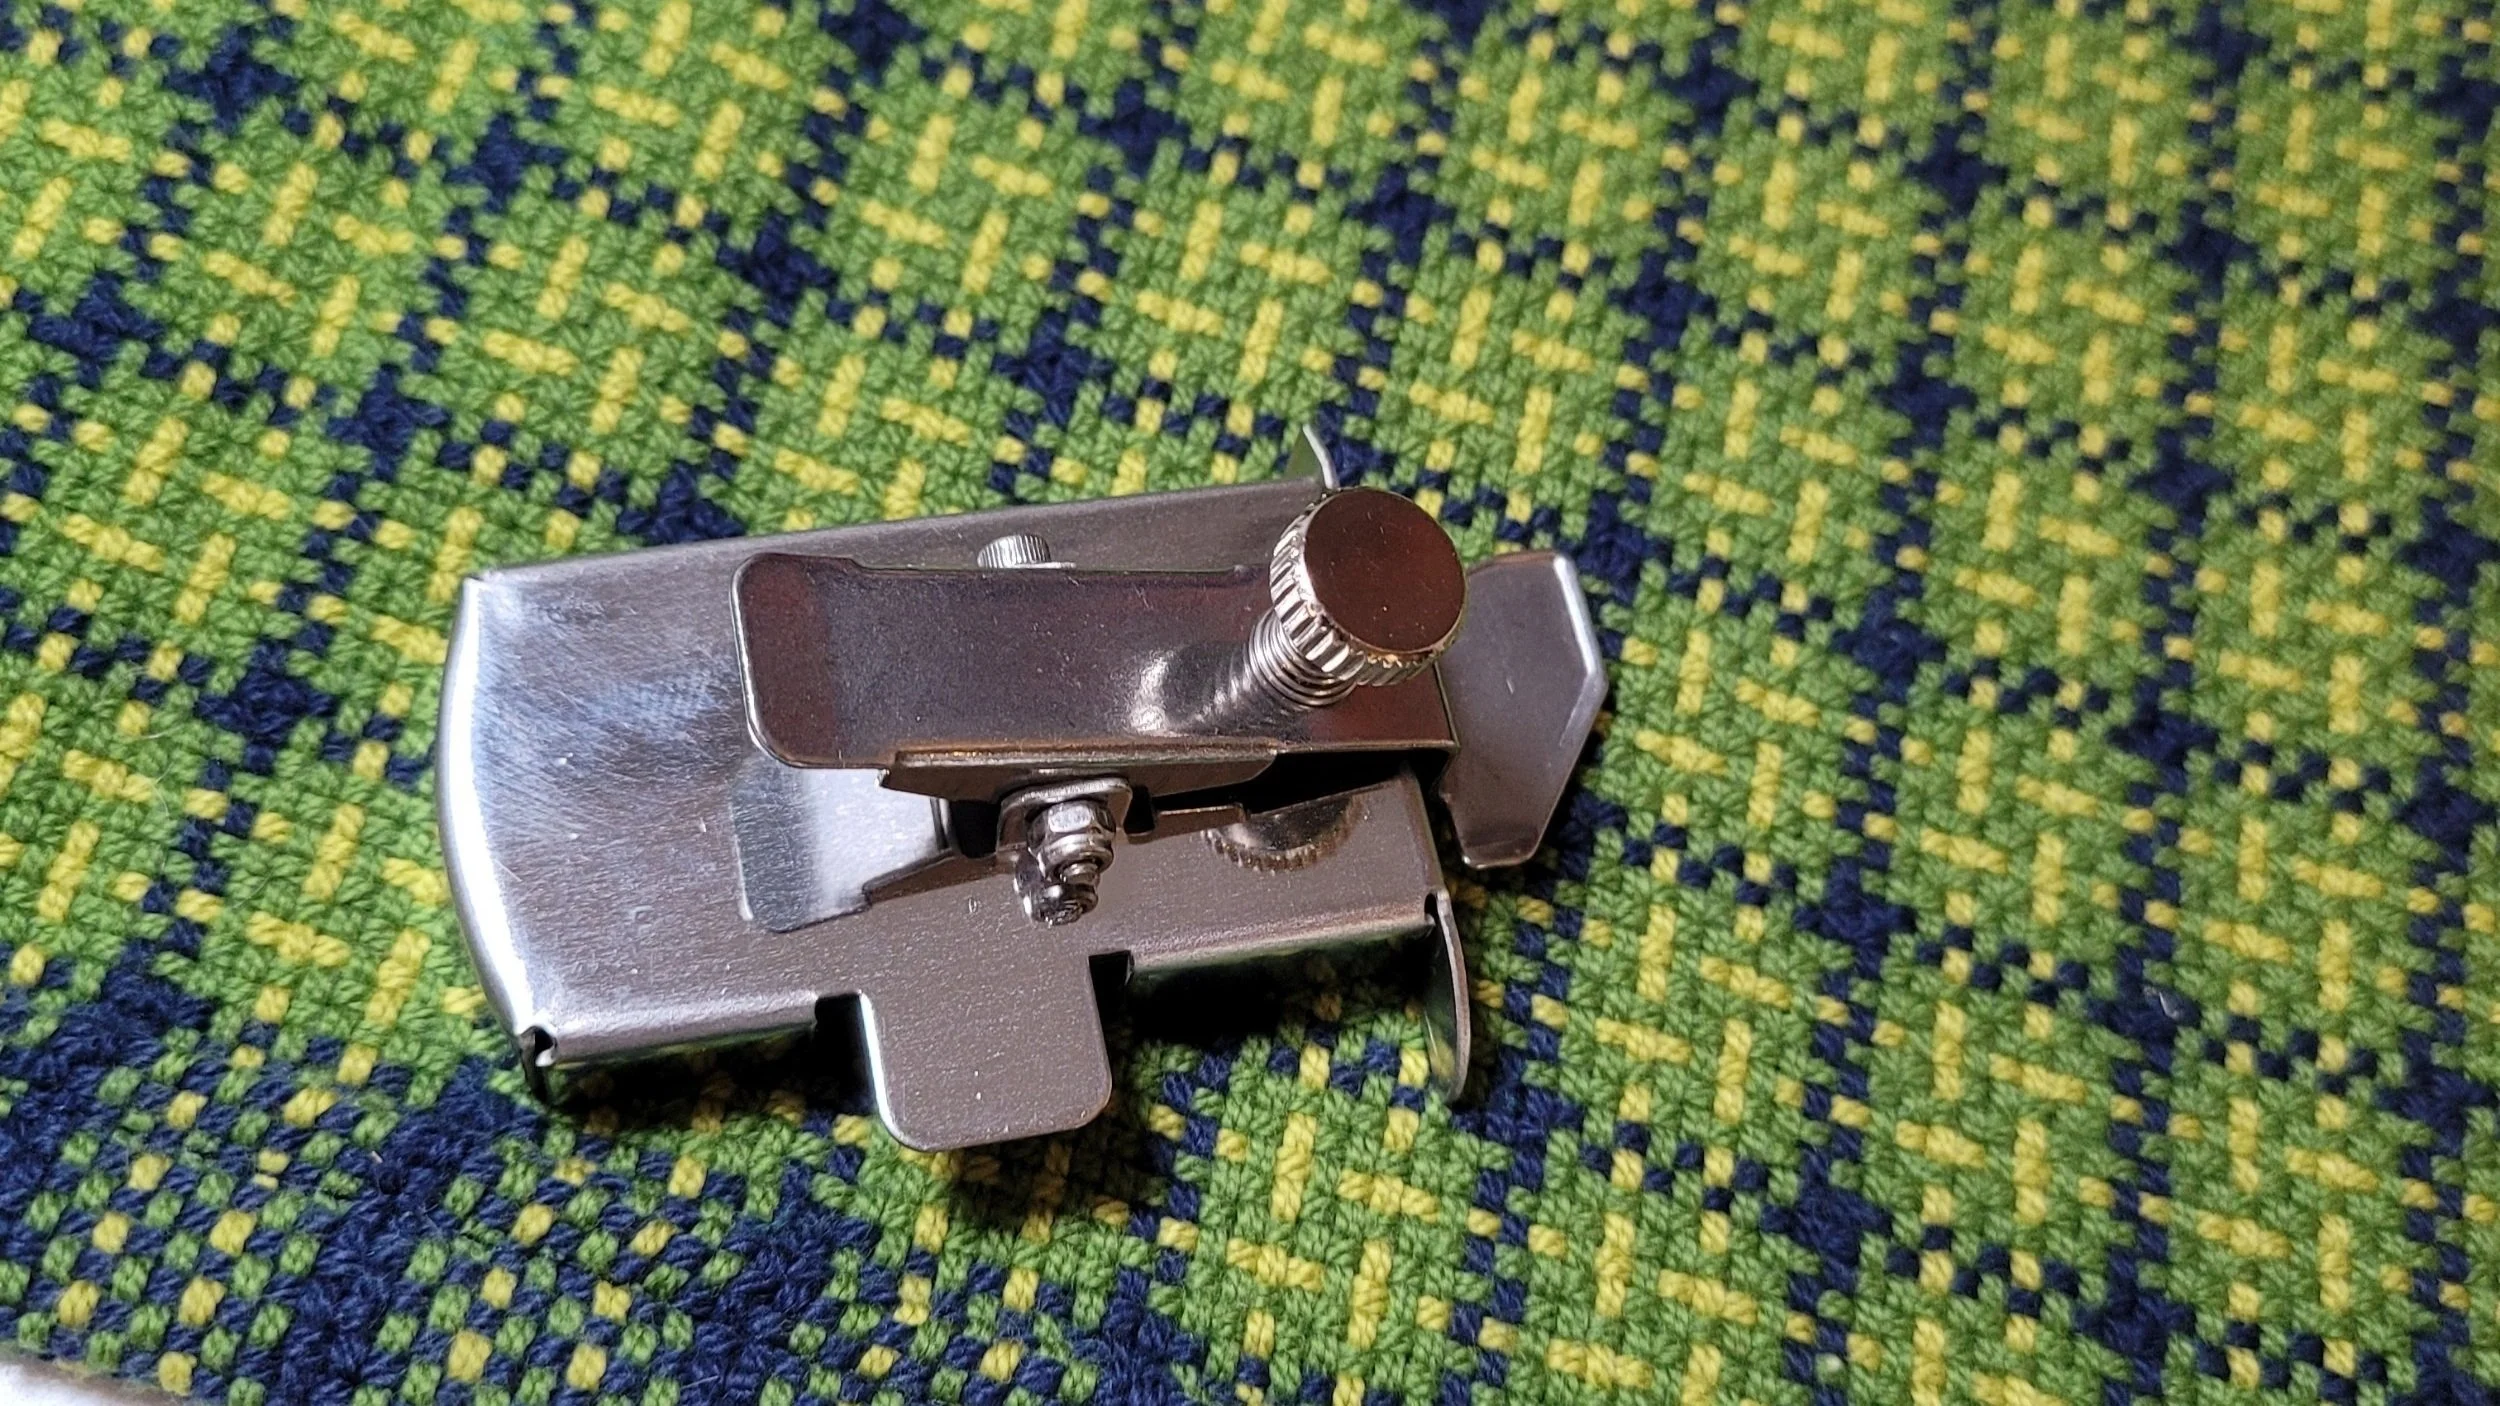
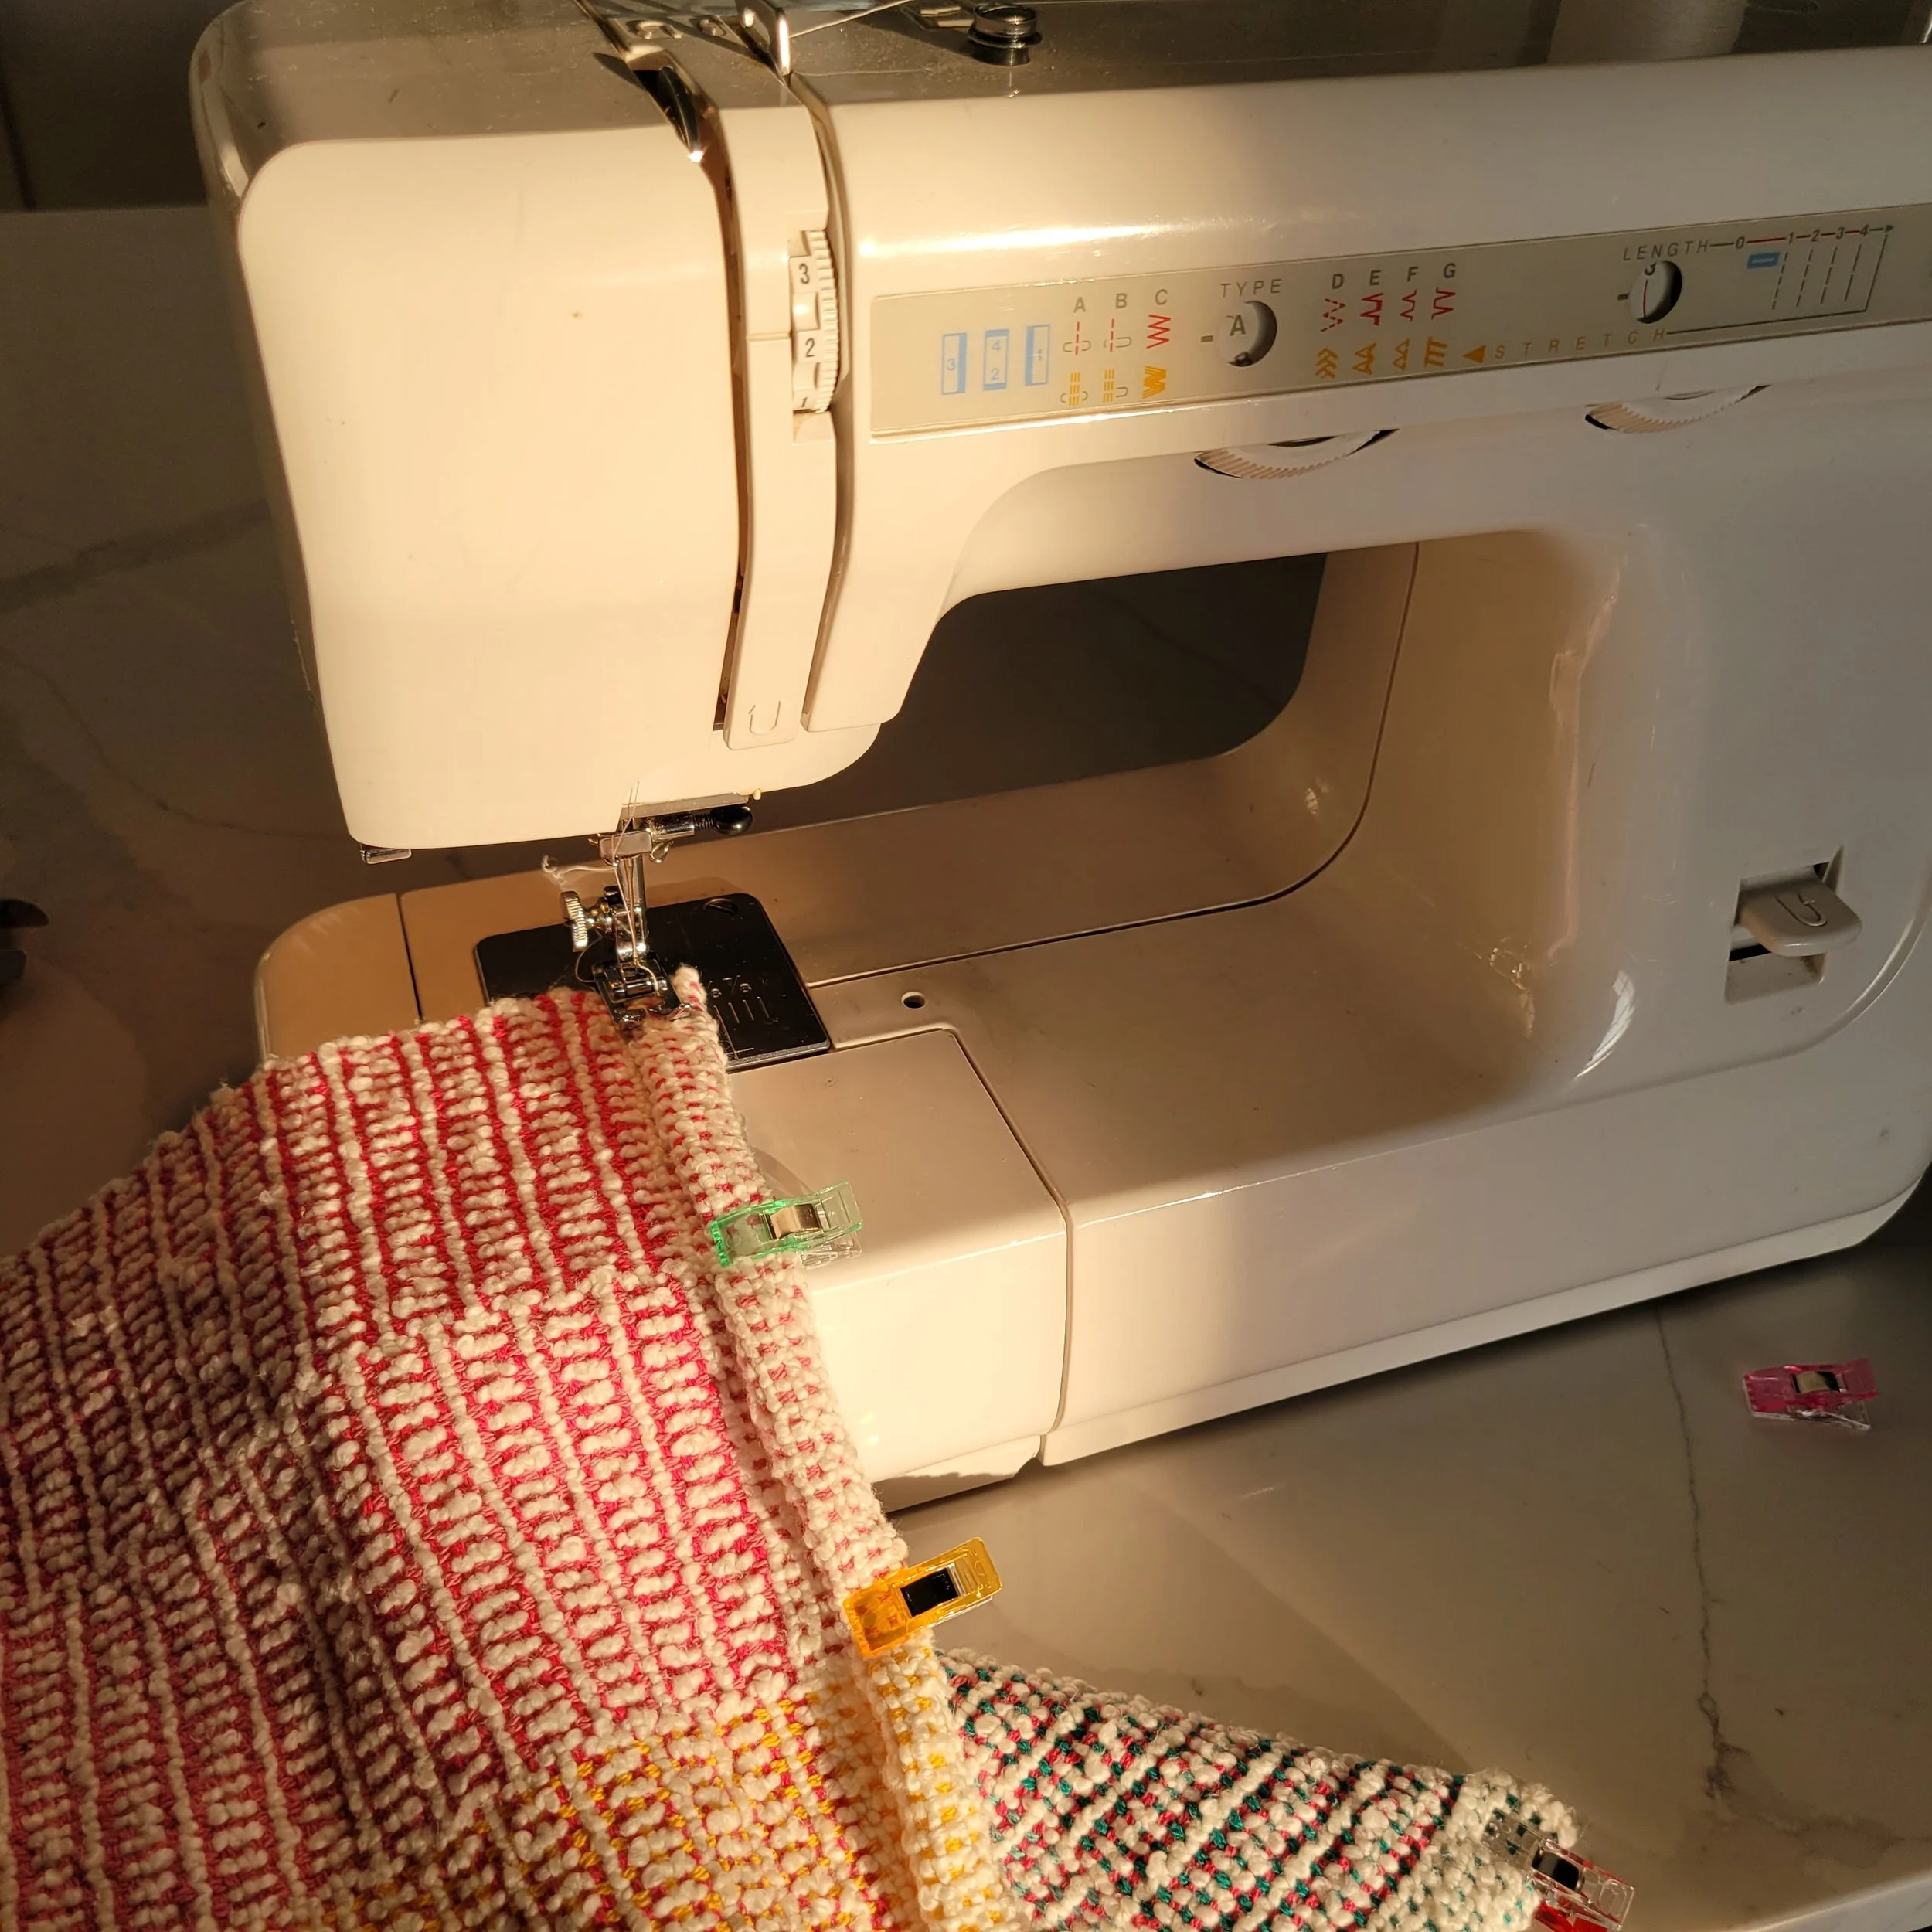
My seam guide
Since I started teaching classes, I’ve had a lot of people ask about temples, and while I knew the purpose, I had never used one so couldn’t really speak to them, and I wasn’t willing to say “a good weaver doesn’t need one” because I don’t *really* believe that. Also, I learned a very valuable lesson sewing towel hems. For a long time I couldn’t sew a straight line. So I bought a magnetic seam guide…life changing! I don’t use it anymore, but I can sew a straight line! That little tool helped me learn how to sew better. But I bet there are sewists out there who would scoff at using a seam guide!
So, a few months ago I bought a temple. Mine is from LeClerc. I’ve used it on a few projects. Initially it was clumsy and and really slowed me down. Then I got the hang of it and the weaving speed picked up again.

A temple works by holding your woven work to the same width as the warp in the reed. This can significantly reduce draw-in. If you are new to using a temple, here are some things to know:
Temples have sharp metal points! These are designed to fit through the fibres without causing damage…but they can certainly cause damage to you!
Temples need to be moved frequently. My research told me to move it every inch, or when I had woven the width of the temple. You will see as you are weaving when the temple is no longer effective. It’s much sooner than you might think!
Temples will not reduce the draw-in caused by using different fibres!
I’ve done a little video showing how I use my temple. I hope you find it helpful.
I don’t have a big issue with draw-in, so for me, I’m not sure a temple is something I will use frequently. However, some projects are more prone to draw-in than others. I am interested to see how it affects lace weaves and some of the super-fine weaves where I do have more draw-in.
Over all, I think if you struggle with draw-in, a temple is a good tool to try. It will slow you down, but slowing down might actually be what you need to improve!
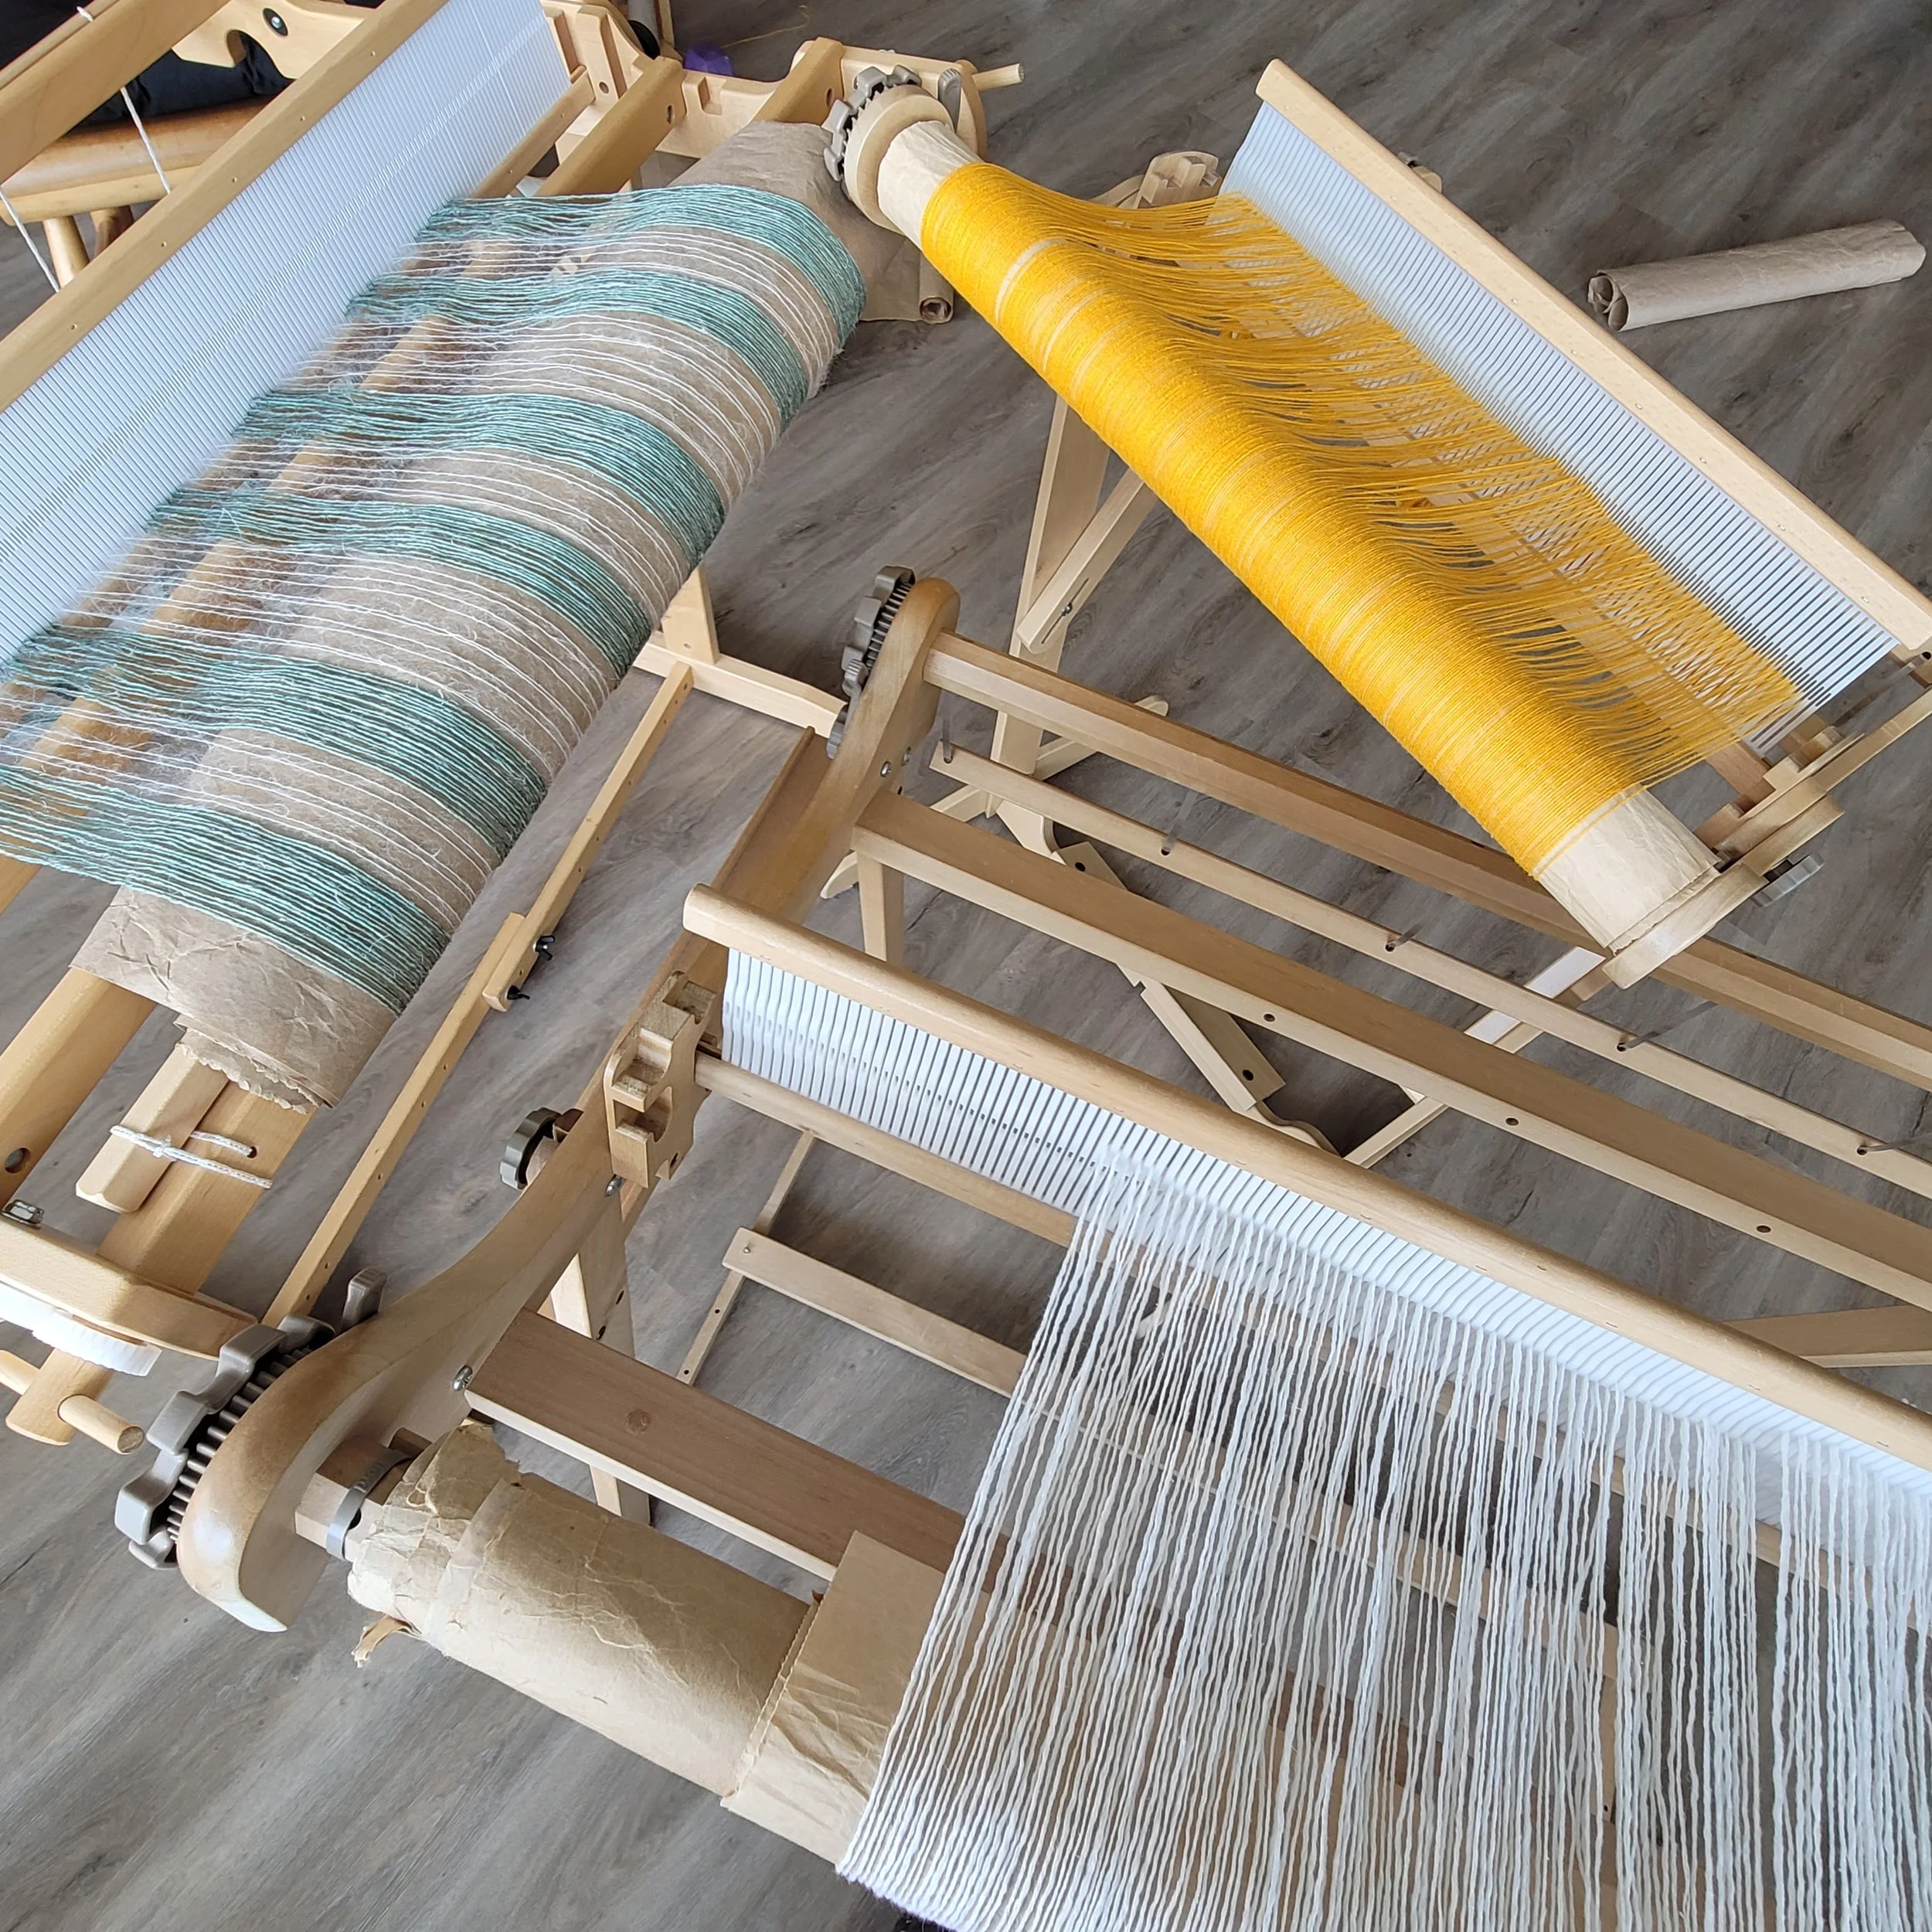
Re-Winding a Warp
Weaving requires attention and care. It never pays to get distracted while warping! And I talk a lot about checking each section before moving onto the next. Let my share why.
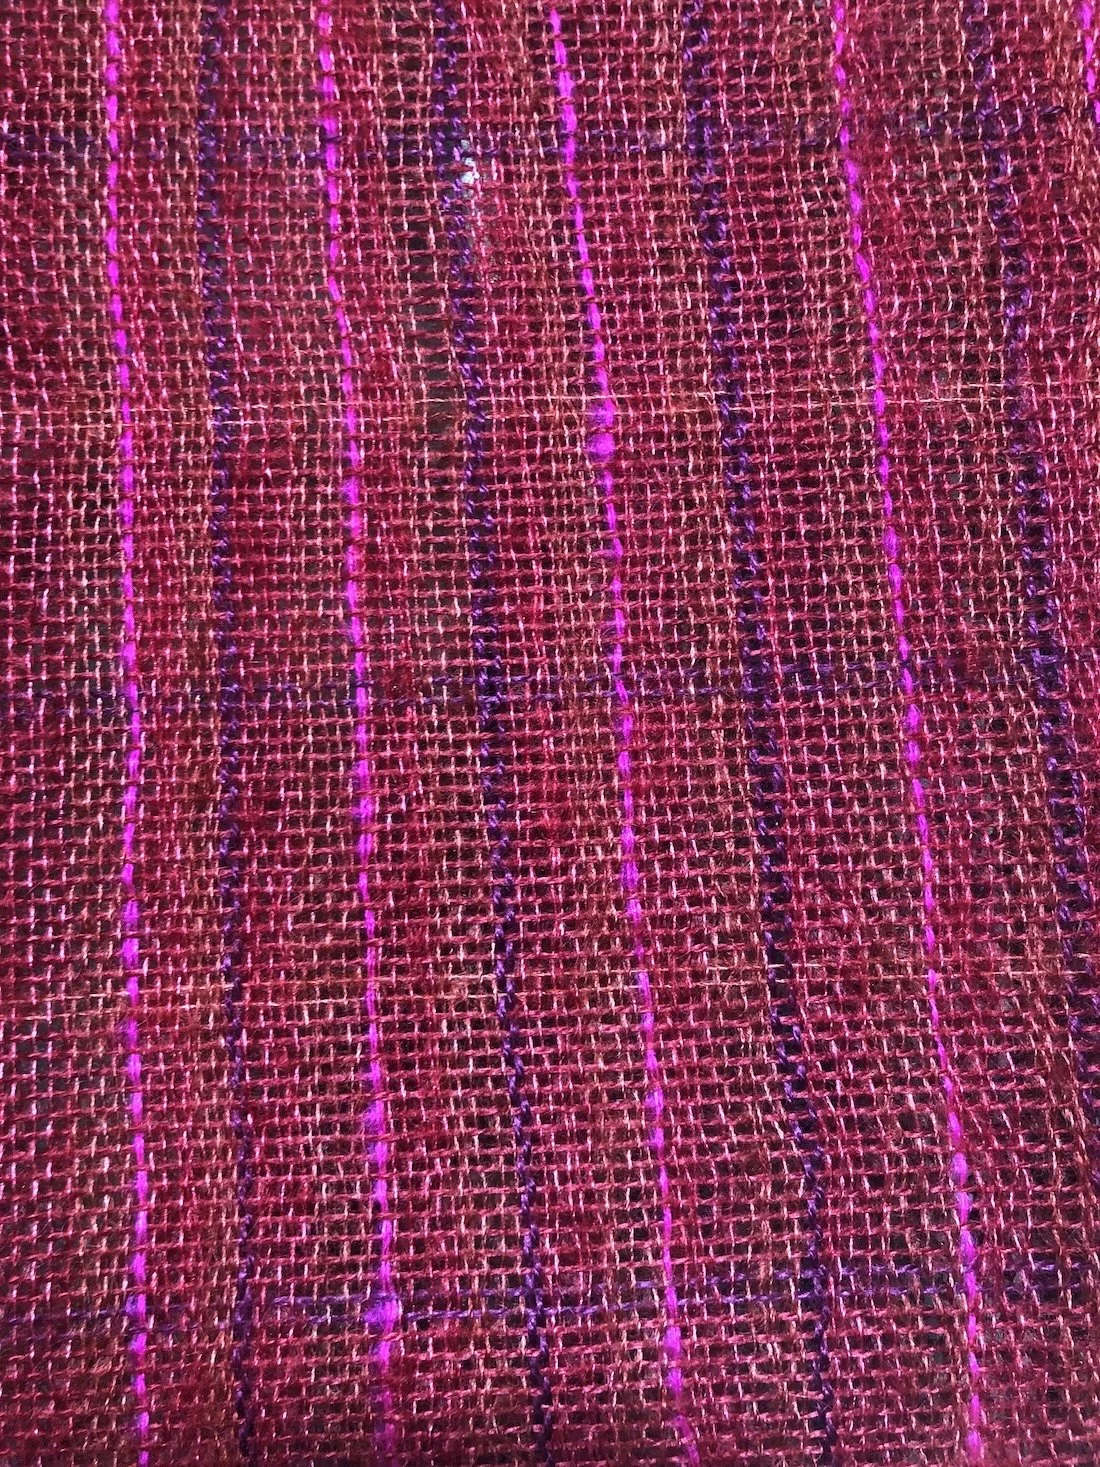
Weaving requires attention and care. It never pays to get distracted while warping! And I talk a lot about checking each section before moving onto the next. Let me share why. Take a look at the picture above. See that wider purple stipe smack dab in the middle? That was where I got distracted. I’m not sure if I forgot to count or forgot how many ends I was supposed to have. And it really doesn’t matter because the result was the same: with that wide stripe, I was not going to have enough slots and holes to warp the pattern. And I didn’t realize the mistake until I was well past it!

I stepped back for a moment to consider my options:
I could unwind and fix the mistake.
I could continue warping and winding, then toss the extra ends off the back, move everything over, then add the final ends and hang them off the back of the loom with s-hooks.
I went with Option 2 for a variety of reasons. First, this is a 2-heddle project; that means that each slot contains 4 ends. That seemed quite complicated to unwind and very time-consuming. Second, I’ve thrown ends off the back any number of times without problem, and added so many extra ends in that it doesn’t even seem a challenge anymore.

So, problem solved, on my way! I wound, moved everything over and added 12 extra ends (3 slots) to the loom with s-hooks. Honestly, things looked good and I was confident I’d have no trouble.

And then I started weaving. May I just say that 12 ends, on the edge of a warp, tied on with s-hooks, does not make for consistent or even tension? It started ok, but as I continued to weave the selvedge edge got worse and worse. I added extra hooks, extra weights and even wrapped the ends around a dowel like an extra warp beam. Nothing helped and weaving was not fun. After about 8” I gave up and decided to cut the work off and rewind the warp.
Here’s a step-by-step guide in case you ever need to do this!
Before cutting off the work, wind the woven cloth and warp far enough forward so that when you cut, the threads do not slip out of the heddle. Cut in small sections, and tie slip knots as you go. Since I had 2-heddles threaded, I really did not want to come unthreaded!
After cutting the warp and tying the slip knots, remove the woven section from the loom.
Begin unwinding the warp. I unlocked the cog and using both hands, gently pulled the warp forward. I had to unwind the full warp since I was going to add ends to the back warping stick. However, if you are unwinding to fix tension issues, you do not need to unwind the full warp. Leave at least 1 full turn on the back beam. This will hold all the warp ends so they cannot slip. If you have unwound fully, since the ends have been cut, and are no longer under tension, it is super easy for you to pull a thread or two or ten making the warp ends uneven. If you must unwind all the way, a length of painter’s tape across the warp and the back warping stick will keep everything in place.
At this point I tied my extra ends onto the back warping stick and removed the extra ends from the middle.
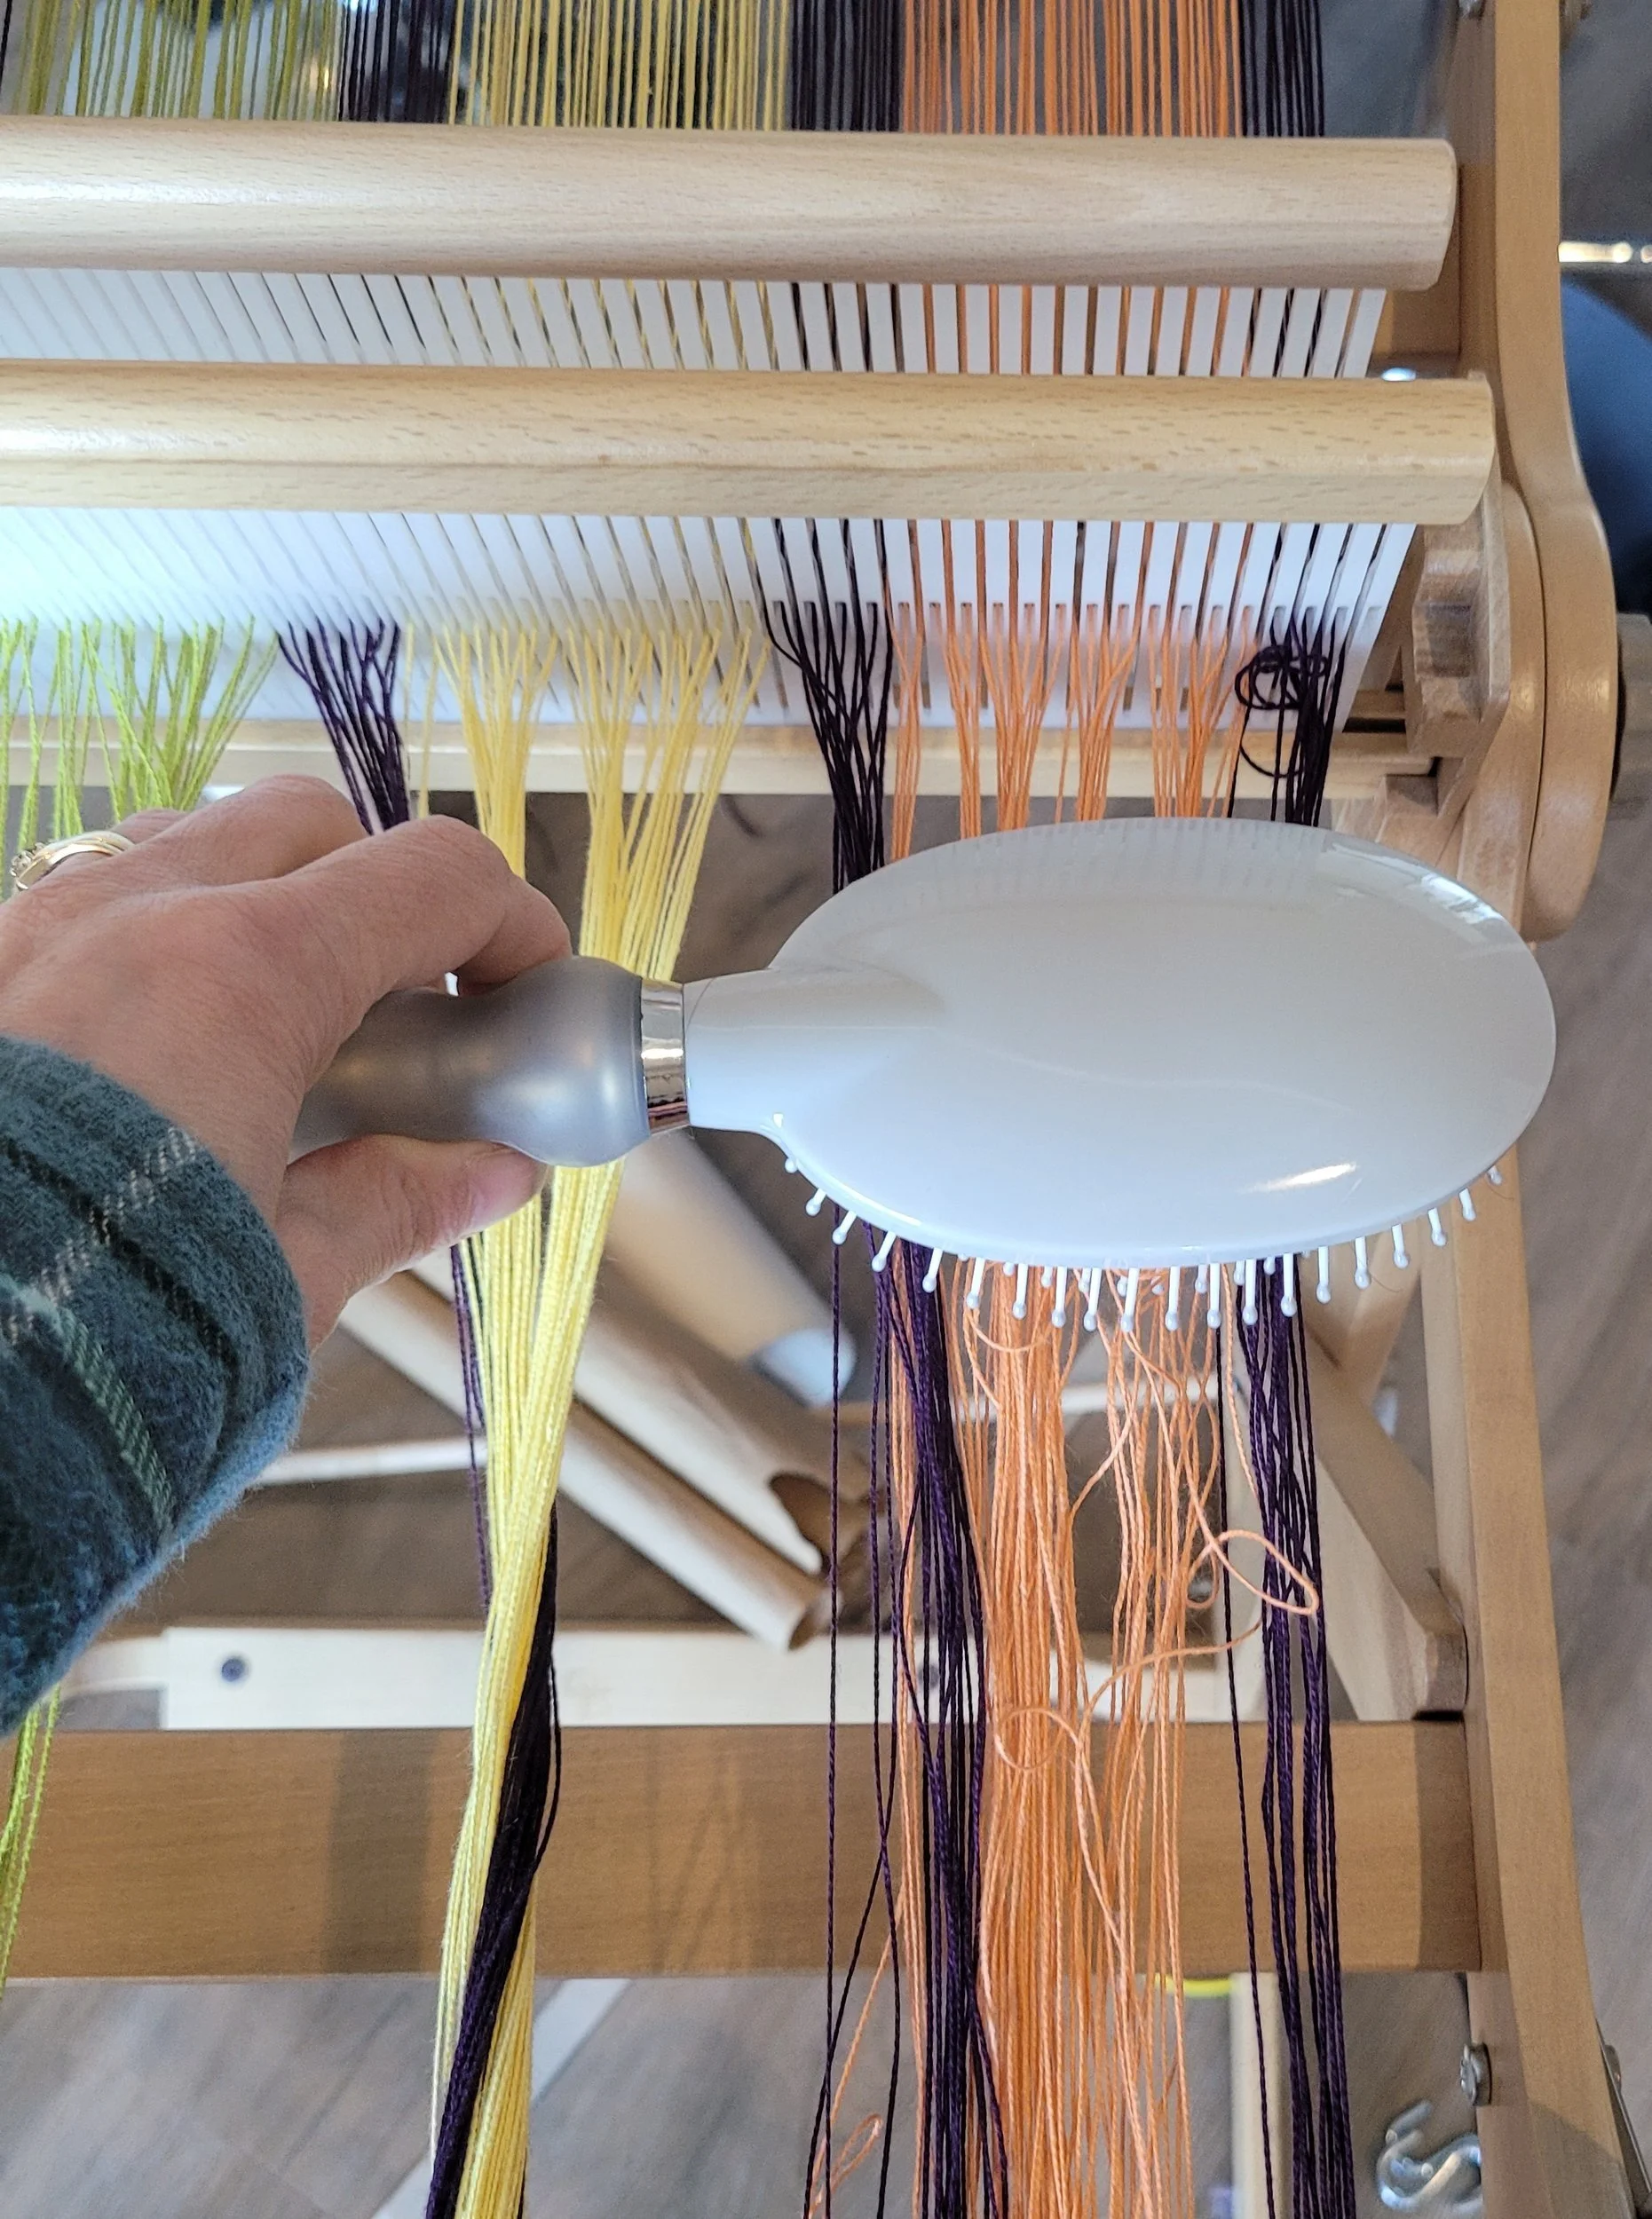
Then I began to wind the warp again using crank and yank. Cotton under tension doesn’t tangle. Cotton left to hang loose can get quite tangled! Don’t stress too much, it looks far worse than it is! This is one of the few times I broke my rule about brushing the warp. I did, however, remember that what I do to one bundle I must do to all the bundles. So each bundle got gently brushed to remove tangles near the reed (I didn’t brush the whole length, just the length that would be woven in with the next crank).
Thankfully, everything went surprisingly smoothly! I had one length that slipped when warp was unwound which resulted in a super-long end and a too-short end when it came to tying on. I trimmed the long end and tied an extra length to the short end so I could tie it on. After passing the knot in weaving, I untied it and wove the end in.
After all of that, and some distance from the project, I realized that the best solution would have been to continue warping and add the extra ends into the reed in the last colour block. So, in the last block, orange, the final three slots would contain 4 orange ends and 4 purple ends each. After winding I could then toss the extra ends in the middle off the back, move everything over, and have room for the purple borders! *Hindsight!*
And here I am, ready to tie on again!
Adapting Pattern: Changing from 4/8 to 2/8
I write a lot of towel patterns. For most of them I use 2/8 cotton (for my US friends, that is the same as 8/2). I love using 2/8 doubled, and in case you are wondering why, here’s a blog post that tells it all! But what if you prefer 4/8? Or what if, as in a recent pattern and class, the pattern gives you the option of using either?
Here are some simple guidelines about switching back and forth.
Switching from 4/8 to 2/8 Doubled
This is straightforward! If the pattern calls for 10 slots of 4/8, warp 10 slots and 10 holes of 2/8 doubled.
💡 Why? Because 10 slots of 4/8 = 20 ends total (one from each slot moves into a hole). So, by warping both slots and holes with 2/8, you’re keeping the full 20 ends.
Switching from 2/8 to 4/8
This takes a little more planning—especially if there are color changes in the warp.
✔ If all color blocks have an even number of ends, switching to 4/8 is easy! Just replace each slot and hole in the pattern with a single slot (since each slot in 4/8 = 2 ends).
✔ If you have odd-numbered color changes, things get trickier. You’ll need to:
Cut and tie color changes at the warping peg (I’ll explain this in a moment).
OR
Rearrange ends after winding the warp
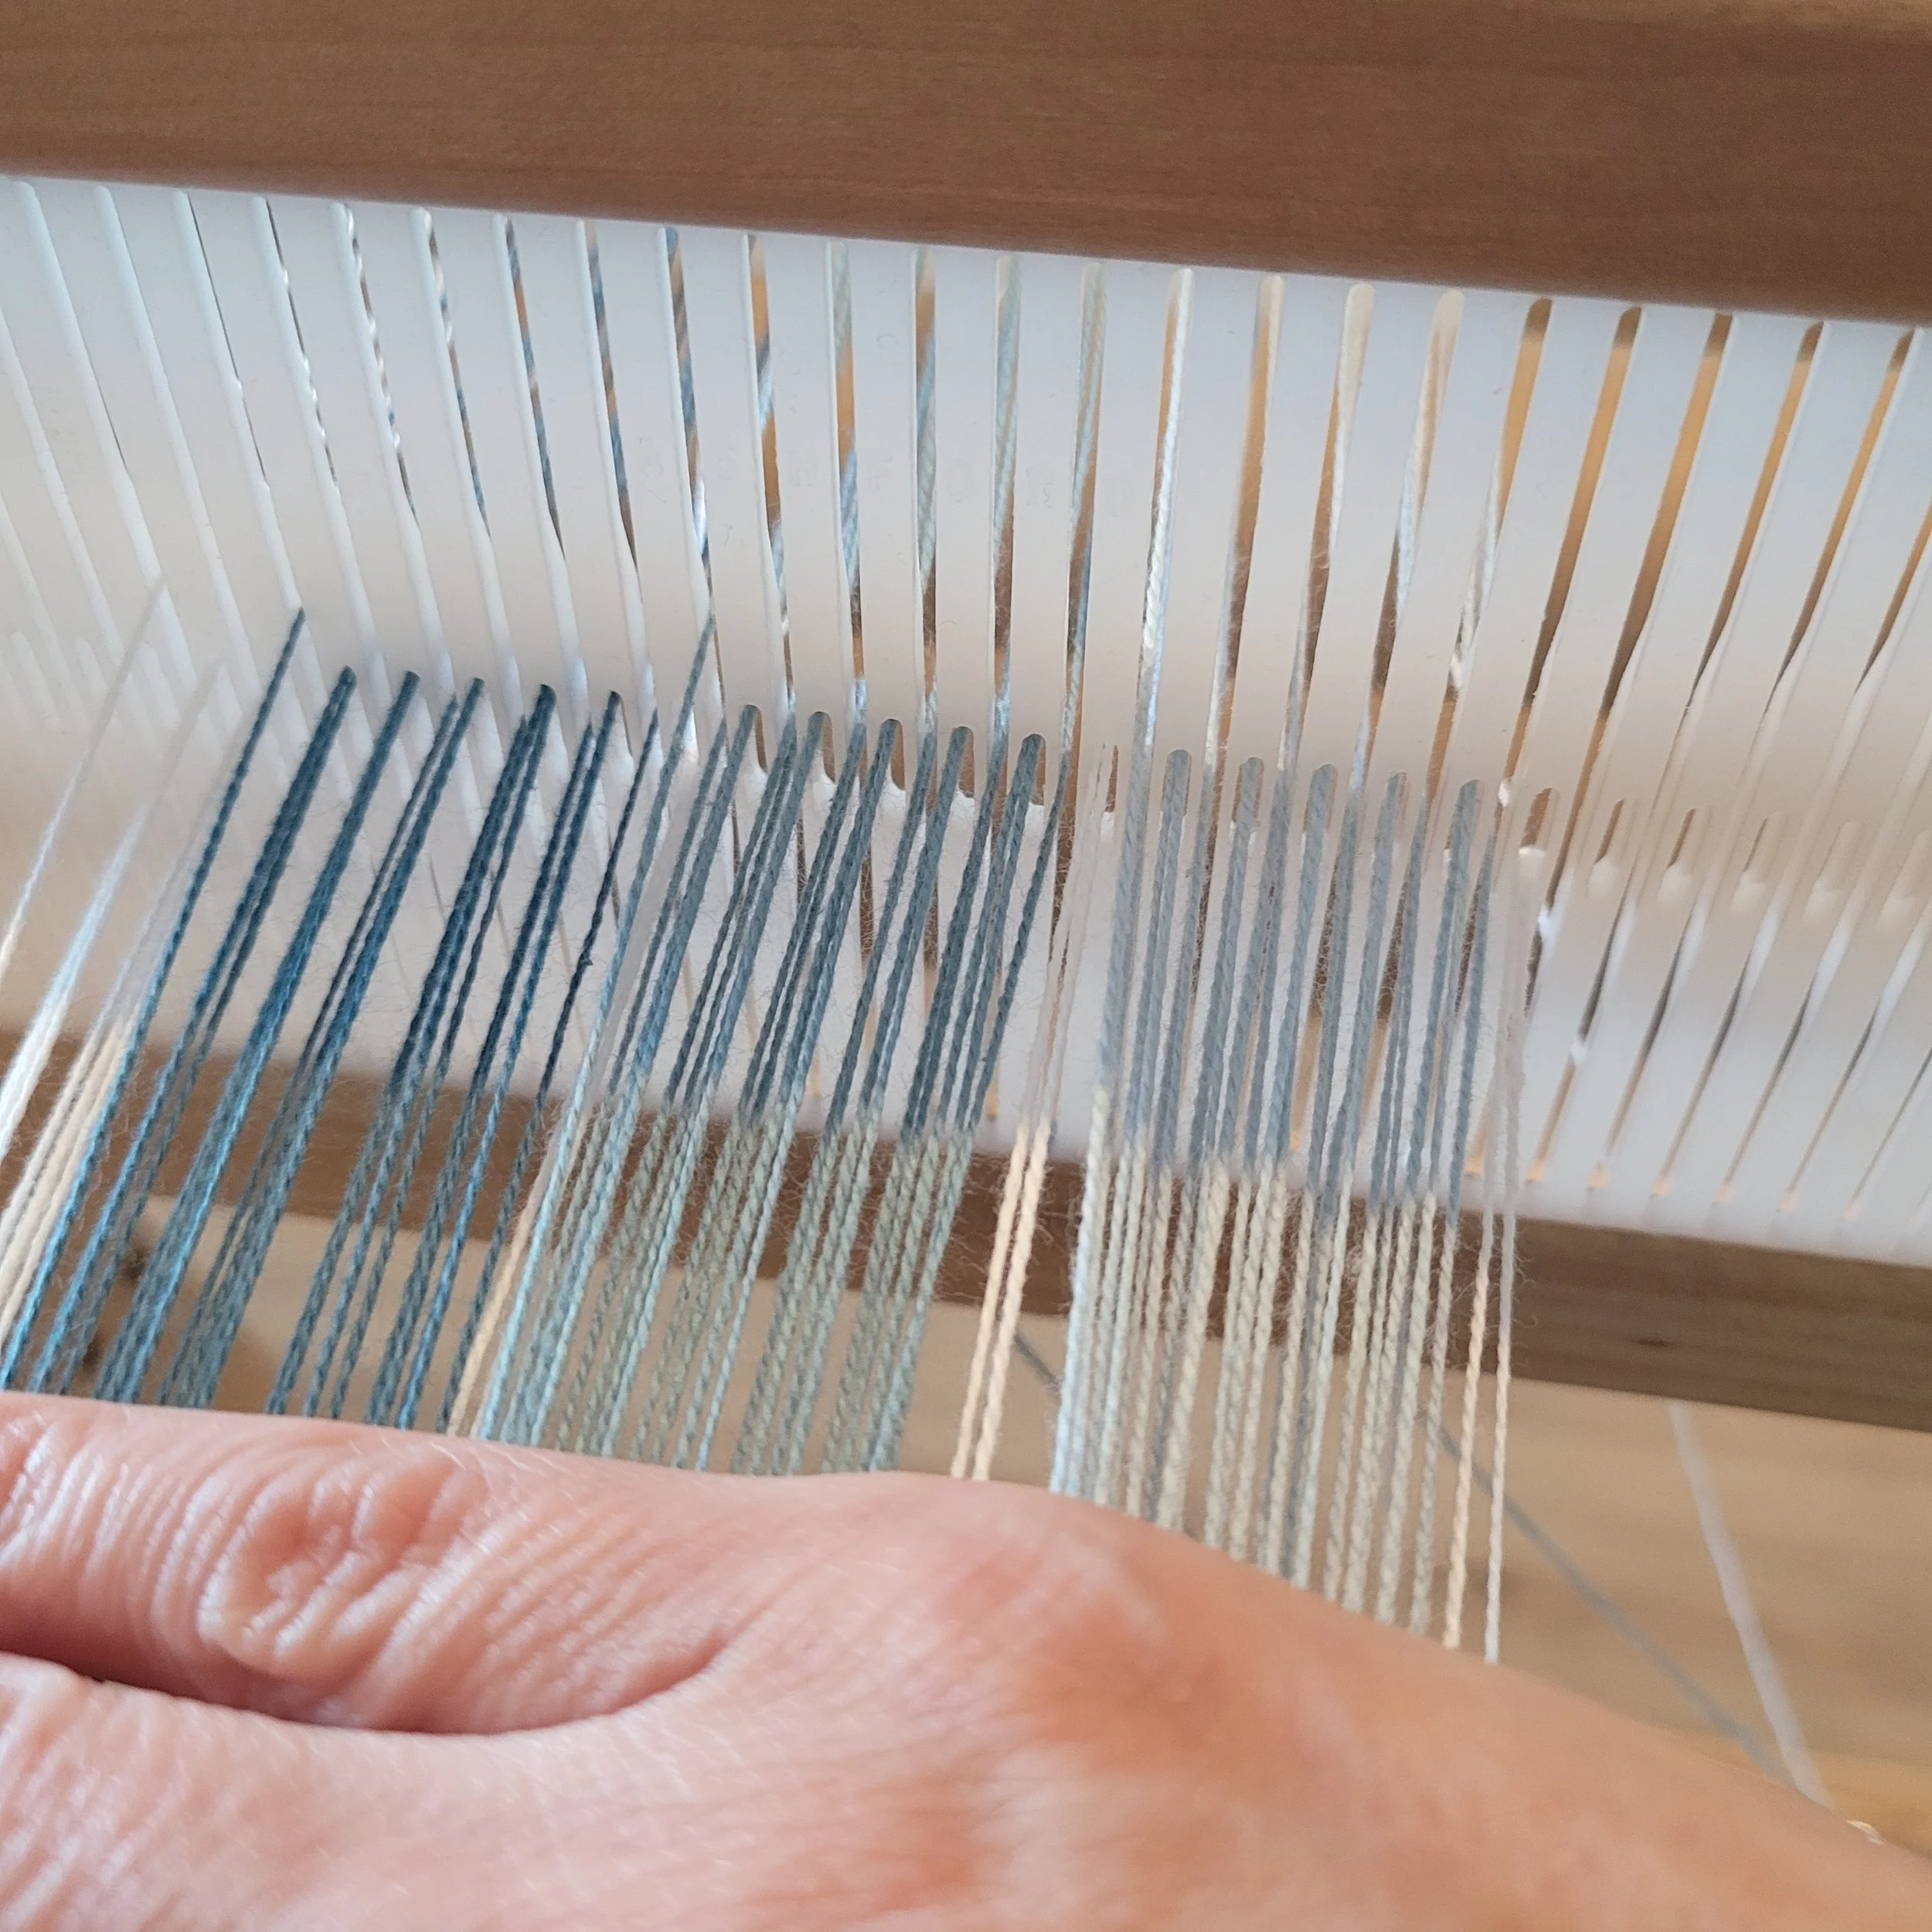
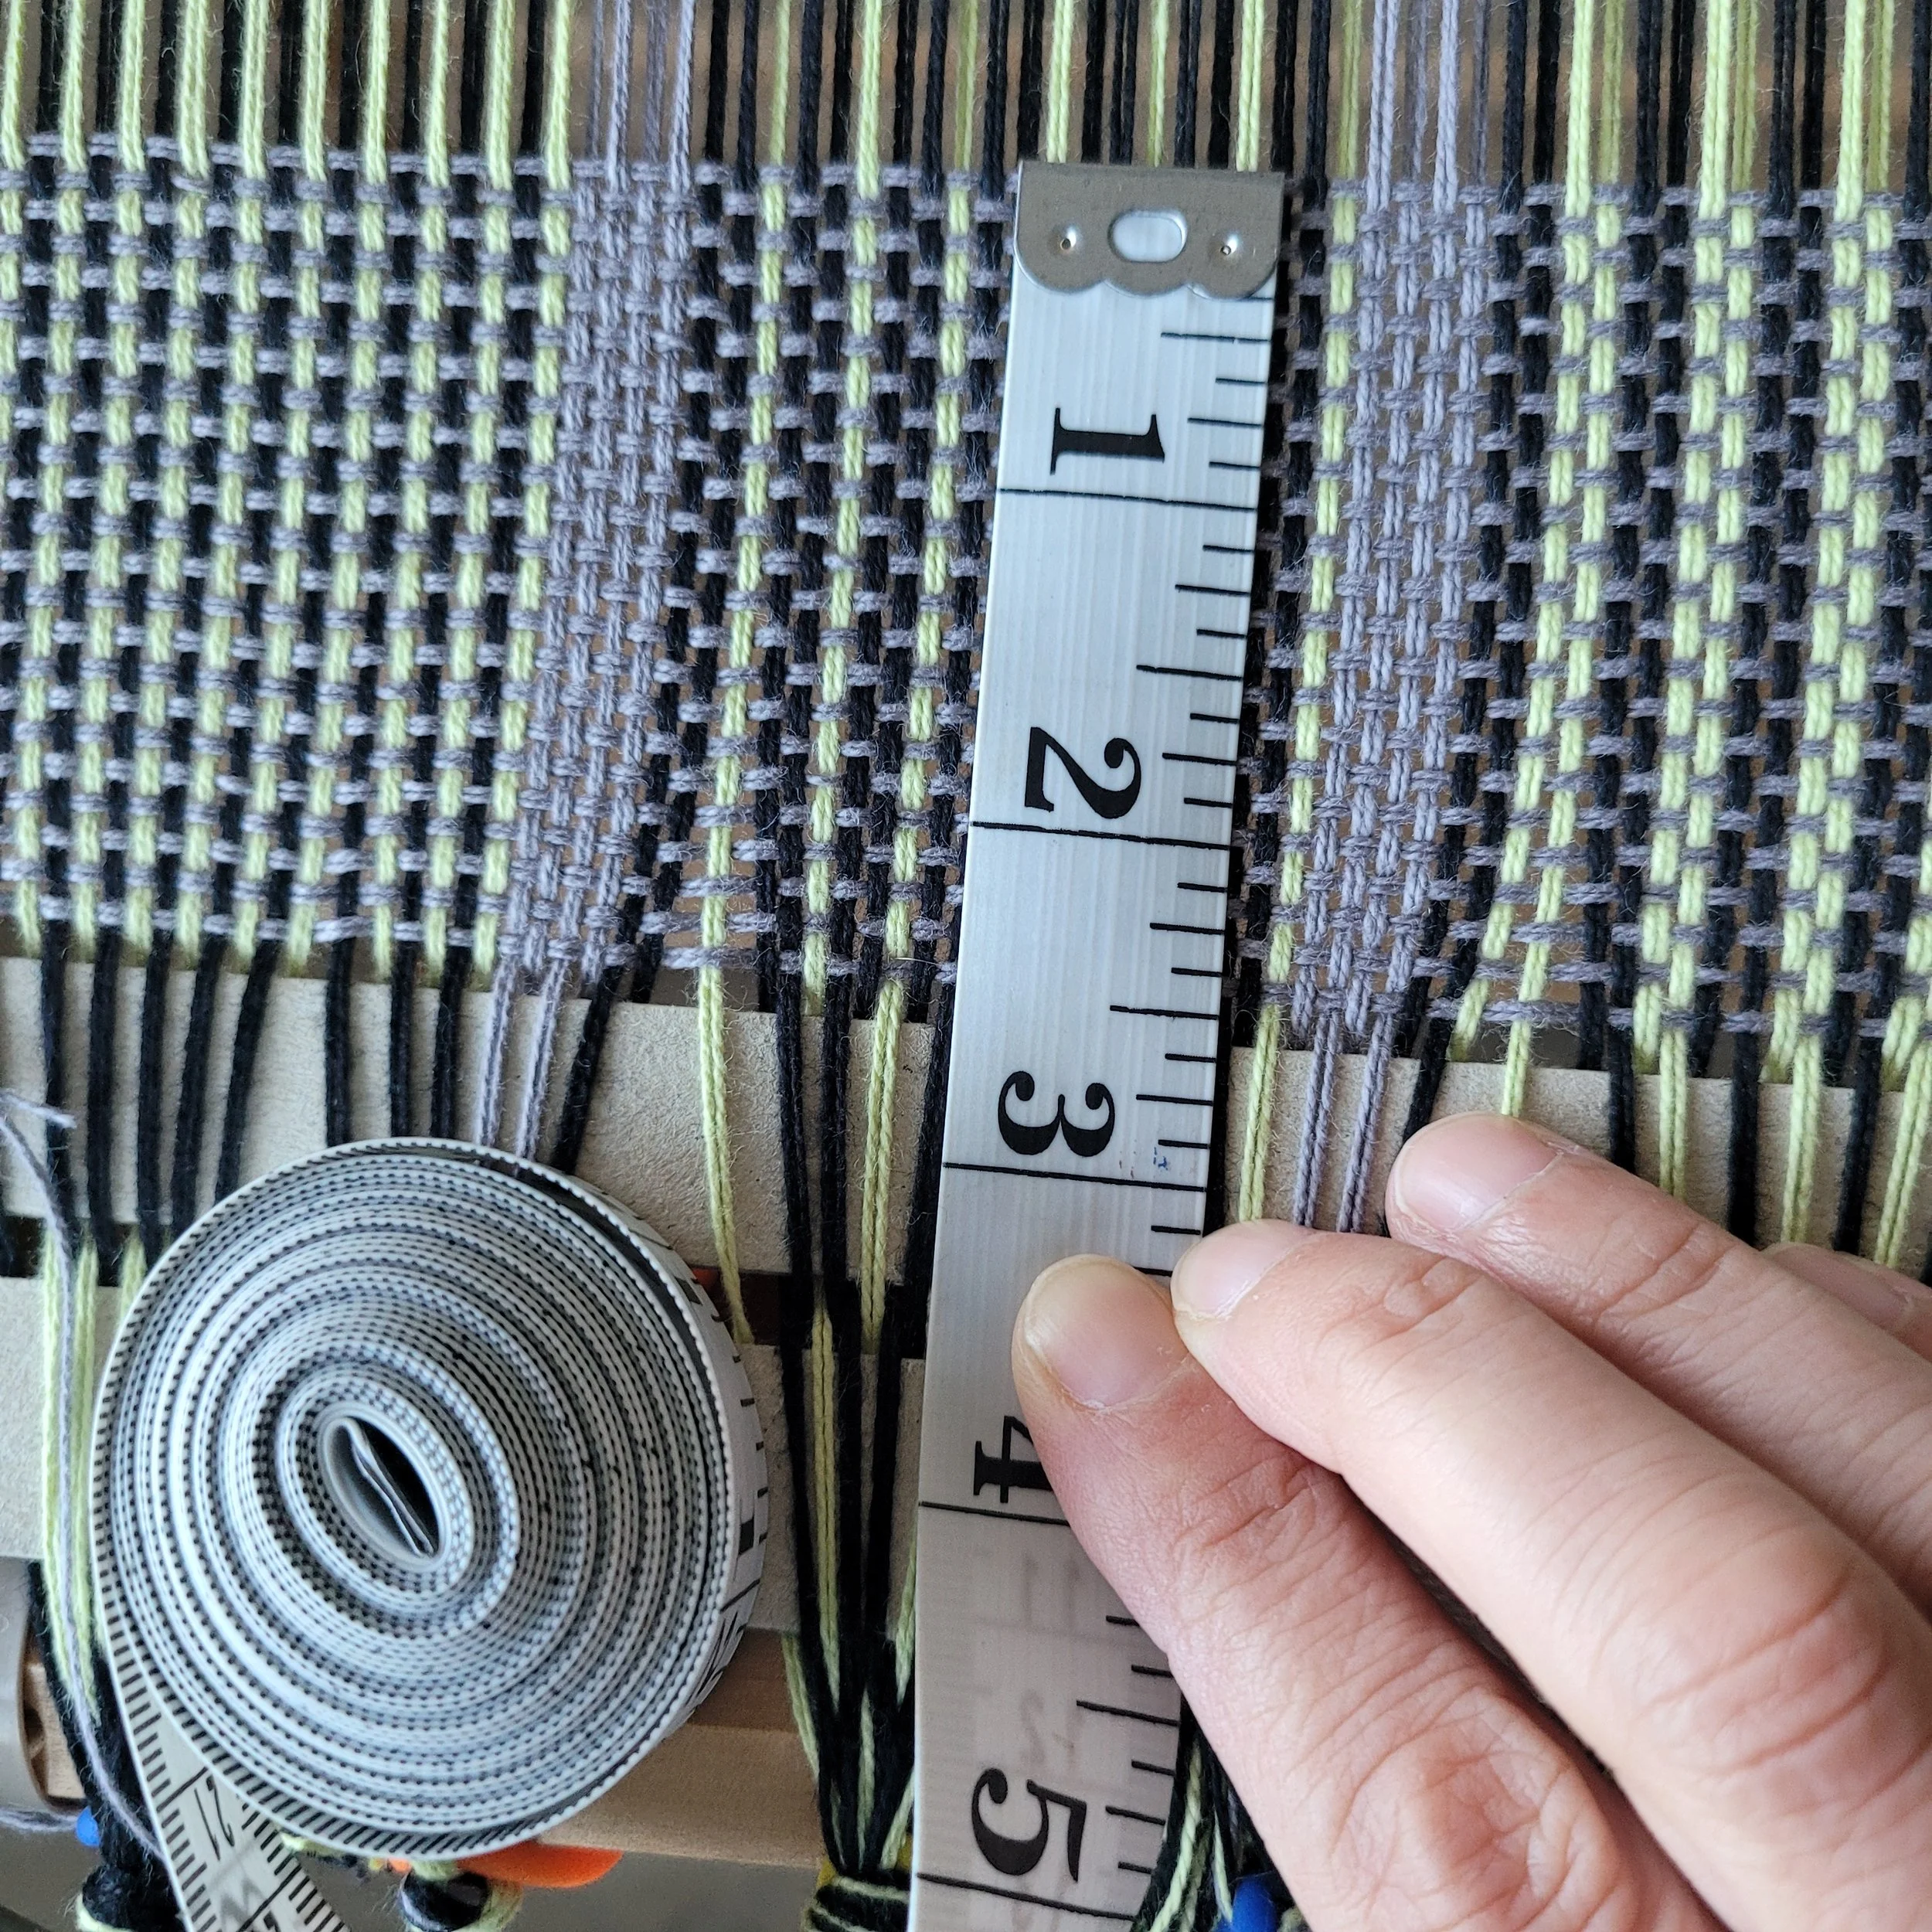
Look at the picture below. It uses 2/8 cotton warping the slots and the holes. The top row are slots and the bottom row are holes.
If I wanted to switch to 4/8, here’s how I’d adjust:
Warp (1 slot black, 1 slot green) five times.
Warp 2 slots grey.

Let’s look at this next example. Looking at the list, we can see that we have multiple colour changes and many of them are odd numbers.
As mentioned above, I have 2 choices, I can cut and tie at the colour changes, OR I can rearrange ends after winding.
Let’s look at cutting and tying.
Step 1: Warp 3 slots with Mauve Fonce. Cut the Mauve Fonce at the peg (this leaves a single end in the 3rd slot)
Step 2: Thread the end of the Naturel through the same slot as the single end of Mauve Fonce and and tie the 2 ends together at the peg.
Step 3: Pull the Naturel through the next slot and cut at the peg (leaving a single end of Naturel in this slot)
Step 4: Thread the end of the Mauve Fonce through the same slot as the single end of Naturel and and tie the 2 ends together at the peg.
Continue in this manner until the section is completed. It’s all pretty tedious (but very doable).
Alternatively, you can calculate the total number of ends for each colour and warp in a way that eliminates cutting & tying but does require rearranging of threads after winding.
For this example:
Mauve Fonce = 20 ends (10 slots)
Naturel = 11 ends (5.5 slots)
Warp:
*2 slots Mauve Fonce,
1 slot Naturel,
3 slots Mauve Fonce,
1 slot Naturel, repeat from * once more
then warp 2 more slots Naturel.

After winding you will need to rearrange the ends, and toss the extra Naturel off the back of the loom. Again, doable, but challenging.
In the picture to the right you can see the crossed threads behind the reed. As you wind forward, you will need to use your fingers to gently move the threads over so they are running more straight from the reed to the back beam.

Can I mix 4/8 and 2/8? Yes, absolutely! In fact, this picture is using 4/8 for the Black and 2/8 for the White. Just remember that for the 2/8 you are warping slots and holes while with the 4/8 you are warping the slots only! It might be useful to create your own warping chart and tape it to your reed. For complex warping patterns I often write the pattern on painter’s tape and tape it to the loom. I will do the same when weaving.
In my Classic Elegance class, I used Hempathy (4/8 weight) with odd-numbered ends. Instead of cutting and tying at the peg, I rearranged ends in the heddle, which meant a bit of extra fiber manipulation during weaving.
Yes, using 2/8 would have been far easier! But the resulting towel in Hempathy or Zooey is worth it.
Want to try this towel for yourself? You can get it here. As mentioned, it is designed for heavier-weight material, but now you can easily convert it to 2/8!
💡 Enjoyed this post? I love sharing weaving tips, patterns, and tutorials to help you feel more confident at the loom. If you find my posts helpful and would like to support my work, you can do so here. No pressure — just a way to help me keep creating resources for weavers like you. 💛
Creative Solutions
A few weeks ago, I had a weaver in my home warping before a class. She was using multiple cones of cotton, and the colours were getting tangled as she warped. So, being the helpful sort that I am, I went to grab my cone holder. But before I could get it, I heard a slightly panicked, "NO!! Then I’ll need to buy more equipment, and I can’t do that right now!"

A few weeks ago, I had a weaver in my home warping before a class. She was using multiple cones of cotton, and the colours were getting tangled as she warped. So, being the helpful sort that I am, I went to grab my cone holder. But before I could get it, I heard a slightly panicked, "NO!! Then I’ll need to buy more equipment, and I can’t do that right now!"
The panic might have been in my head, because I totally get it! There are so many tools we can buy, so much yarn to collect, and then, of course, the additional looms...and suddenly, a relaxing hobby becomes a huge budget item—and not quite so relaxing.
This is my internal conversation while out shopping:
💖 Heart: Sees random beautiful thing… or something I actually need.
*Oh! This is beautiful, I love it, I could buy this!
🧠 Head: Would you like this… or more yarn?
💖 Heart: Sigh Yarn. Always more yarn. Puts random beautiful object back on the shelf and continues to wear 15-year-old jeans.
So, I completely understood her hesitation. I don’t want to be tempted to buy things I never needed—until I tried them! That meant it was time for a little creativity:
A laundry basket and a dowel.

I’m sure this isn’t a new trick, but if you haven’t tried it: Slide the cones onto the dowel, then rest the dowel across the handles of the laundry basket. You can even use small baskets from the dollar store and dedicate one to each colour.
This setup worked beautifully—except for one small issue. If she picked up any speed, the cones kept spinning when she stopped, and the cotton would fall off the cone, wrapping itself around the dowel. That stopped the dowel from turning and meant we had to keep unwrapping yarn mid-warping.
To fix it, I grabbed a couple of plastic lids, cut an “X” in the centre of each, and slid them onto the dowel on either side of the cones. Problem solved!
Once upon a time, I was a hobby farmer, and I heard the phrase:
"You know you’re a real farmer when you learn to make do with what you have."
Well, I think most hobbies are like that too. We can buy all the tools and all the things, but there is something delightfully satisfying about seeing a problem, coming up with a solution, and not spending a penny.
I’m curious…what are your creative solutions to weaving problems? Please share them in the comments.
Fixing Warping Errors
It doesn’t matter how experienced we are, we all make mistakes. Some say the the more experience you have the bigger the mistake. I suppose that might be true…mostly because we are a little over-confident and start working too fast, or we are under pressure and can’t focus.
It doesn’t matter how experienced we are, we all make mistakes. Some say the the more experience you have the bigger the mistake. I suppose that might be true…mostly because we are a little over-confident and start working too fast, or we are under pressure and can’t focus.
Not too long ago I warped almost an entire warp before realizing I had messed up. And until that point I was thrilled. I was estimating that by the time I had the warp wound on the back beam ready for threading I would have taken about 30 minutes! *sigh*. I ended up needing to unwind all that I had already warped except the first 10 slots. I’ll tell you how I did it without a tangled mess further on.
Most warping mistakes we make do not require a complete unwind, or unwinding at all. Let’s look at two of the most common mistakes.

Two ends through the same slot
Threading 2 ends into the same slot:
This is a super easy fix IF the doubled slot does not impact the pattern. If you notice this while warping, just keep going and ignore it until it is time to thread the heddle. When you get to the doubled slot, simply take the 2 extra ends and toss them off the back of the loom. Then just weave as usual. The ends hanging off the back will not interfere with you weaving. (You don’t need to make sure they are a pair, just pick two ends and chuck them!)
If tossing the ends off the back is going to cause a problem with the pattern…for example you needed 33 ends and with the doubled slot you have 33 ends but will have only 32 if you toss them off the back, there are a couple of options depending when you discovered the error.
A) When you notice the mistake, take a look at where it is in the reed compared to the beginning of the warp AND check the pattern to see if the ends need to be in a slot or hole (sometimes this matters!). If the end is closer to the beginning of the warp AND the slot/hole doesn’t matter, just keep warping. When you are threading the reed, move each slot over 1 until you reach the doubled slot. Take the doubled end and thread it into the now empty hole beside the doubled slot. If if isn’t very close to the beginning, leave a slot empty and keep warping. After winding, you can move the warp over until you reach the doubled slot. You should now have a space for the doubled end.
B) If the slot/hole matters, leave an empty slot at the next colour change. You most likely realized you had a mistake because the next repeat/colour change did not start in the correct slot or hole. At the next change, leave a space, check to be sure that the end is starting in the right slot or hole and continue warping. When it’s time to thread the heddle, move the threads over until you reach the empty slot. You should now have an end to put in it!
I’ve even got a video for you!
Skipping a slot: We have all done this. The solution depends on when we noticed the mistake!

Painter’s tape to help keep track!
A) If you are still warping the same colour, just go back and thread the slot, then return to where you left off. You will have some crossed threads behind the heddle but that is nothing to worry about.
B) If you notice it quite quickly while still warping, but are onto the next colour, leave an empty slot and keep warping. After winding, you can move the threads over one slot, starting from the empty slot and working back to the doubled slot.
C) Sometimes you will not notice this until it is time to thread the heddle, or maybe even until you start weaving if you are threading both slots and holes! If it doesn’t interfere with the pattern, treat the empty slot as a broken warp end, adding a new end, tying it onto the front beam and weighting it off the back of the loom. If it does interfere with the pattern, you will need to go back and move the ends over one until you have filled the slot. Time-consuming, yes, but not as time-consuming as undoing a whole warp!
Here’s a video!
Checking my warp!
Ok, now that we know about how to fix these mistakes, let’s just briefly touch on how to prevent them! The best way to prevent mistakes is to slow down and reduce distractions. But I get it, we get excited and want to get to the weaving, and we can’t always ignore our distractions (especially if we had a hand in making them!!). So, the next best thing is to check frequently. I try to check my work at each colour or block change. Sometimes I write the warping sequence on painter’s tape and tape it to my loom so I can do a quick check if the colour changes are frequent. I also warp using multiple pegs, so I check each time I move from one peg to the next. These don’t eliminate all my mistakes, but it does keep them to a minimum!
Now, as promised, how to unwind a whole warp without a tangled mess! I really wished I had videoed the process, but at the time I was not in a video-ing mood! The most important thing to remember that yarn under tension cannot tangle. Here’s a step by step:
Starting from the reed, use your fingers to follow the last end warped back to the peg.
Lift that end ONLY off the peg and wind it back onto the cone/skein/ball.
Only after the last end is fully wound, go back to the reed and follow the next end to the peg.
Repeat this as many times as needed to get back to the mistake.
Do not be tempted to try 2 or 3 ends at a time…I assure you it will not save time! In the end, it took me longer to unwind than wind, but there was no tangled mess and I preserved my yarn and my sanity!
Help! I didn’t Go Around the Warping Stick!!!
Even the most experience weavers make mistakes. Some are big, some are small, hardly ever are they complete disasters! The first thing to do is take a deep breath and relax. Maybe walk away for a few minutes and settle with a warm cup of tea (tea solves all my weaving woes).
I was teaching a class last weekend, and when we started I asked the students that when they found a mistake, not to unwind to fix it, but call me…because there are lots of ways to fix mistakes without having to undo anything! And, how better to teach than to turn mistakes into teaching moments?
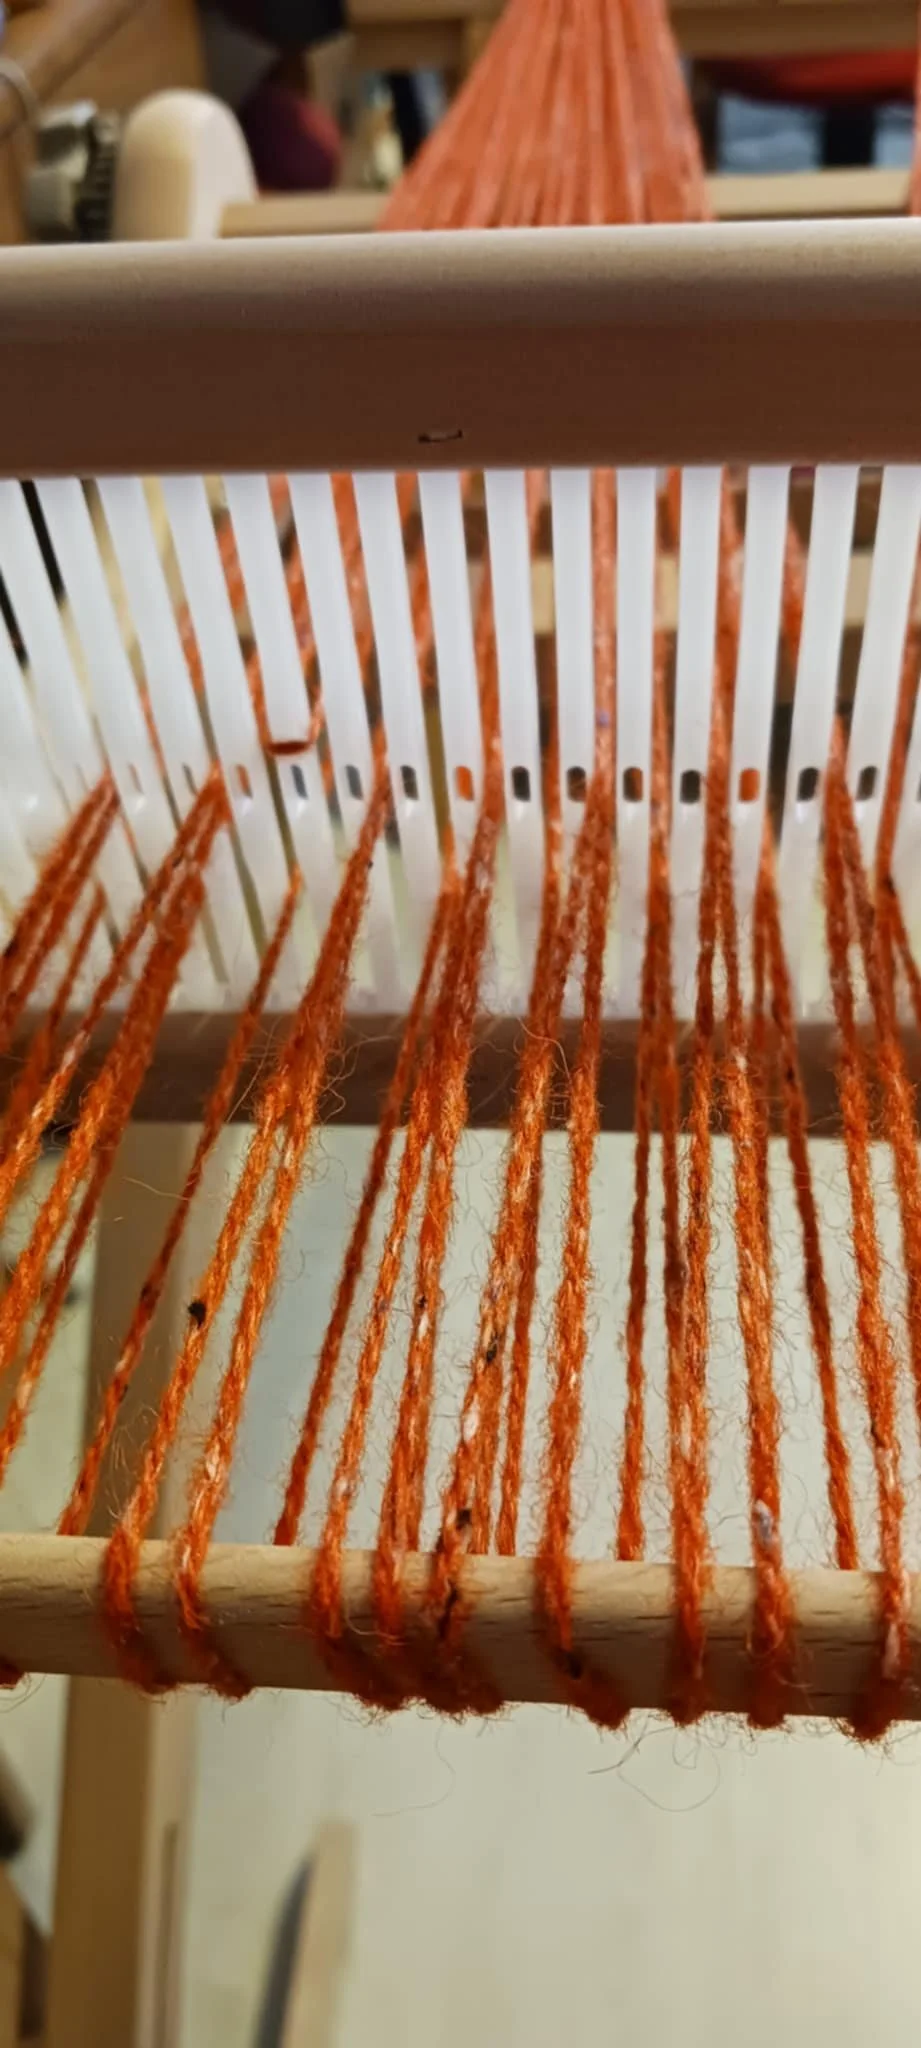
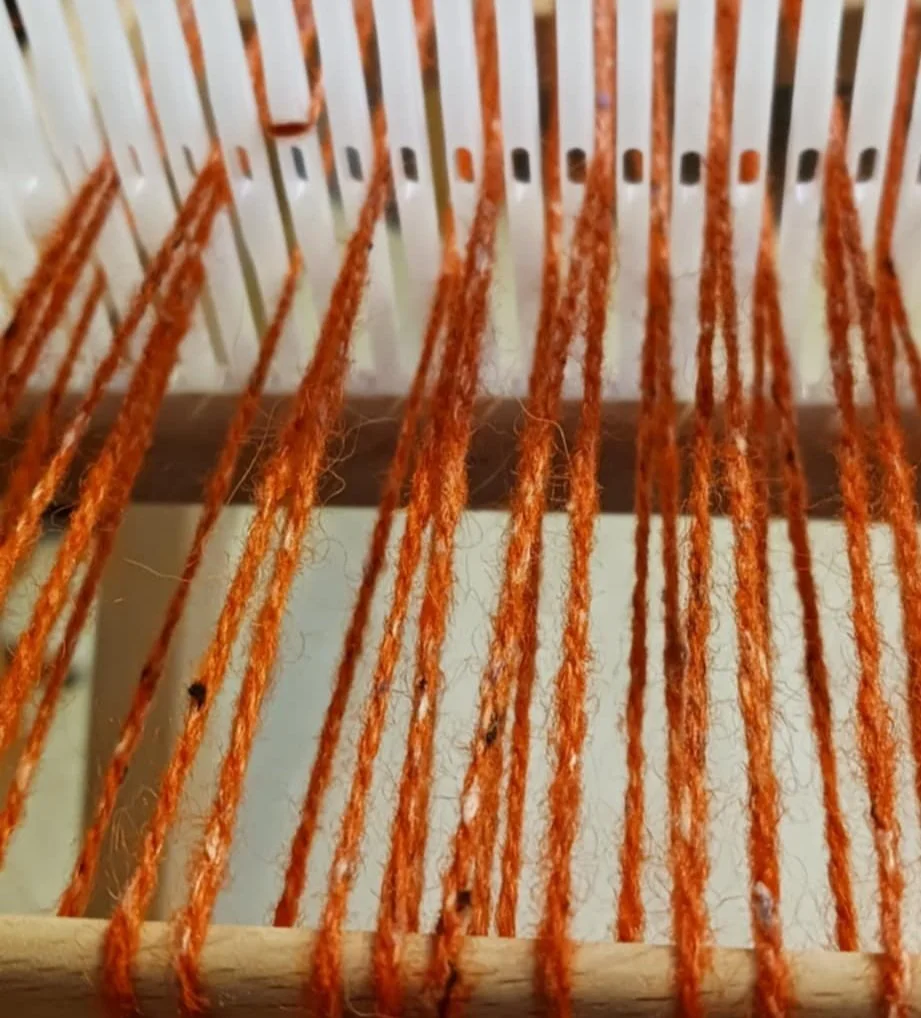
As my students warp, I wander around the room helping as needed, but really, I’m looking to make sure that everyone is getting their cotton wrapped around that back warping stick. It’s such an easy thing to miss but so important to warping! And, if you warp standing in front of your loom, you might miss this until it is time to wind your warp. The first time this happened to me I carefully unwound my warp and fixed my mistake. The second time this happened I decided there must be an easier way! And, of course, there is!

Step 1. Always check before winding to be sure that all the warp ends are wrapped around the back warping stick. Not sure? If you have an end going from one slot/hole directly to the next slot/hole on the reed, you forgot!
Step 2. Grab some scrap yarn (it doesn’t matter what it is as long as you can tie it in a knot)! Insert your finger or threading hook between the reed and the warp and pull it back a little. There should be some give.
Step 3. Loop the scrap yarn through the warp thread and tie the ends together around the warping stick.
Done! It really is that easy. Your warp will not reach all the way back to the warping stick, but the scrap yarn will hold it back and in place so that you can wind and not run into tension issues.
I’ve got a video…sadly my hands are somewhat in the way, but hopefully you can get the idea.

What to do…When You Forgot To Hemstitch
I use the word mistake a lot, but in my mind, I have reframed them from being a bad thing to being a learning opportunity. I love that in weaving there are almost no mistakes that cannot be fixed, and since hobby weavers are not weaving to earn a living, the worst that can happen is some string is wasted. The stakes are pretty low! If you are a perfectionist, try to view your weaving as a “safe space” for making mistakes. As you learn to embrace learning experiences in your weaving life, you may find that it overflows into your daily life in a positive way. (Can you tell my educational background is social work?!)

I use the word mistake a lot, but in my mind, I have reframed them from being a bad thing to being a learning opportunity. I love that in weaving there are almost no mistakes that cannot be fixed, and since hobby weavers are not weaving to earn a living, the worst that can happen is some string is wasted. The stakes are pretty low! If you are a perfectionist, try to view your weaving as a “safe space” for making mistakes. As you learn to embrace learning experiences in your weaving life, you may find that it overflows into your daily life in a positive way. (Can you tell my educational background is social work?!)
Let’s slip back to the yarn wasted: this, I agree, in the short term can be pretty tragic and you are allowed to shed a few tears, stomp your feet or whatever it is you need to do to express your frustration and disappointment. Then do a quick Google search to see if your project can be saved or pop me an email, I try hard to answer, and who knows, your disaster could be the basis of a new blog post. (I’ve even set this email link to have HELP in the subject line!)

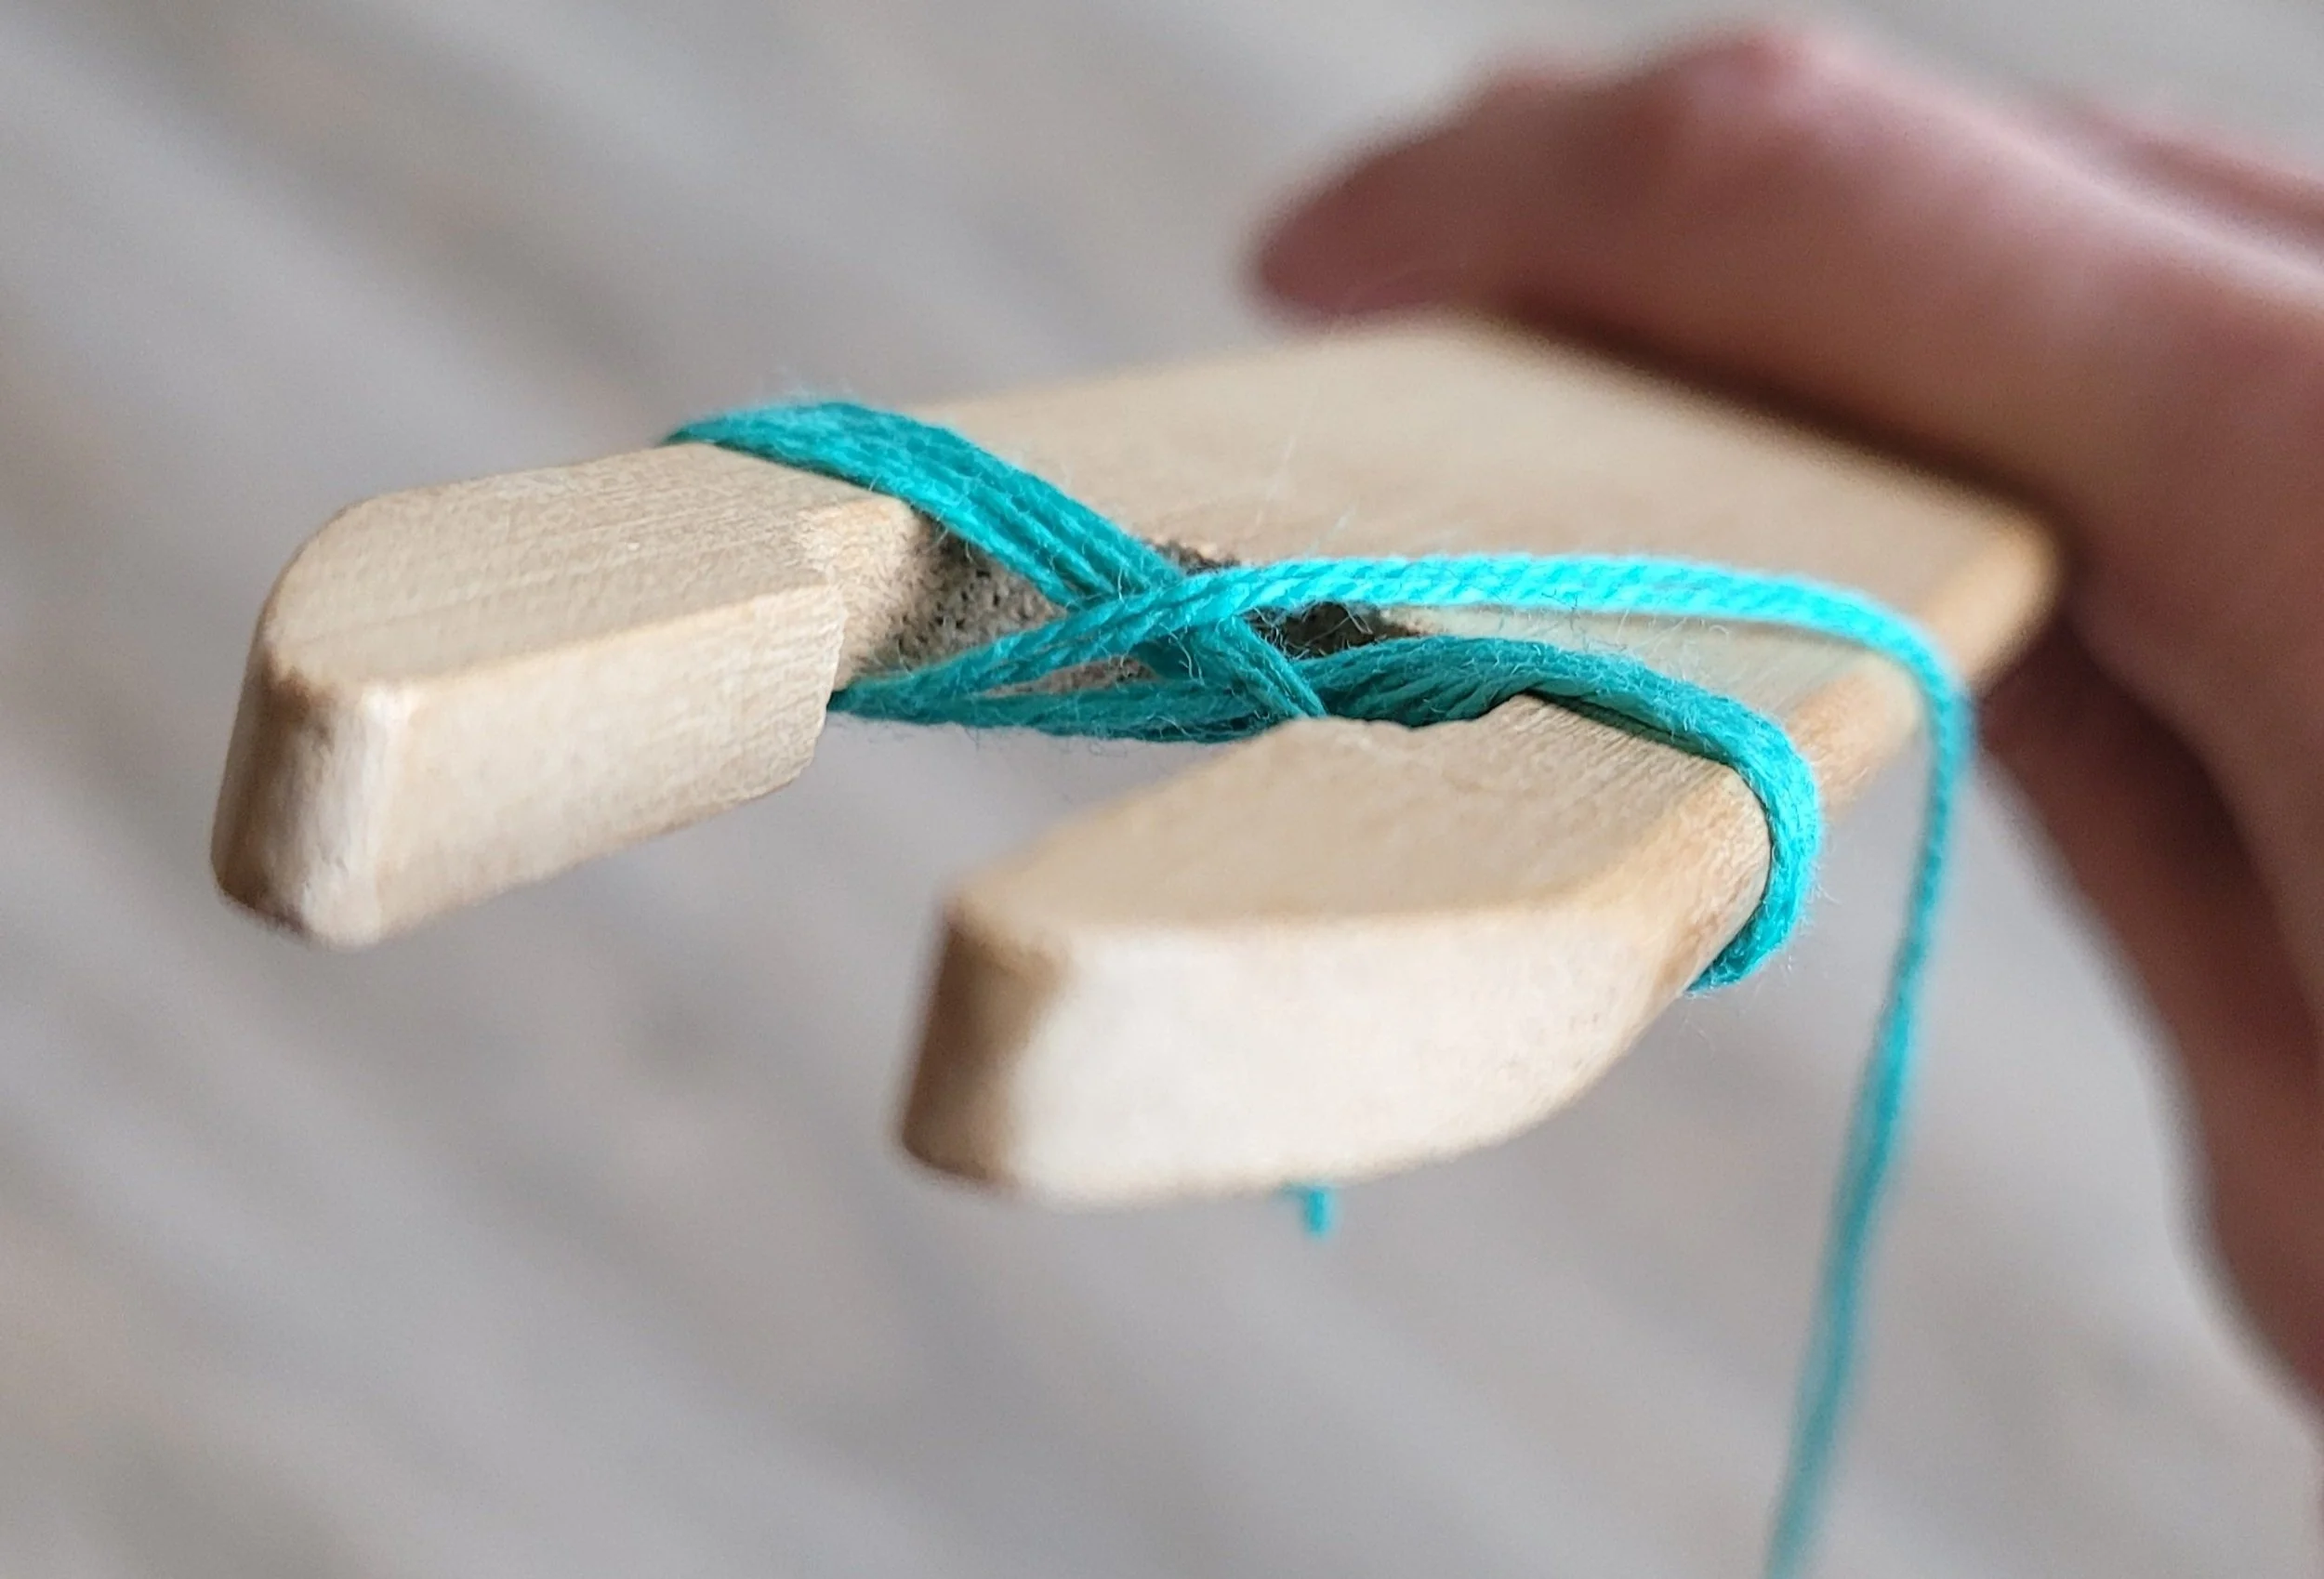
See that black thread? That’s my tail for hemstitching!
Ok, moving on…I had far more learning opportunities than I wanted this past week, most were not related to weaving and had something to do with my brain malfunctioning (I think it’s my age? Or maybe just too many ideas in my brain?) Anyway, I was super excited about the project on my loom. I carefully measured the tail needed for hemstitching and began weaving away. Well into the weaving process…probably around the 36” mark, I noticed a lot of yarn wrapped around the front beam. Confused, I wondered if somehow the weft had gotten wrapped around the beam and I was going to have a mess. But no: it was my tail for hemstitching! There was a piteous cry (I don’t curse, but I have a very piteous “oh no!” )
What to do? I had several options:
I could try fringe twisting without a hemstitch. It would probably work and while I love how hemstitching looks, I’m not fond of doing it.
I could tie knots instead of hemstitching, but I’m pretty sure this yarn will fray with use.
I could hemstitch after taking the scarf off the loom. Have you ever tried hemstitching a project not under tension? It’s not fun!
I could try winding the whole project back after weaving. What was there to lose? If it didn’t work, I could still do any of the other options.
So I kept merrily weaving along. It was a fun weave…no pattern yet, but it will be coming eventually. When I got to the end, I hemstitched. Then, I took the heddle and placed it behind the heddle block. With one hand on each pawl, I unlocked the front and started winding back onto the back beam. It was sooo smooth! That heddle just rolled back around that back beam like it was meant to do that all along. Maybe you have a different loom, you might need to help ease the heddle around. When I got to the beginning of the work I locked everything back in place and hemstitched. Easy-peasey! I didn’t take a lot of pictures of the process, but here’s a video!
On a side note…I love helping weavers and solving problems. I also do (try) to make a living weaving. I’m always happy to help solve weaving problems, so don’t hesitate to reach out if your “learning opportunity” has you stumped. Your questions keep me inspired and I love being part of your weaving community! If my tips or advice have been helpful, and you’d like to support my work, I have a donation option on my website. There’s absolutely no pressure—it’s just a way to help me keep creating resources and sharing what I love with you. Whether you donate or not, I love hearing from you and being a part of your weaving adventure!

Picks Per Inch: A Beginner’s Guide
There’s a lot to learn when you first start to weave. One of the first things you will notice is that weavers have their own language. We start taking about reeds and sheds and warps and wefts, fell lines, epi, ppi and before you know it, the non-initiated have glazed over and all they hear is blah, blah, blah. As a retail worker and a lover of weaving, I’ve learned to explain new terms as I used them and quit talking when the glaze appears!
There’s a lot to learn when you first start to weave. One of the first things you will notice is that weavers have their own language. We start taking about reeds and sheds and warps and wefts, fell lines, epi, ppi and before you know it, the non-initiated have glazed over and all they hear is blah, blah, blah. As a retail worker and a lover of weaving, I’ve learned to explain new terms as I used them and quit talking when the glaze appears!
As a weaving instructor, there are a few things that I harp on (just ask my students!) and one of them is ppi.
PPI? Please speak English! Ppi refers to Picks Per Inch. Still doesn’t make sense? No worries, by the end of this post you will know everything you need to know and sound like a pro too!
First, a pick is one weft thread. So every time the shuttle goes through the weave, it is called a pick. When you count how many ends are in one inch, you get the picks per inch (ppi). Pretty simple. But why does this even matter?

Inkle weaving…no weft visible
Picks per inch plays a role in the structure of the finished fabric.
Picks per inch plays a role in the structure of the finished fabric. Lots of picks per inch in relation to the ends per inch (how many warp ends are in one inch) will give a weft-faced fabric. This means you will see the weft but not the warp. (Think Krokbragd.) Fewer picks per inch in relation to ends per inch means that you will have a warp-faced fabric. This means you will see the warp much more than the weft. (Think inkle weaving.)
If you are following a pattern, think of ppi in the same way as gauge in knitting. When you have too many picks per inch, you will run out of material and the project will be much shorter and denser. If you have too few picks per inch the fabric will be gauzy and may not hold together well. (Sleazy is the actual technical term!)
Balanced Weave
Since I am focused on beginners, I’m going to stick to a balanced weave. A balanced weave means that you have the same number of picks per inch as you have ends per inch. Your ends per inch is determined by your reed. If you are using a 7.5 dent reed, your ends per inch is 7.5, so for a balanced weave, you should have about 7.5 picks per inch. This works when you are using similar weights for warp end weft and I will be assuming this for the remainder of this post.
I’m using my 10 dent reed and have about 10ppi
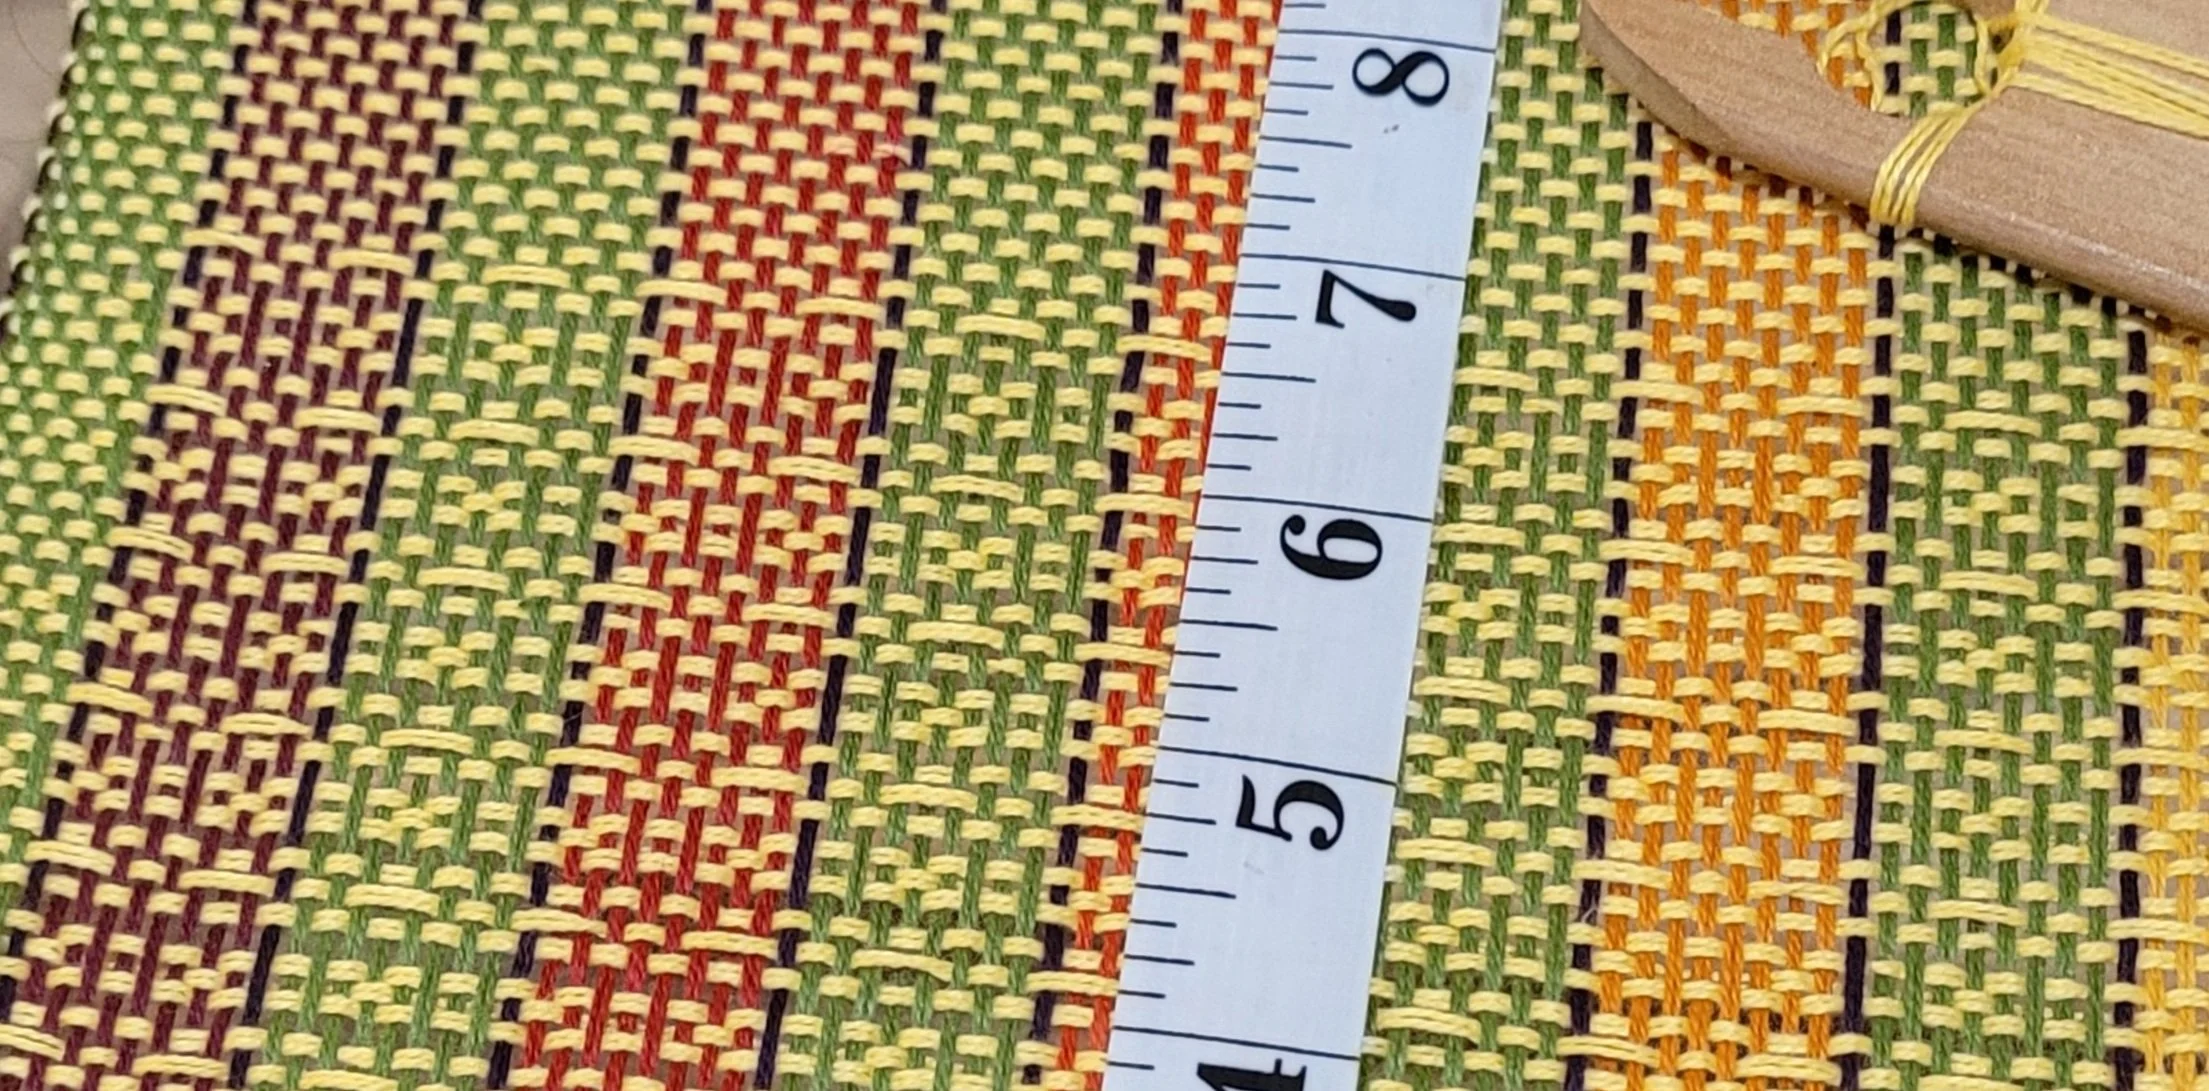
Measuring Picks Per Inch
There are several tools that are designed to help you measure wraps per inch (wpi) another term we’ll talk about another time. These tools also work well for measuring your ppi. Personally, I prefer my tape measure.
As a beginner, you should be checking your ppi frequently. Every few inches, when you wind forward and when you come back to your loom. As you become more experienced, your eye will recognize when your picks per inch is off, but you should should still measure at the beginning of a project to be sure you are starting off right.
Let me share a true story here. As a teacher, I learn things every class I teach (I might learn more than my students). Anyway, I was teaching and all was going well with the pattern and weaving (okay, there was 1 disaster but I’ll save that for another blog) and it was time for the students to go home and finish their project. Later that week I received a call from a student looking for more weft yarn as she had run out. As always, when something goes wrong with a pattern, I panicked and wondered if I had made a mistake. But since I had woven this several times and had leftovers, and other students also had leftovers, I began to breathe again. I asked if she had checked her picks per inch. She had not. And so I learned to stress this many times in every class! There was a happy resolution though, we were able to find more yarn, though of a slightly different dye lot, and the scarf got finished and we are still friends! (Because weavers truly are the nicest people!)
Adjusting Picks Per Inch
On the loom and after washing!
Ok, so now let’s pretend you are weaving using a 7.5 dent reed. You’ve measured your picks per inch and they are at 14…now what??? (Most new weavers have way too many picks per inch, not too few.)
First, how you press with your reed matters! One gentle press is all that is needed. Some people refer to the pressing as allowing the weft to gently “kiss” the previous weft pick. You want spaces in your weave. Nice neat squares of empty space is perfect! When the project is no longer under tension, and has been washed, those holes will fill in. But they need the space! If they don’t have the space, you will have a very dense stiff fabric with little to no drape and the loveliness of the fibre will be lost.
Second, adjust your tension. If your tension is loose, the weft can pack in tighter. So a tighter warp means that the weft will pack in less tightly.
It takes practise to get consistent ppi, but it will become second nature and your eye will learn to recognize when you are even a quarter inch off!
PS - Did you notice that every ppi picture was a different project? That’s because I measure (and take pictures) of the ppi in every project!


Yarn Substitutions
We’ve all been there. We have the pattern in hand but no yarn. We visit our LYS and they don’t have the yarn. They can maybe order it in, but we want to start our project now! What to do? How do we know what else we can use?
I don’t have all the answers because I have not used all the yarns in all the projects *sigh*, but, here’s what I do when people message me asking for ideas:

I open up Ravelry and go to the yarn section. Type in the yarn, then pick a project. It doesn’t really matter what project but if I’m making a scarf I’m going to look at a scarf pattern just because. I do want to pick one that has many projects.
Once I find a pattern that has lots of projects, I click on the pattern, then open “yarn ideas”.
Once I have all the yarn choices, I can start picking the best ones for the project.
Now, I know not everyone uses Ravelry, so as I was writing this I thought there must be an alternative, so I googled “yarn substitution” and found YarnSub. I expect many of you reading this so far was wondering why I didn’t go to this in the first place! Sometimes if something works, I don’t go looking for something better. YarnSub is super simple. Just type in the yarn and search! I tested it with lots of different yarns and it could only not find one (and I did find the same yarn on Ravelry). You can even search by weight and fibre content. Search results will bring up the yarns with the ball band description. I now have YarnSub added to my phone!
Right, so we now have a zillion and a half choices, how do I know which one to pick?
First, eliminate anything you think you can’t get. Remember, you went to your local yarn shop for a reason so see if they carry any of the options.
Second, look at the fibre content. Animal fibres behave differently from plant fibres so replacing cotton with wool will not give the same effect as the pattern. You might decide to go with it anyway, but know it will not be the same as the pattern and you might need to change things up a bit.
Third, if it is for warp, make sure the yarn you are looking at is warp friendly. Of course you can’t start pulling yarn apart before buying, but you can look pretty closely. Is it a loose single ply? Probably not ok. Is it super fuzzy but the yarn called for is smooth? Probably not ok.
Fourth, look at the structure of the yarn. If the yarn called for in the pattern is super stretchy but the yarn is in the shop has no stretch, it’s probably not a good substitution. As a general rule, plant fibres do not have as much stretch as a plied animal fibre.
Finally, do talk to the yarn shop staff. For they most part they are friendly happy people who really want you to go home and make a fabulous project that you love. Yarn shop staff are a wealth of information that they can’t wait to share! They will be able to read the info about the yarn in your pattern and compare it to the yarns you are considering and tell you which would be the best choice and why.


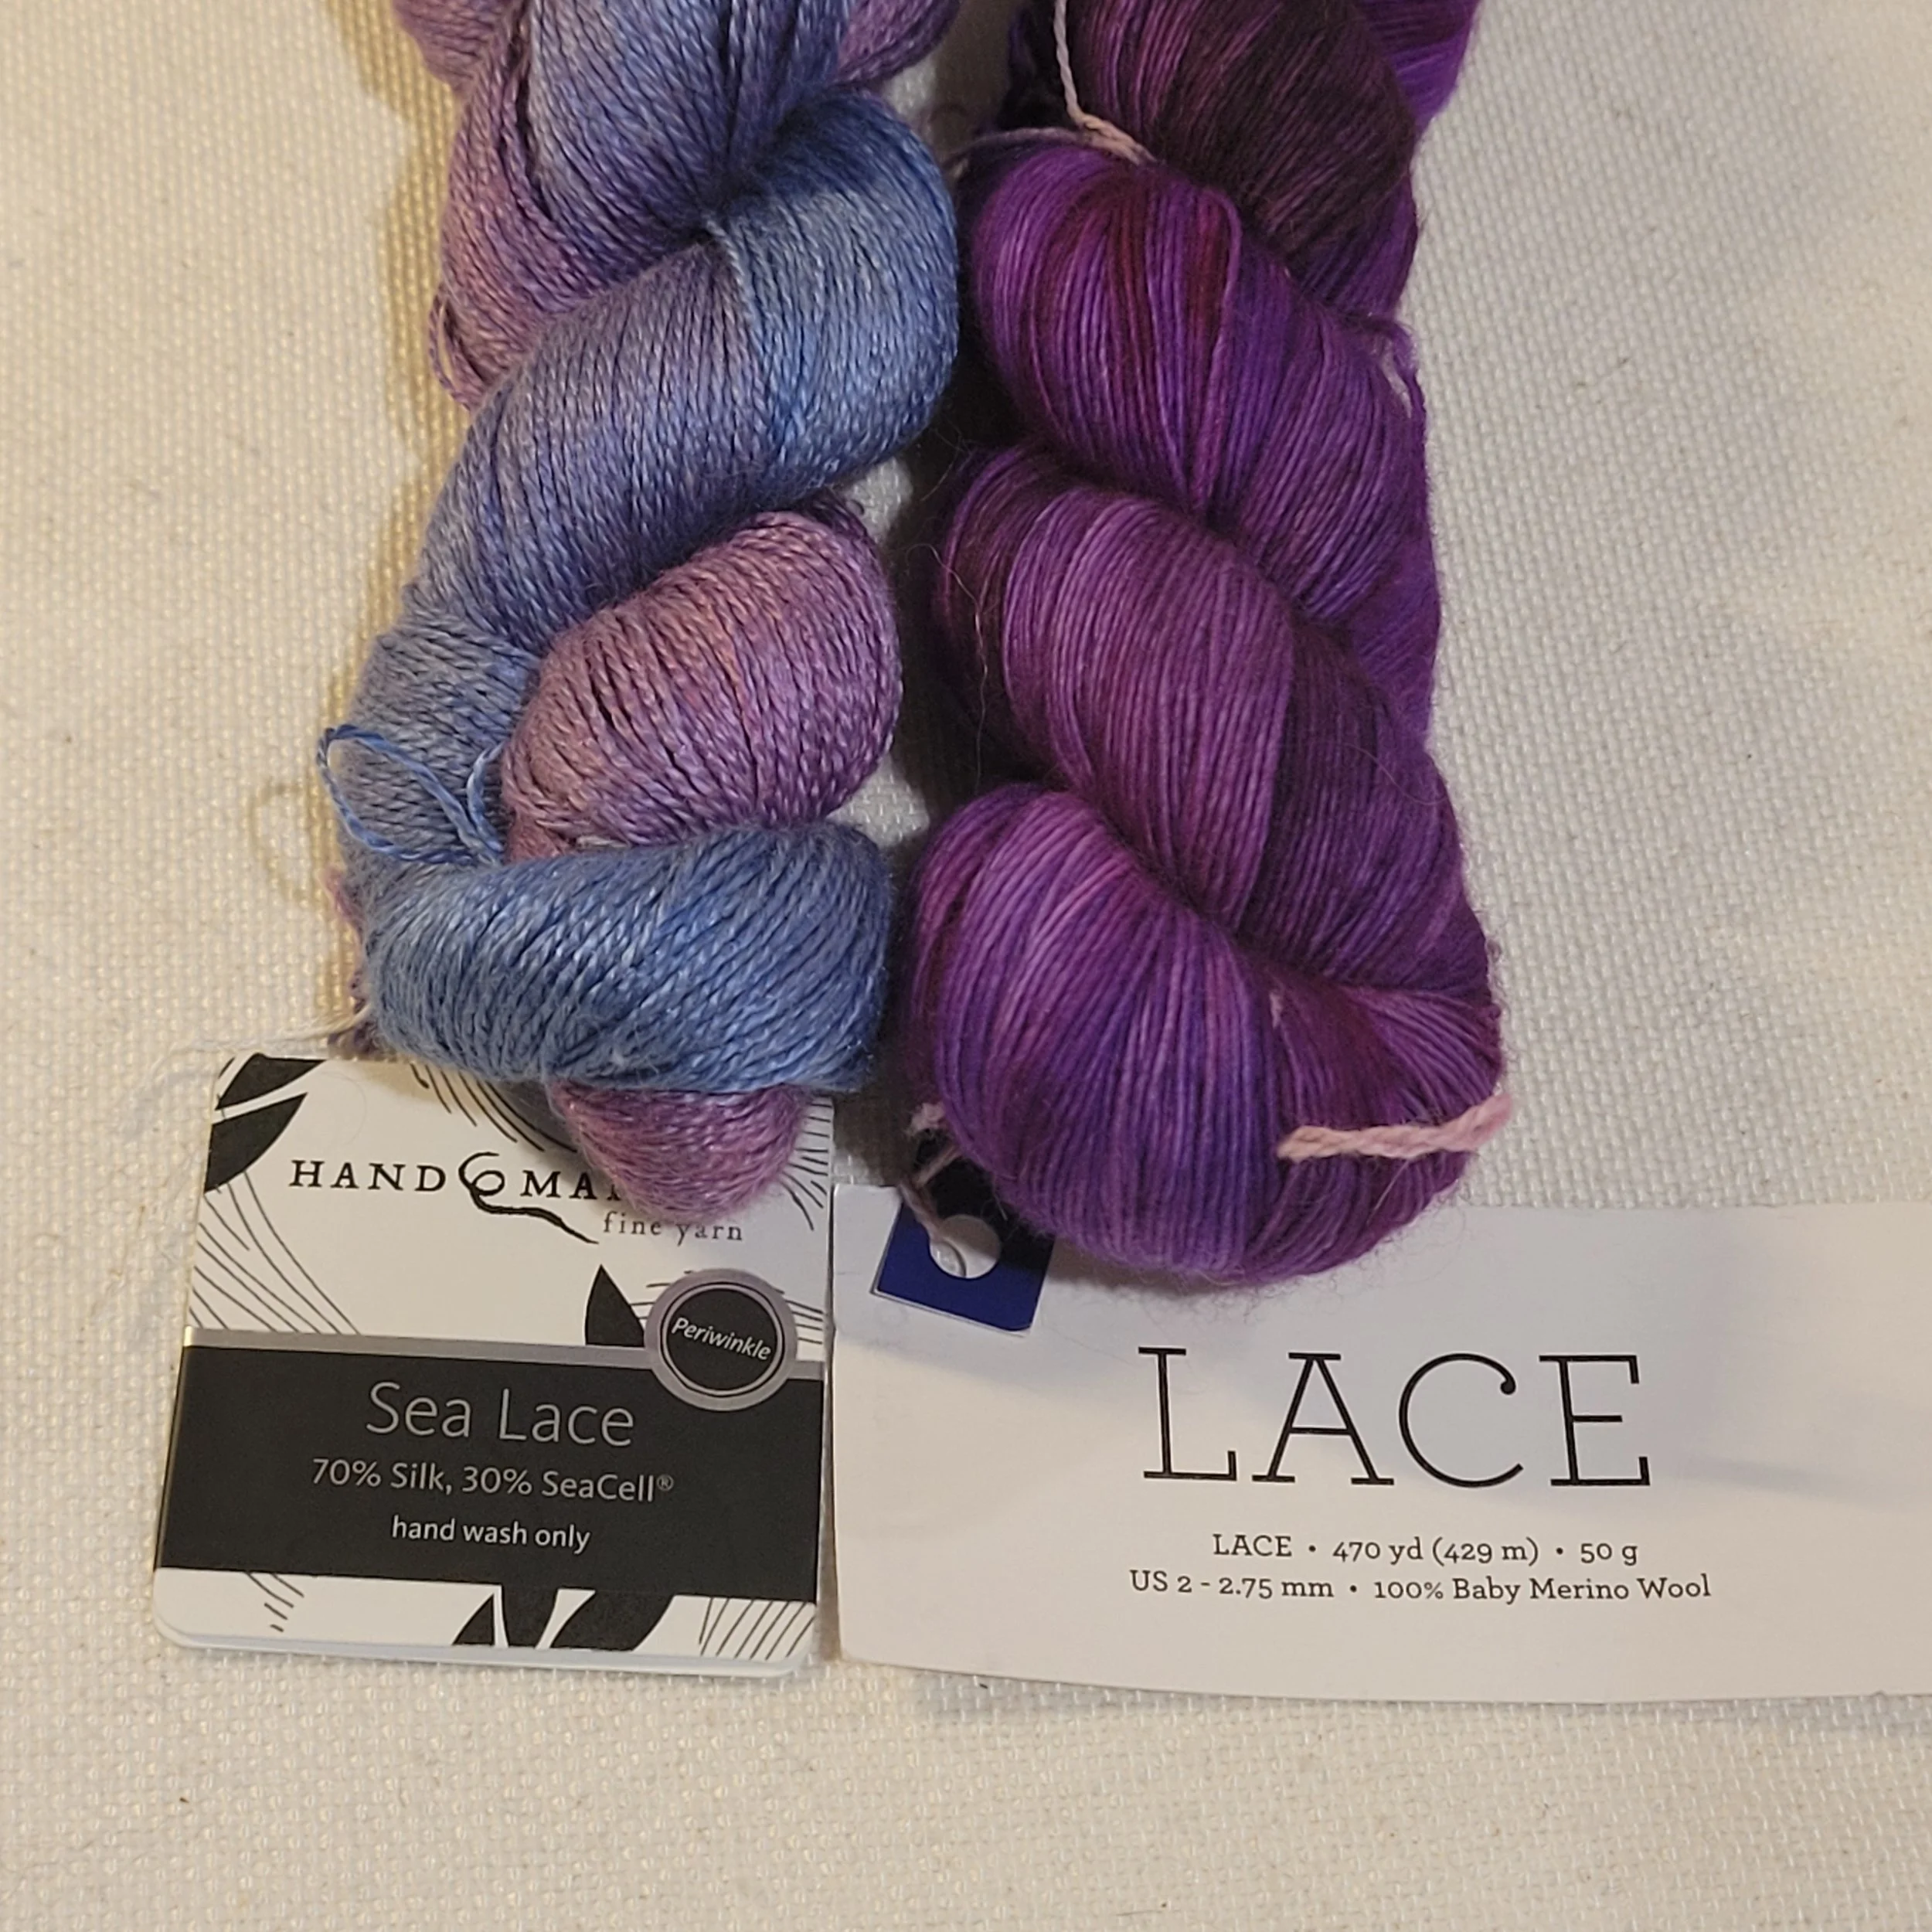
The yarns in the photo on the left might substitute well, the weights are the same and will work in the same reed. Also, both contain mostly animal fibre. But the tweedy bits in the Kathmandu will have a visual impact and might obscure a pick-up pattern. The yarns in the middle picture are both the same weight. The cotton content in the Illimani however means that there is very little stretch while the Juniper Moon has a fair bit of stretch. This might be fine, but you may need to add in extra length to the warp on the stretchy yarn to maintain the same finished length. And, the Juniper Moon is superwash meaning I might use a smaller reed. The final picture: again, the weights are similar but the content different. The Sea Lace will not stretch or full very much, but will give a beautiful shine. The Lace is has no shine and will full (in fact, it will felt with wear). That means I can use it on a bigger reed than the Sea Lace even though the Sea Lace is slightly heavier.
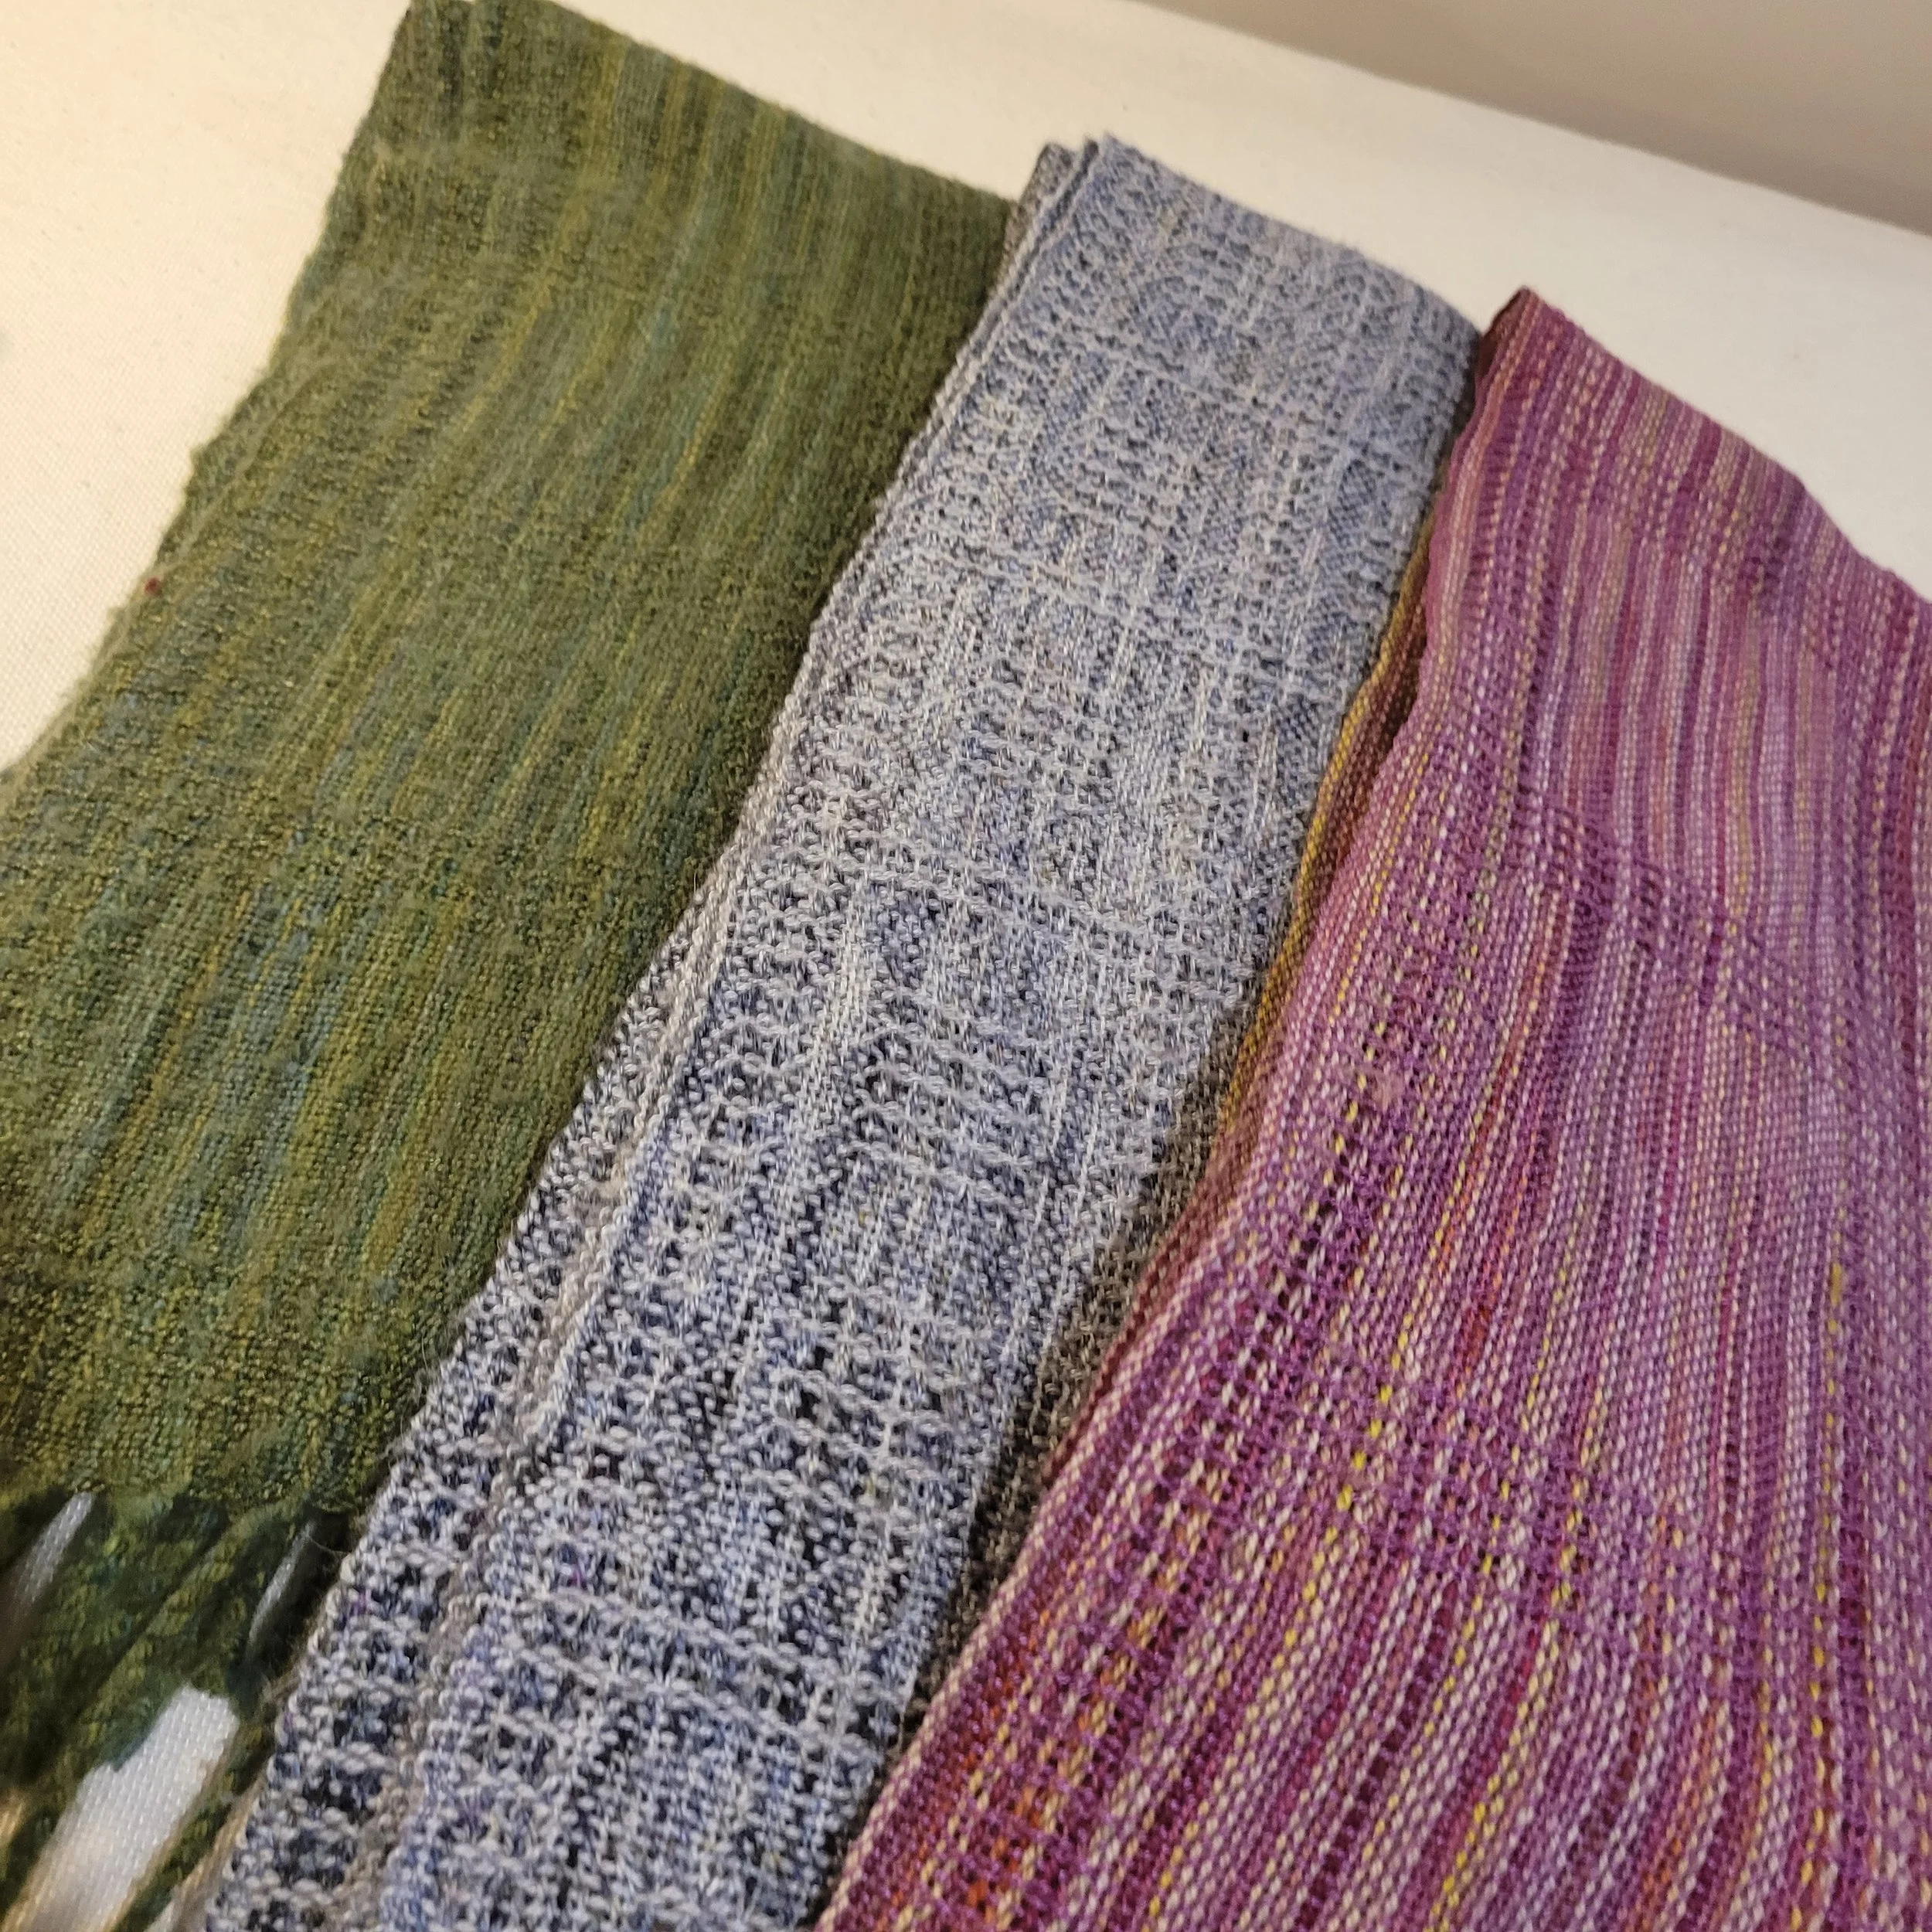
Three almost identical scarfs using three different yarns with very different (but lovely) results.
Now for the disclaimer. (Maybe I should have put this at the top!) When a designer suggests a yarn, it is because we have used the yarn for the project and know it works. When we suggest alternatives, we might never have seen or touched the yarn. Sometimes we are familiar enough with the alternative to be able to confidently say yes, this will work. Other times we are much more tentative. You’ll often read me saying it *should* work but I’ve never tried it.
When you make substitutions you are taking your life into your own hands. And this is exactly what I think you should be doing! Play with yarn, learn how different yarns react to tension and being released from tension. Take a tea towel pattern and weave a scarf using wool instead. There are no serious consequences from taking weaving risks and so much to gain. Yes, you may end up with a project that didn’t turn out as intended, but you will have learned some important information about your yarn and the pattern. And save the piece, you never know when it might come in handy!
Weaver Stories - Kim
The fibre arts seem to truly be a way to heal both emotional and physical injuries. Mary Black (Author of The Key to Weaving) knew this when she used weaving as physiotherapy for soldiers returning home and we seem to know it instinctively!
This week we are going to hear from Kim. I think that her story is one that many of us can relate to. How many of us view weaving as our “safe place” or a sanctuary from the world? We have the chance to take a deep breath, slow down and release the pent-up anxieties within us.
Weaving is our safe space and sanctuary.
The fibre arts seem to truly be a way to heal both emotional and physical injuries. Mary Black (Author of The Key to Weaving) knew this when she used weaving as physiotherapy for soldiers returning home and we seem to know it instinctively!
This week we are going to hear from Kim. I think that her story is one that many of us can relate to. How many of us view weaving as our “safe place” or a sanctuary from the world? We have the chance to take a deep breath, slow down and release the pent-up anxieties within us.
Here is Kim’s weaving story:
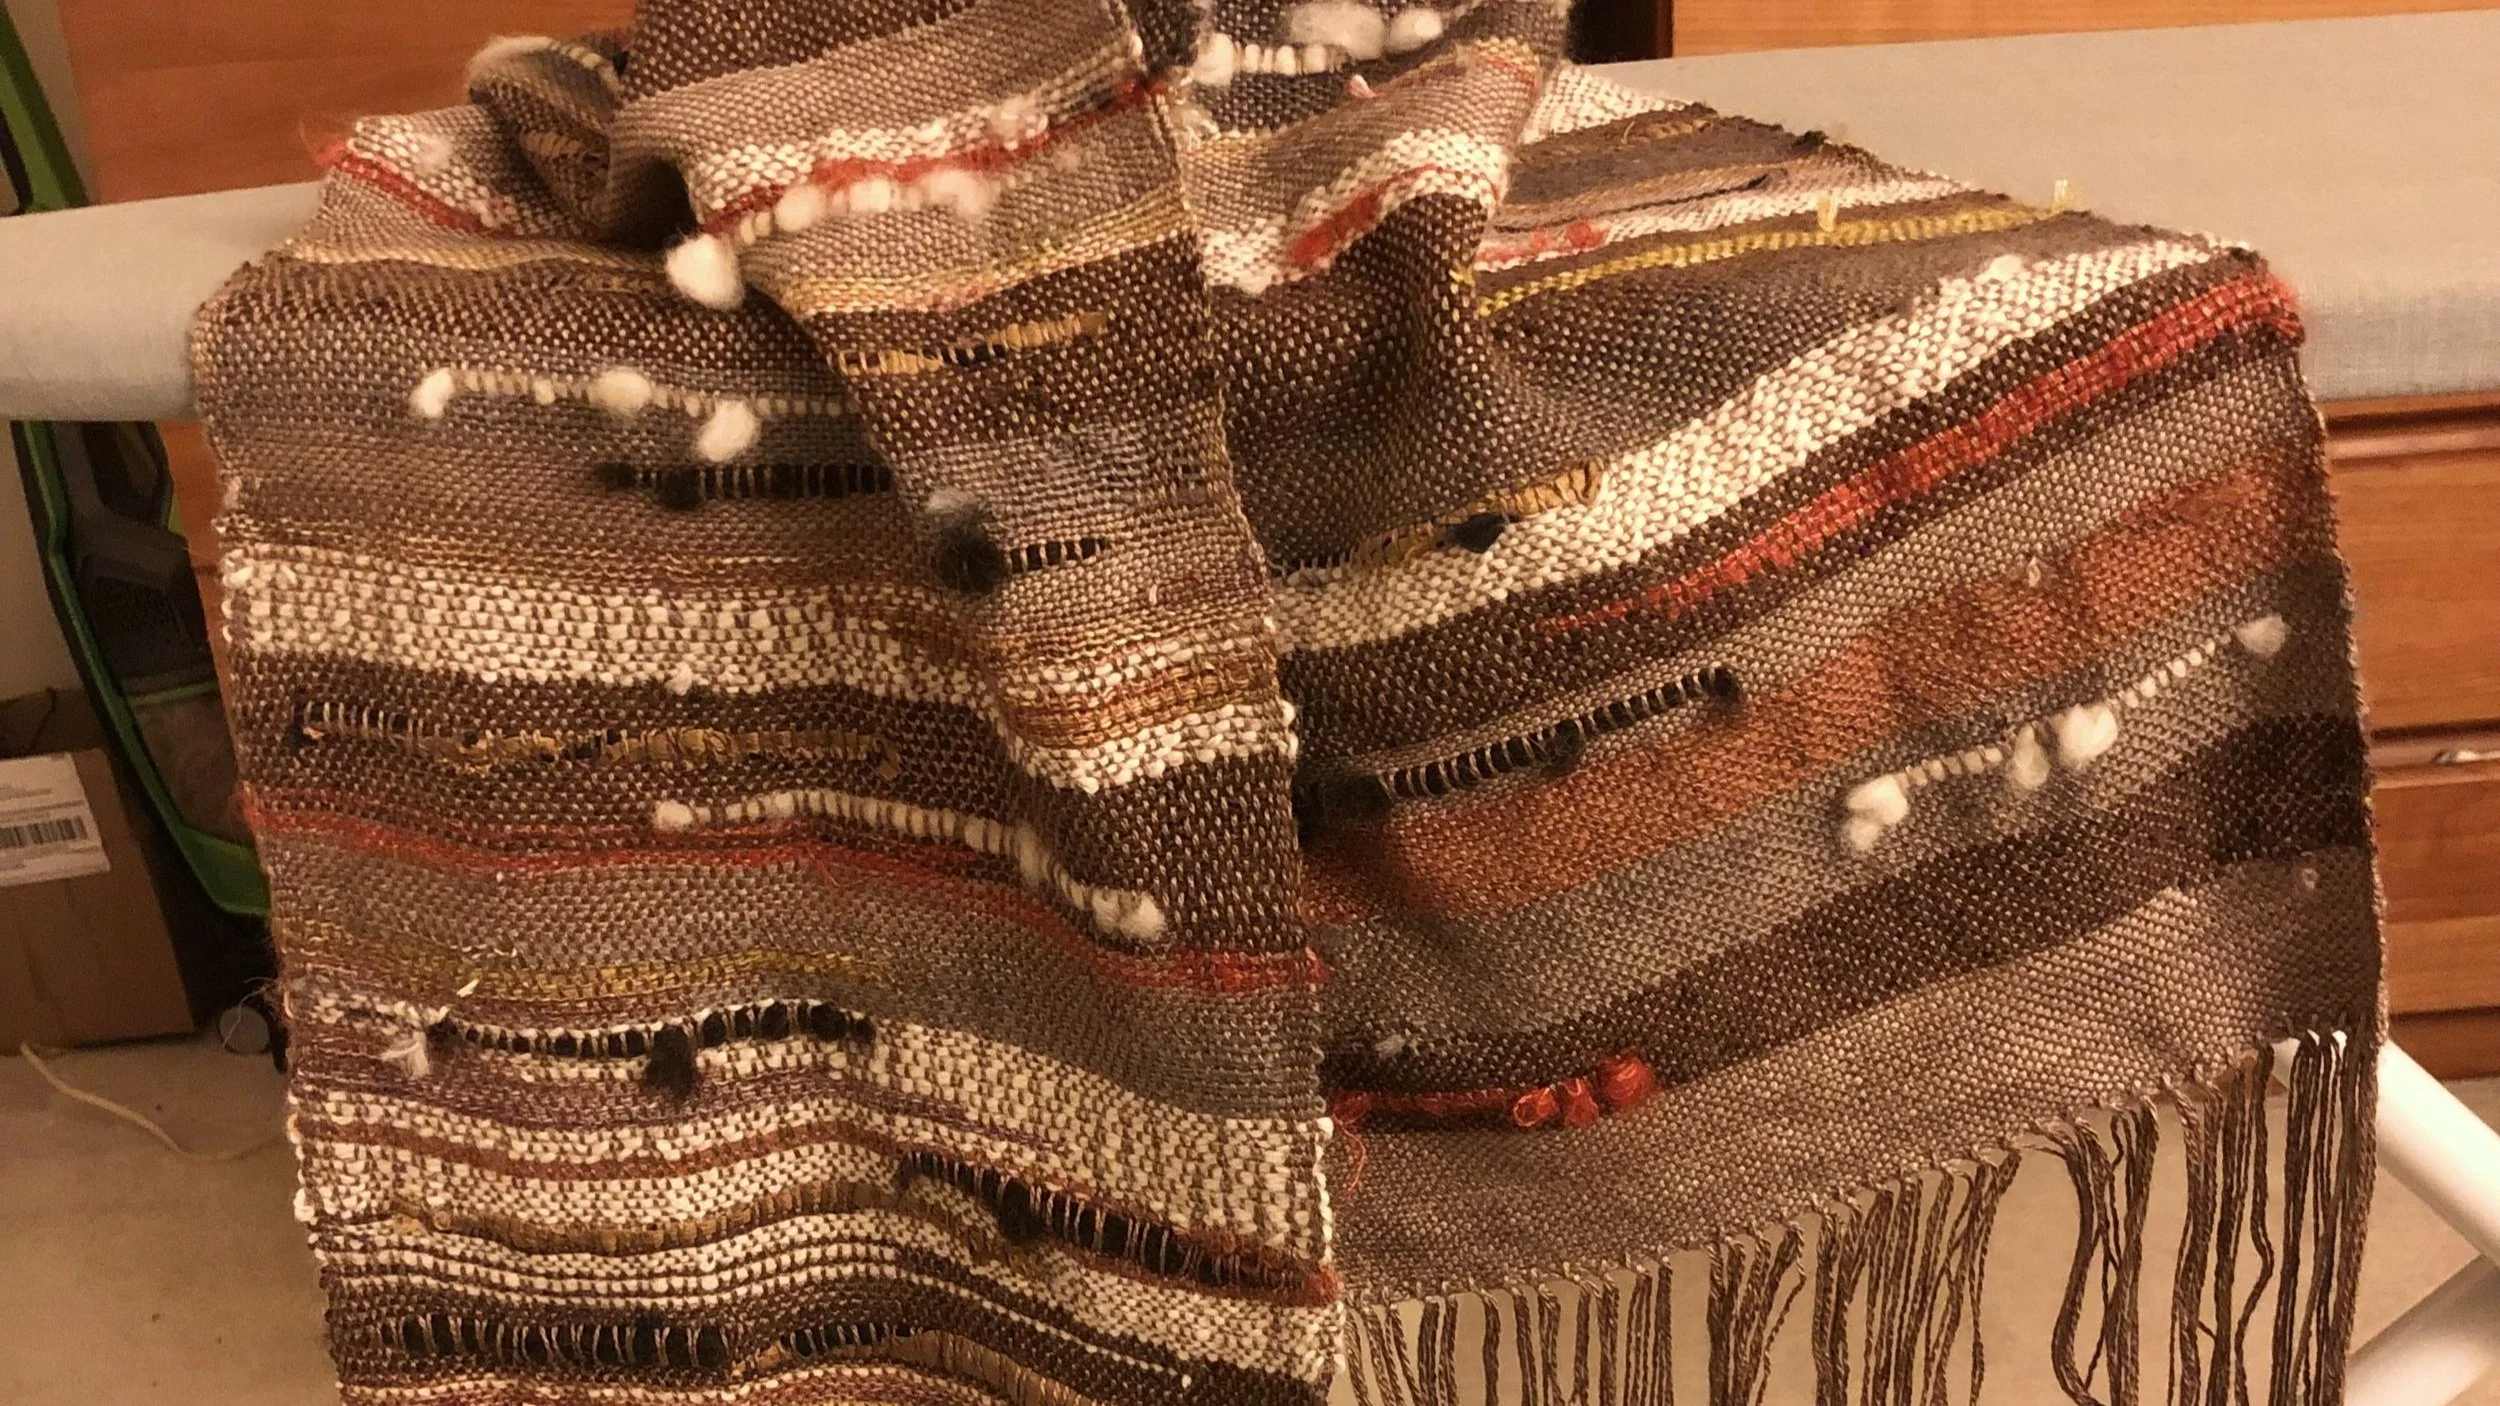
These are some of Kim’s weaves…and I think that’s a tapestry loom we see too!
I started weaving about five or six years ago. I had a severe head trauma that left me, shall I say, "different". Poor memory, attention span, etc. I took up spinning because it intrigued me and also became a kind of meditation helping with focus. However I did not know how to knit or weave. So out to bookstores to find books to help me learn. I am still very much a beginner as I live alone and in a rural area and am a slow learner but I absolutely love the process. I can give myself permission to go slow cuz that's the only way to go. I have since been diagnosed with early AD and the medication prescribed has given me a whole new perspective and focus so I can now complete projects. I was diagnosed in mid-May, meds kicked in by mid-June. Point being I have woven and learned more in a month then I had in all the years before. My hope now is to find a teacher so I can achieve more of my goals. I have a massive collection of many different looms because every time I was not able to figure one out I thought maybe another would be easier. Nope. I have got the rigid heddle down (sort of) so now onto a four-shaft. Learning Krokbragd is my ultimate goal. Anyhow spinning and weaving are my most ecstatic joys, which I live for and do every day. Life is a blessing and even the darkest times can evolve into something bright and beautiful. I hope everyone can find their joy and bliss in creativity.
All the best and warmest regards,
Kim
Kim, thank you so much for sharing your joy as well as your pain with us. May weaving always bring you joy and best of luck in your continued weaving journey!
Kim mentions books helped her learn. I thought I’d share my favourite books.
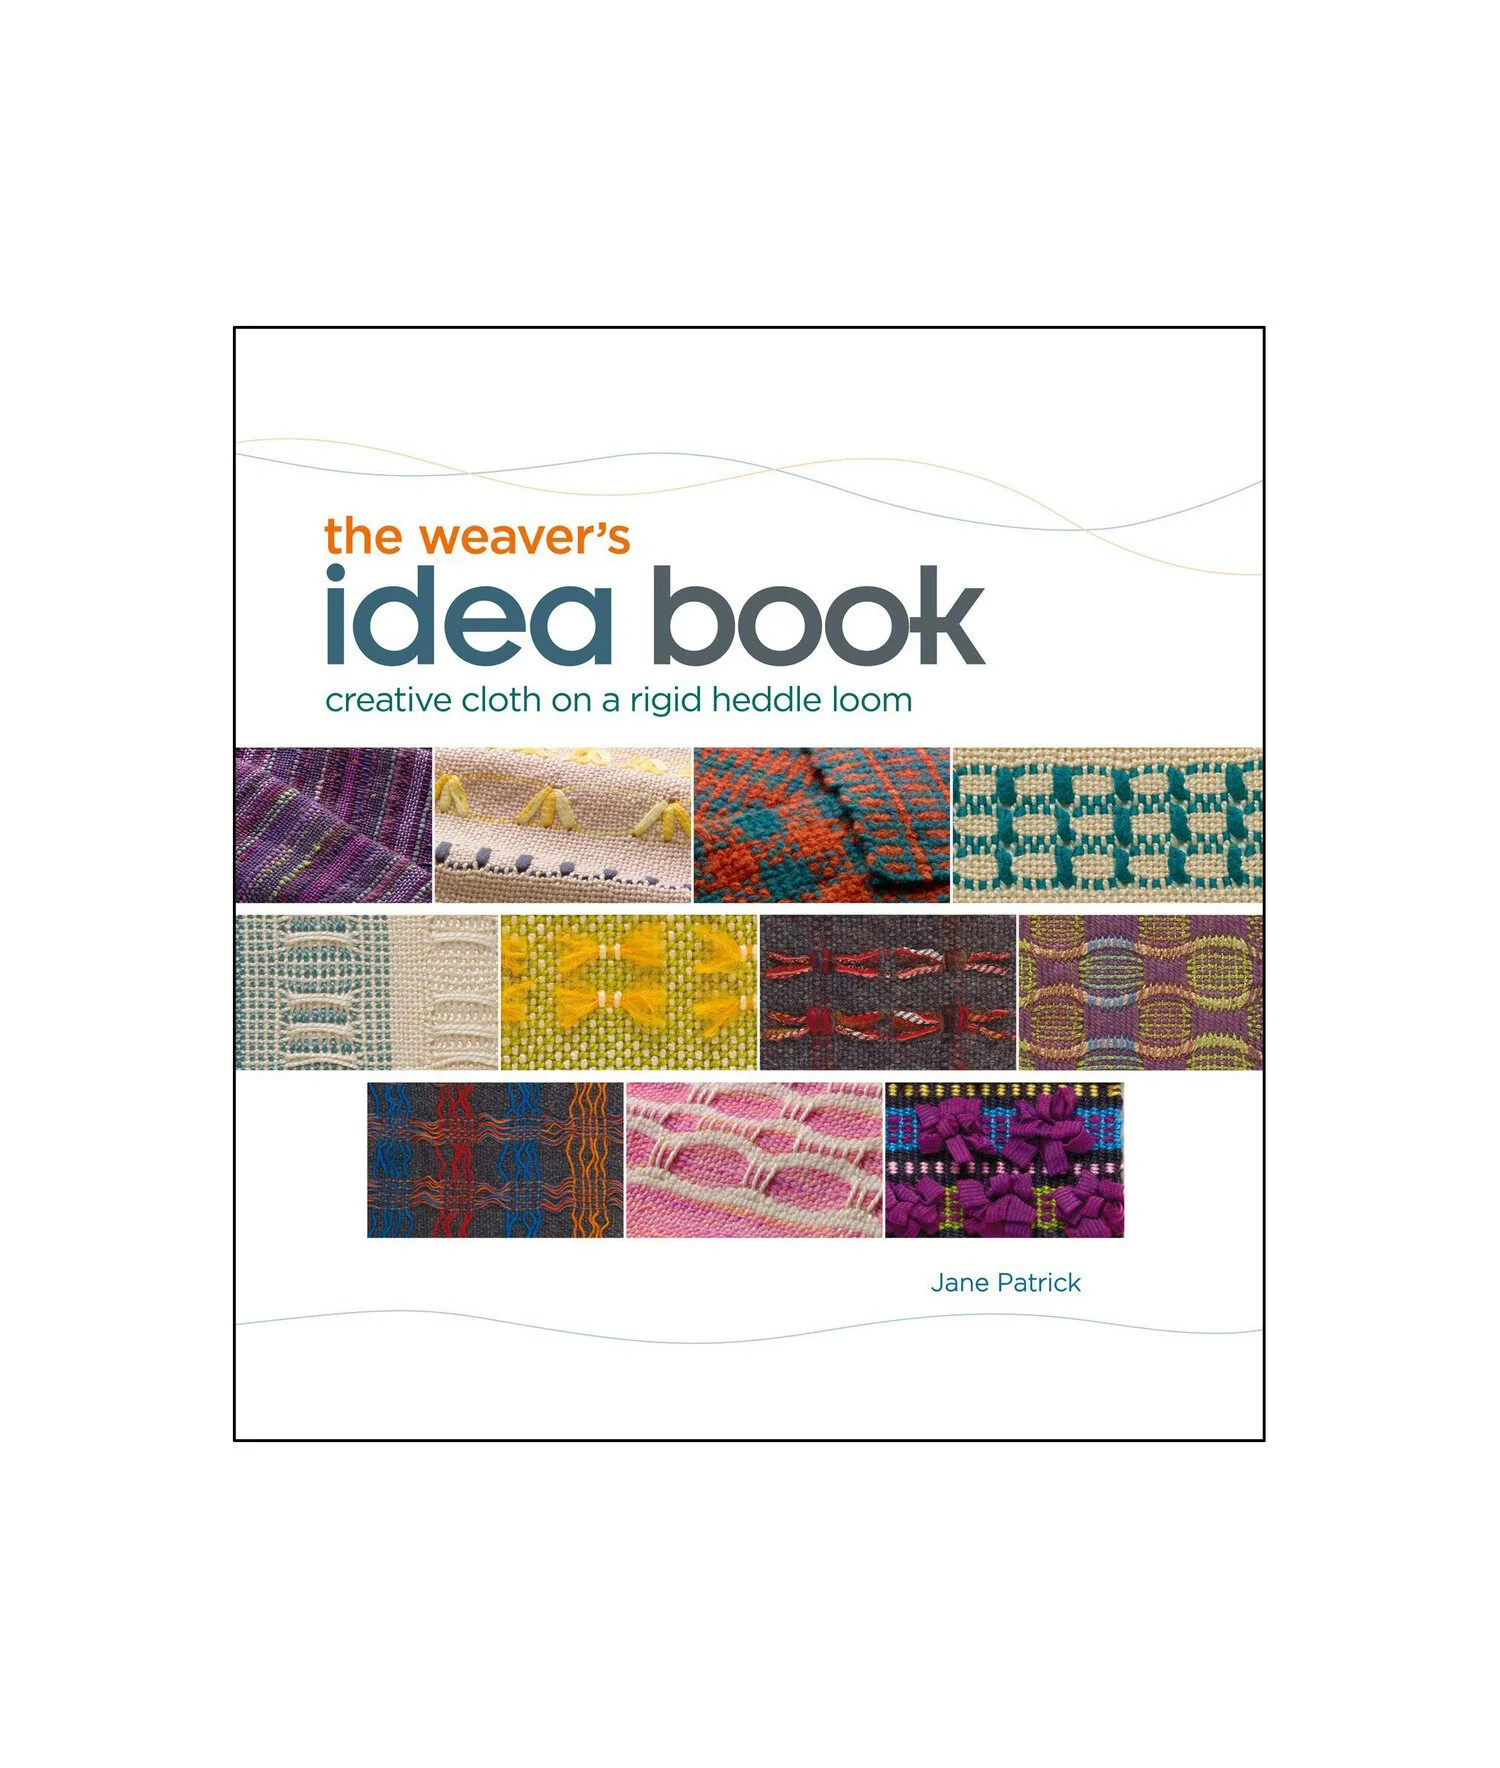
The first, and my all-time favourite, is The Weaver’s Idea Book by Jane Patrick. This got me started and I still refer back to it when I want inspiration.
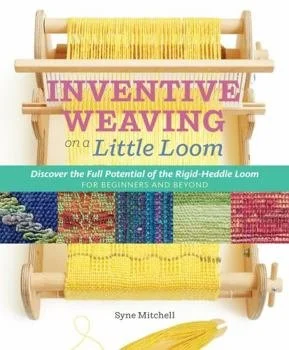
The next is Inventive Weaving on a Little Loom by Syne Mitchell. Syne has great pictures and lots of creative ideas.
I love reading your stories! If you would like to share your weaving journey, be it just beginning or a lifetime, please email me at: tammy@therogueweaver.com.
Perspective
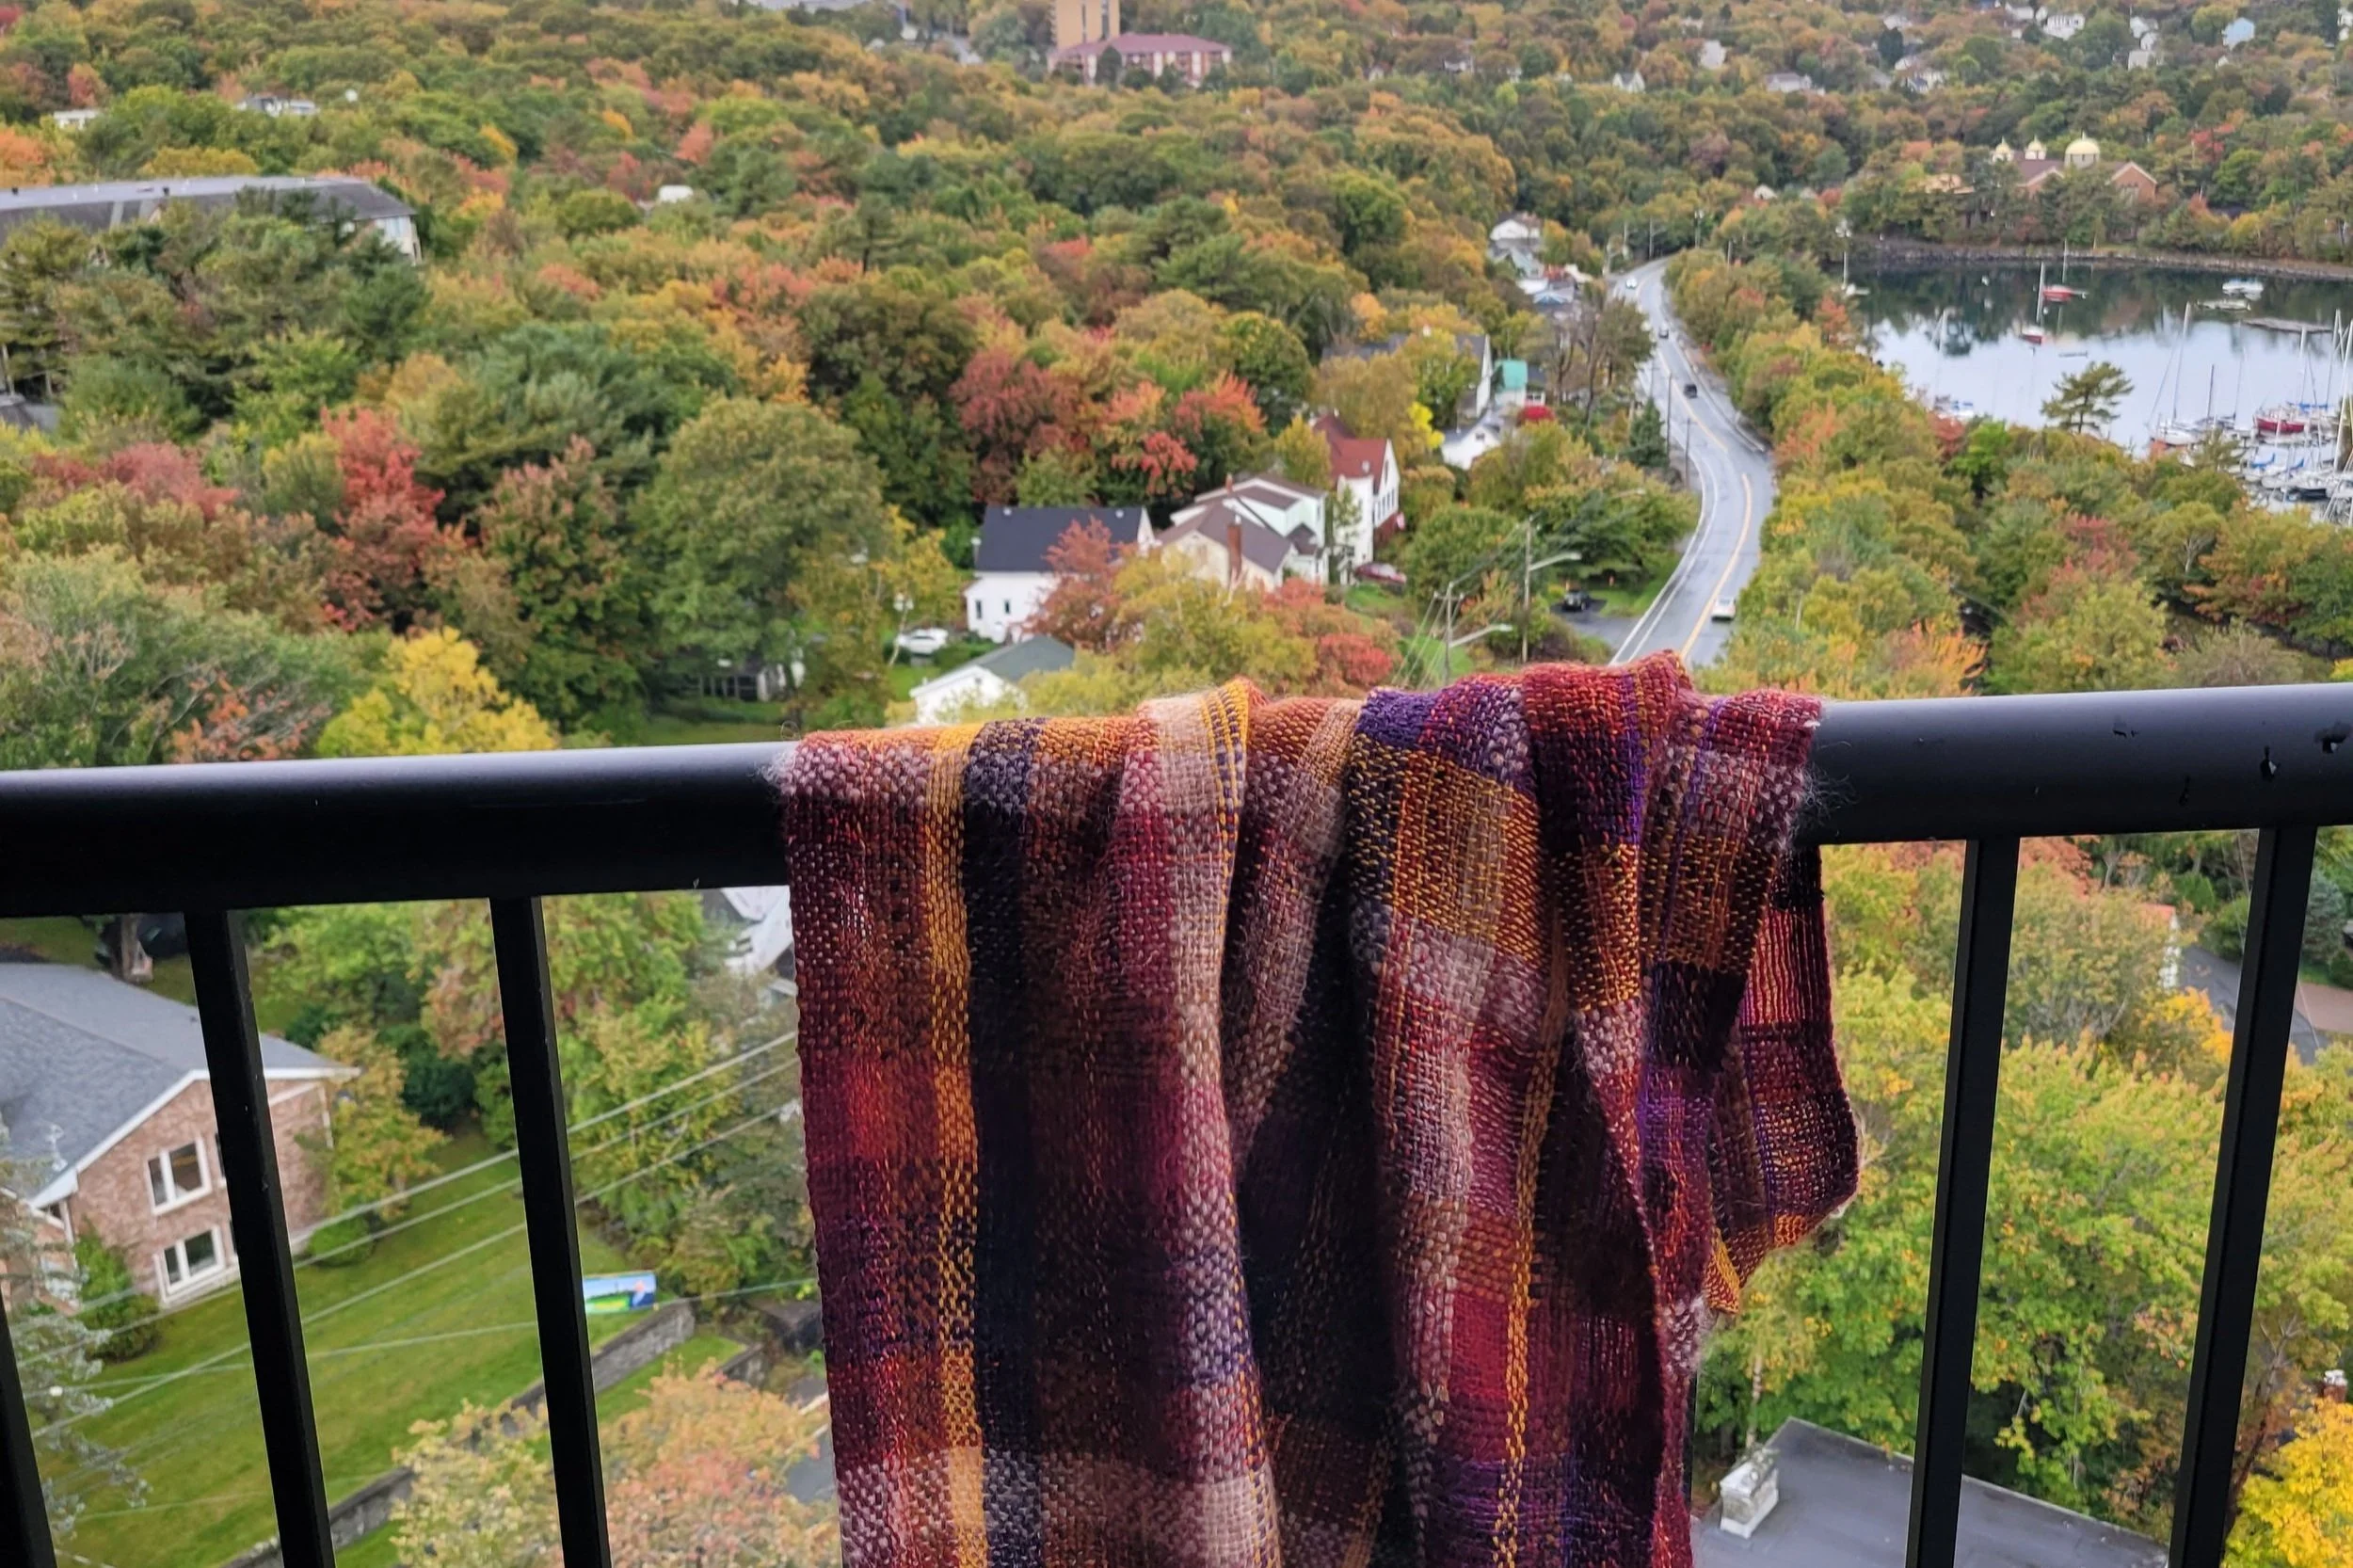
Most of my life I’ve lived on the ground, it’s a whole new perspective seeing the world from above. Instead of seeing individual trees I see ALL the trees. From up here I can pick out sugar maples, oaks and aspens. I can’t see all the tiny details, but I get a birds-eye view. Sometimes I actually see the backs of birds as they are flying below me, and some days I look out my window and it looks like there is no one else in the world as I’m in the middle of a cloud!
I love being on the ground, I like to feel the grass, I touch the trees that have interesting bark and anything that looks fuzzy. I’m very tactile…I’m the one the security guard keeps their eye on in a museum because I WILL touch: I can’t help it! I once got reprimanded for touching a wall at a museum (apparently it was a really old and very important wall), but the texture looked so interesting and my eyes just weren’t enough. (I spent the rest of the day with my hands firmly in my pocket.)
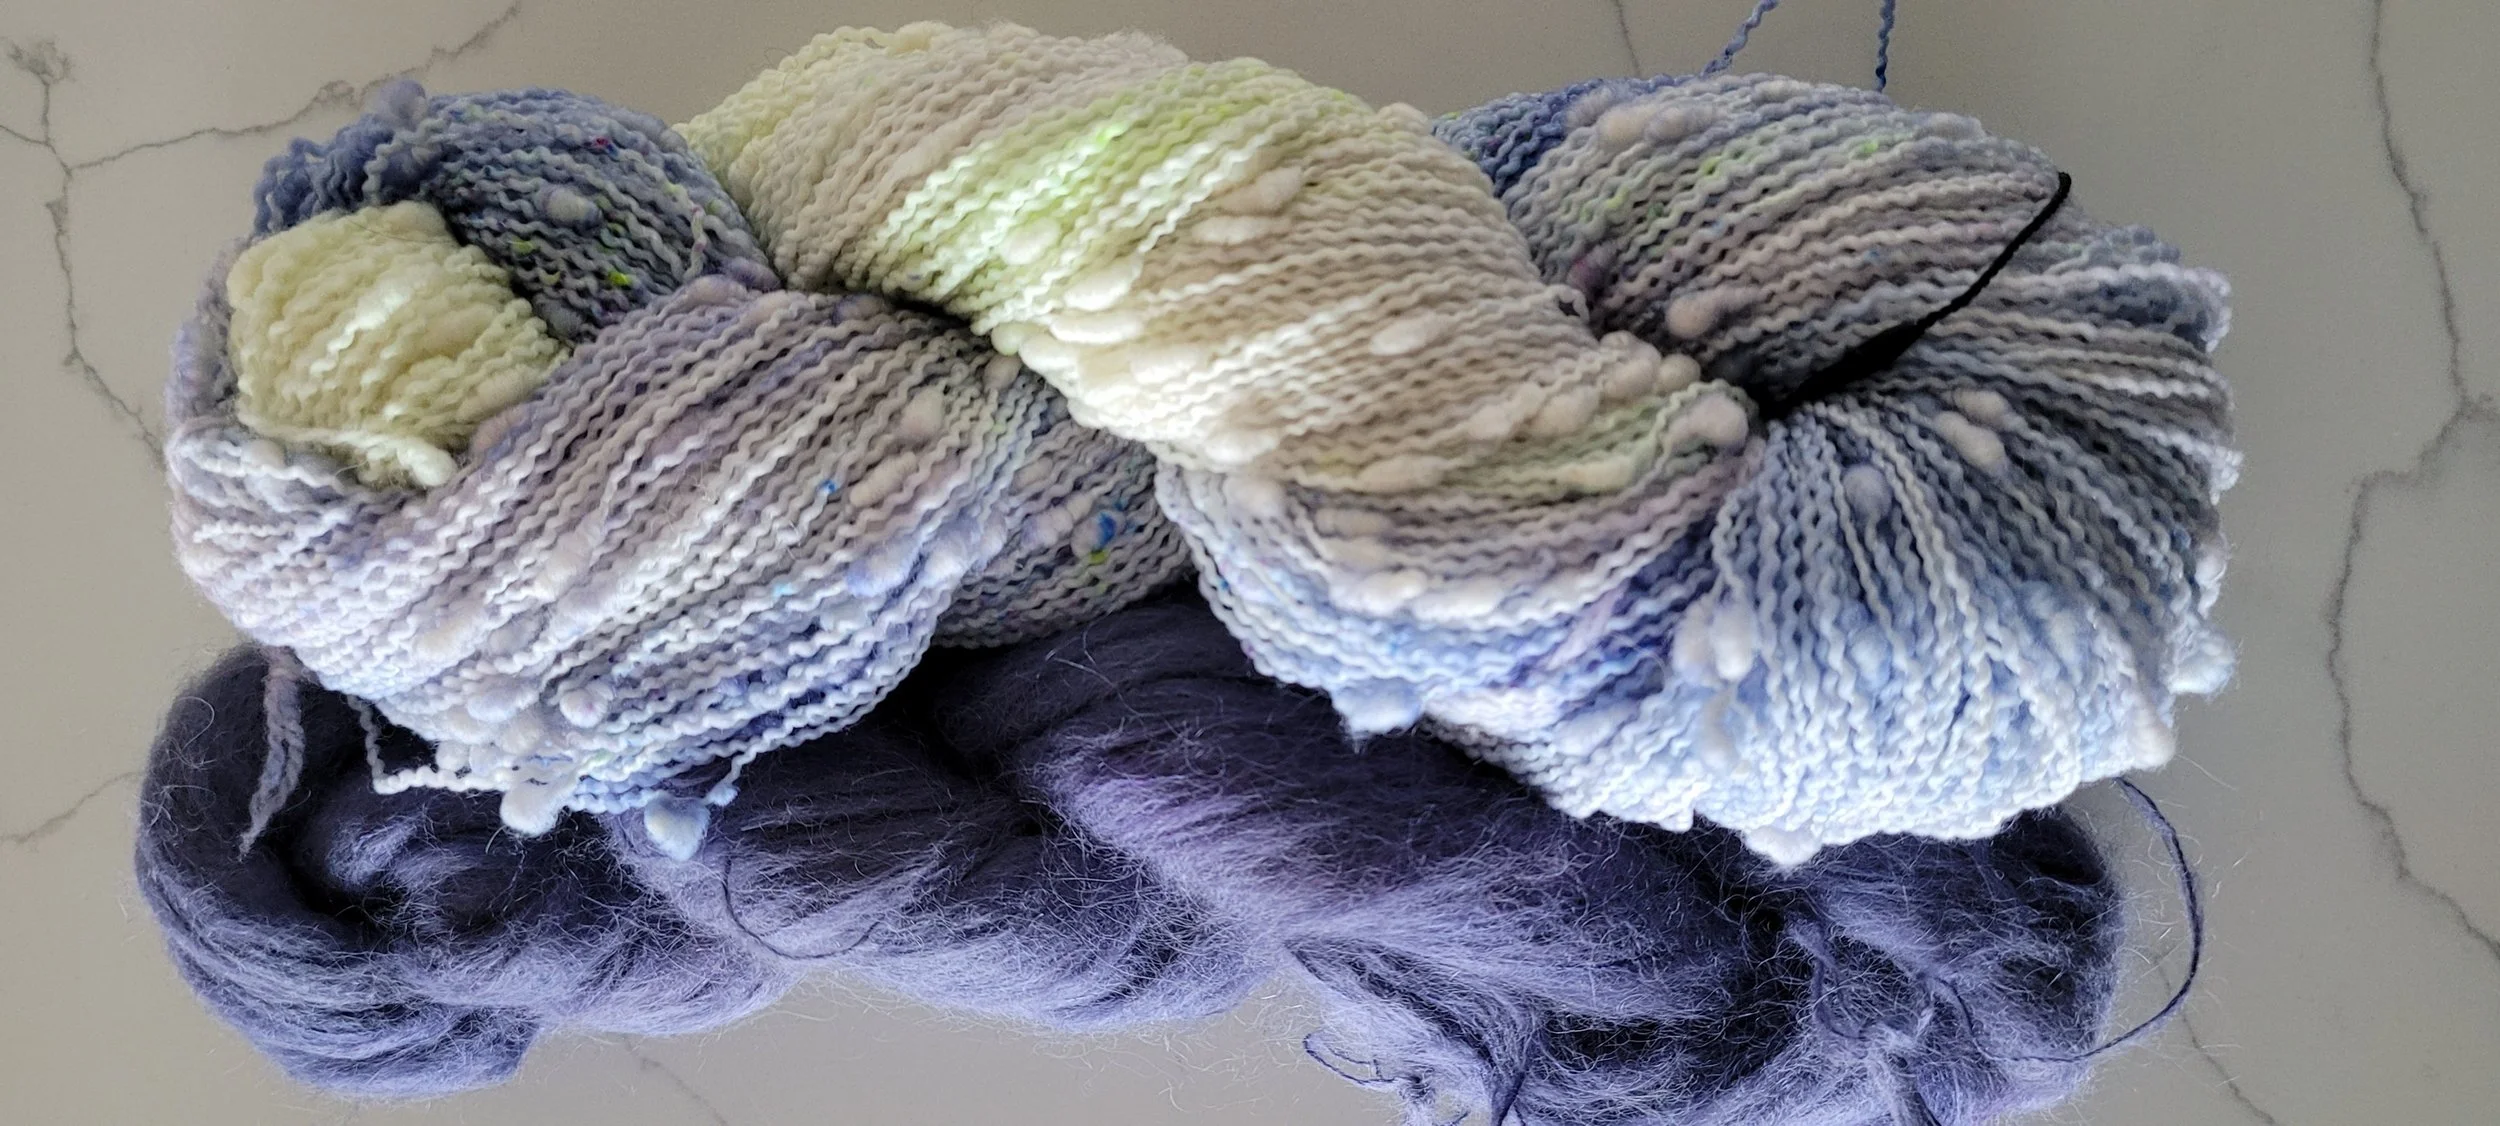
But what does any of this have to do with weaving? Funnily enough, a lot! Perspective in weaving is important…the close up and the far away. Just this week I came to the end of a project but had some extra warp still on the loom. I grabbed some Caterpillar yarn and started weaving. I take a tonne of pictures while weaving: mostly close up to measure ppi or to catch the pick-up pattern. And I’ll be honest, despite the colours I was a little underwhelmed. The colours looked all busy and jumbled and the pick-up pattern was virtually invisible. Well, said my mind, that’s what sampling is for and maybe washing will work a miracle. (It often does.) Then I left the room.
When I came back in later, I saw the piece from a distance. I saw how all the colours had aligned themselves in a way to make a lovely design. And the pattern was visible! What I couldn’t see up close suddenly because visible. It’s all about perspective. I don’t know about you, but when I am sitting at my loom I only focus on a very small piece of my work at a time. I might be paying attention to the edge, then the pick-up pattern, then checking that there are no floats. Even when I look at the whole piece, up close looks very different from standing back, or even a different angle.
There have been many times when I’ve been weaving a tone-on-tone pattern where the pattern is almost invisible while I’m at the loom and my fingers need to do the seeing for me. But when I lean to the left or right I see the pattern. And it almost always pops when I look at my weaving from the doorway of my loom room.
But that’s the perspective on the loom: there’s a whole new perspective once the cloth is off the loom. (Fun fact…did you now that the cloth on the loom is called a web? It isn’t actual cloth until it has been wet finished.) Once the weave comes off the loom, the yarns, which have been under a great deal of tension, snap back into their comfortable shape. Length is lost and patterns are suddenly visible. Then throw it in the wash and dry it and it’s a whole new thing - with two sides! I’m delighted to say that I love the wrong side of this piece. The solid warp floats really pop against the bright colours of the weft. And the softness of the Caterpillar yarn blends really well with Hempathy, a cotton, hemp and modal blend, which can feel a little…string-y on its own. Good for drying dishes, but on its own, not bath towel material. Mixed with Caterpillar, I can see baby blankets!
So, perspective. Sometimes we need to step back to see what is really there. Sometimes we need to let things finish before judging. And sometimes, we need to get close up and touch! (Maybe remember to ask before touching if you’re trying to deconstruct someone’s scarf or jacket!)